Start here, not at page one. You don't need the whole manual. Read 01 Welcome (the loop and the first-steps guide), 02 Your first rig, 05 Mining rigs and 14 Power & the bill. Everything else is reference for when you get there.
Something broken or confusing? Press Report a problem at the top of the game screen: every note reaches the team. Where the game is going: the roadmap.
What is a cryptocurrency
Never heard of crypto mining? Start here. A few short pages, no maths, so the rest of this manual makes sense. If you already know what a hashrate is, skip to Part one.
Money that only exists on computers, with no bank in the middle.
When you pay with a card, a bank keeps the record of who has how much. A cryptocurrency (Bitcoin is the famous one) replaces the bank with a shared notebook of every payment, called the blockchain. Everybody can read it; nobody can secretly change it.
Your money is RGC (RIG Coin). It lives inside the game, in your wallet.
Who keeps the notebook
Thousands of computers around the world keep a copy of the notebook and check each new payment. New payments are written onto a fresh page (a block); each page is stuck to the one before it, so changing an old page would break every page after it. That is the "chain".
The game keeps the RGC records for you. You only see your balance and your history.
What mining is
Mining is how a new page gets written, and how new coins are born.
Every few minutes the network runs a kind of lottery: the first computer to guess a special number gets to write the next page, and is paid in new coins for the job. There is no trick to the guess; computers just try number after number as fast as they can. Doing that is called mining, and the people who do it are miners.
Your rigs are your miners. While they run, they earn RGC.
Hashrate
Each guess is called a hash. Hashrate is how many guesses a machine makes per second, written h/s. More guesses per second means more tickets in every lottery, so more of the coins land with you over time.
Your rig's hashrate is the main number on its screen and in the panel on the left. Better video cards raise it.
Network difficulty
If everybody suddenly mined twice as hard, coins would come out twice as fast. To stop that, the network makes the guess harder as more miners join, and easier when they leave. That setting is the difficulty. What you earn depends on your hashrate compared with everyone else's: your share of the network.
The top bar shows the network difficulty; the dashboard shows your share of the network.
Why video cards and "rigs"
The chip in a video card (a GPU) is very good at doing the same small calculation millions of times, which is exactly what guessing is. So miners put several video cards on one motherboard, usually in an open frame so they stay cool. That machine is a mining rig.
You assemble rigs part by part: power supply, motherboard, CPU, RAM, SSD, cables and video cards.
Power, heat and dust
Mining eats electricity. For a real miner the power bill is the biggest cost, often more than the hardware. All that work also makes heat, and heat plus dust slow the machine down and wear it out faster.
Each workshop gets a power bill. Rigs get dirty and must be cleaned; a meter, breaker and nobreak protect them.
Hardware breaks
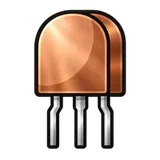
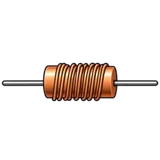
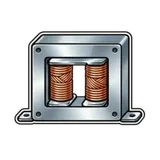
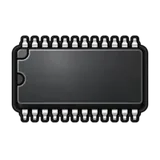
Every part is made of small electronic components: resistors, capacitors, transistors, chips. Run a machine long enough and one of them fails, and the part stops working. Someone who knows how to find and replace the one bad component can fix it cheaply instead of buying a new part.
Parts wear and break. The Repair station lets the machine fix them, or you, by hand, with a multimeter and soldering iron.
From the real world to CryptoRigs
| Real world | In CryptoRigs |
|---|---|
| Bitcoin, Ether… | RGC |
| A mining farm | Your workshop and its rigs |
| Electricity bill | The workshop's power bill |
| Network difficulty | The same thing: it rises as more players mine |
| Electronics shop, scrapyard, marketplace | Stores, Junk yard, Trade center |
| Hackers and break-ins | Hacking (and the Jail when it goes wrong) |
Everything in the rest of this manual is one of these, in more detail.
RGC is not real money yet
During this phase of the game RGC exists only inside CryptoRigs. It cannot be bought with real money, sold, or withdrawn. You play for the fun of building and running the operation, not to earn real income.
And later? The project is studying a real economy: RGC on a blockchain and items with real value. Nothing about it is promised yet, neither the format nor a date: it would come after the launch and only if the legal review allows it, once the economy has proven stable in the betas, security is hardened and there are enough active players. The roadmap shows where we are.
Three things are already certain:
- Nothing from the alpha and beta carries over. Progress from these phases will be wiped before launch. Testers get a cosmetic reward, not RGC.
- RGC is not an investment. Don't play expecting a profit. If RGC ever becomes a crypto, the rules will be announced first, in the terms of use.
- Nobody sells RGC. Anyone offering RGC or accounts for money is trying to scam you.
When you are ready, carry on to Part one: Start here.
Welcome to mining
CryptoRigs simulates real crypto mining. You build rigs out of real PC parts, those rigs earn RGC (RIG Coin) while they run, and everything slowly wears out. Keeping the operation profitable is the game.
The loop
The getting-started guide
On your first login a small card in the top-left corner walks you through thirteen steps. It floats over the screen and never moves anything else. Each step pays RGC and XP the moment you finish it, and Take me there opens the right screen.
- Build your first rig
Install every starter part into the empty rig. Installing costs no stamina during this step. +10 RGC · +10 XP
- Power it on
Flip the rig's power switch. +15 RGC · +15 XP
- Collect your first RGC
Let it mine a few minutes, then collect. For this first one there is no minimum to wait for. +20 RGC · +20 XP
- Dig in the junkyard
Scavenge the scrap piles once. +25 RGC · +25 XP
- Buy an Air Blower
Ferro & Solda and Bancada do Mestre sell it. +30 RGC · +30 XP
- Clean your rig
A new rig hasn't gathered any dust yet, so the guide puts 10% on it when you get here. Blow the dust out to bring the hashrate back. +50 RGC · +50 XP
- Buy a component
Ohm Sweet Ohm, Casa do Capacitor and Transistor Express sell the pieces every repair needs. +30 RGC · +30 XP
- Learn a manual
A GPU cooler repair manual and a damaged practice cooler arrive in your inventory. Study the manual from the Manuals tab; this one is instant. +20 RGC · +20 XP
- Repair a part
Fix the practice cooler with Auto Repair; the 2 capacitors it needs are already yours. +50 RGC · +50 XP
- List an item on the Trade Center
Put something you don't need up for auction. +40 RGC · +40 XP
- Hack a data center
A security-1 target is the gentle start. If you are caught this time, the guide gets you out of jail at once. Optional. +60 RGC · +60 XP
- Complete a mission
Any daily or weekly one. Optional. +50 RGC · +50 XP
- Pay your first energy bill
Your first bill closes early for this step; pay it in the power room. +80 RGC · +80 XP
The card shrinks to a pill if you minimise it. The two optional steps have a Skip this step link (no reward). "I know the game, hide the guide" hides it for good. Steps you already did (an assembled rig, an Air Blower you own, a manual you already know) tick themselves off. When you reach a step that costs stamina, the guide tops your stamina up to that cost, once, so you are never left waiting.
Your rigs keep mining while you are away, and dirt, wear, stamina and the power bill keep going too. Log in once a day or once a week: everything that happened in the meantime is waiting for you.
Your first rig, step by step
A new account starts with one workshop, one empty rig and a box of parts. You assemble it yourself. Here is the whole thing, start to finish, in about five minutes.
What you start with
The parts are exactly the minimum a rig needs to run: power supply, motherboard, CPU, CPU cooler, RAM, SSD, one video card, a SATA data cable, a SATA power cable, the CPU power cable and the ATX power cable. No tools. You buy or scavenge those later, when you start repairing.
- Open Rigs and pick your workshop
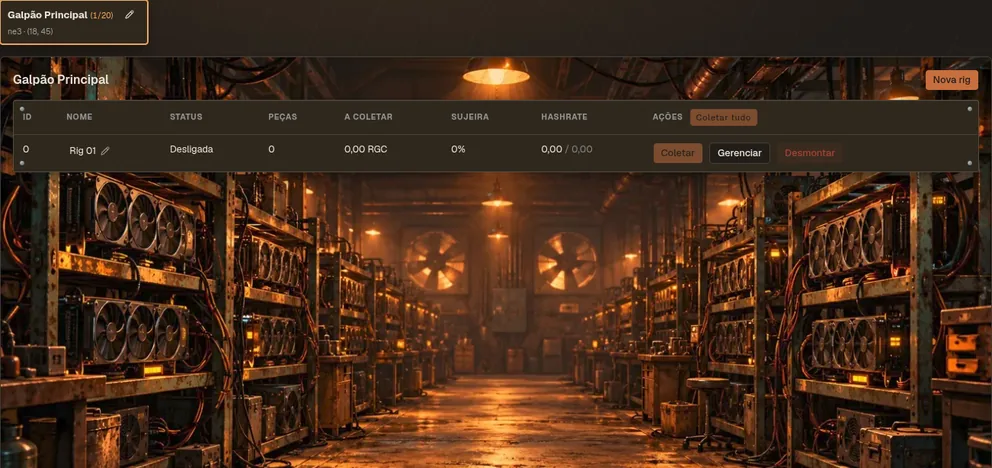
The left card is your workshop: its name, its map zone and position, and how many of its 20 slots are used. Your empty rig sits in Slot 0. Press Manage.
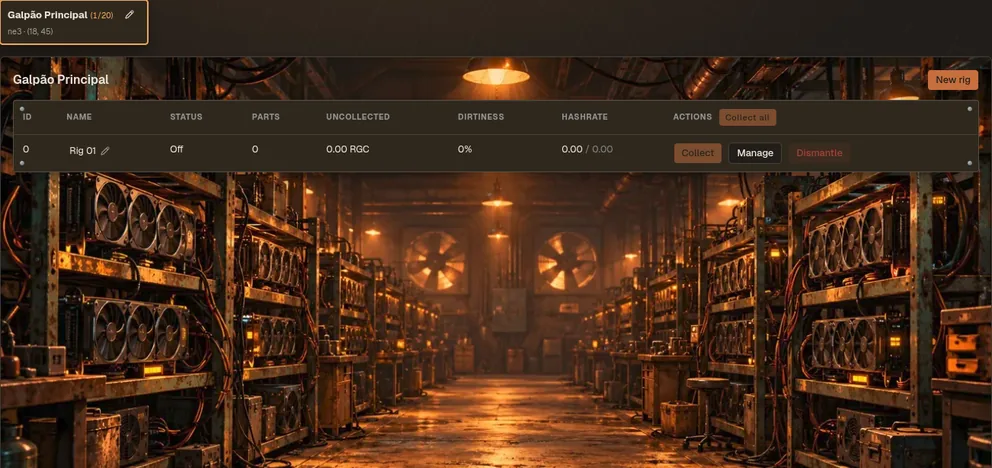
Fig 2.1The Rigs page. "ne3 · (18, 45)" means zone 3 of the north-east territory, at x 18, y 45 on the world map. The rig's name (Rig 01) changes with the pencil next to it. - Look at the empty chassis
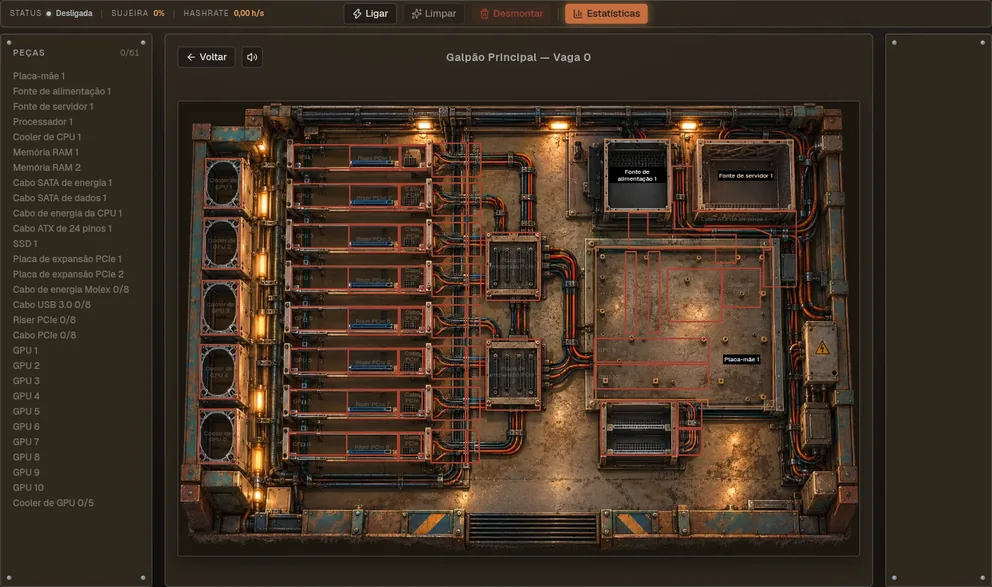
The rig view is a top-down chassis with all 61 possible positions. The list on the left counts what is installed. Most positions start locked: only the power supply, PSU server and motherboard accept a part at first, because everything else plugs into one of those.
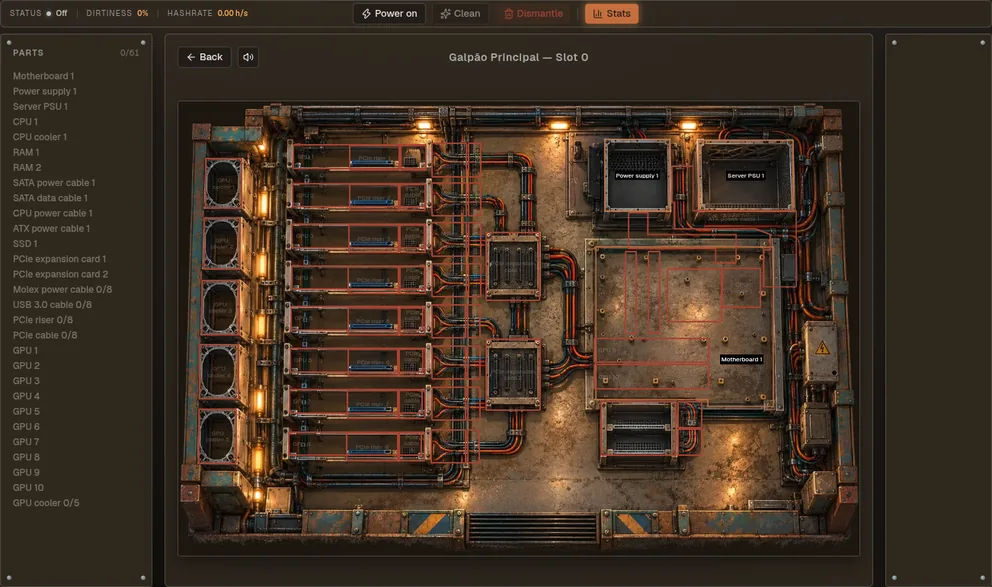
Fig 2.2An empty rig: 0/61 parts. Status Off, hashrate 0. - Install the motherboard first
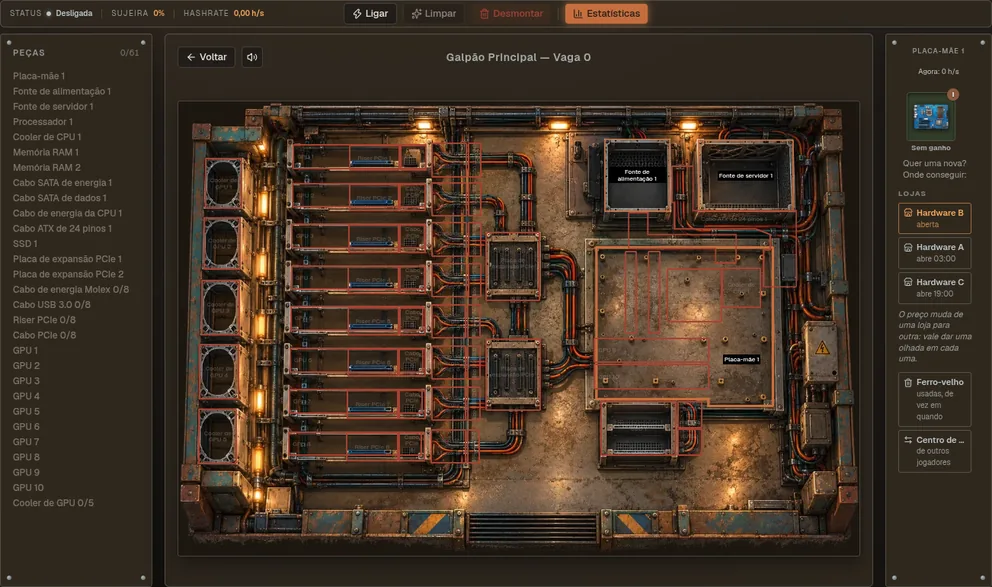
Click the motherboard slot. The panel on the right lists the matching parts in your inventory. Drag one onto the slot. Installing costs stamina by the part's size: 1 for a cable, 3 for a small part (coolers, RAM, SSD, risers, expansion cards), 5 for a big one (video card, motherboard, CPU, power supplies); taking a part out costs 1, 2 or 3. The guide's first assembly is free.
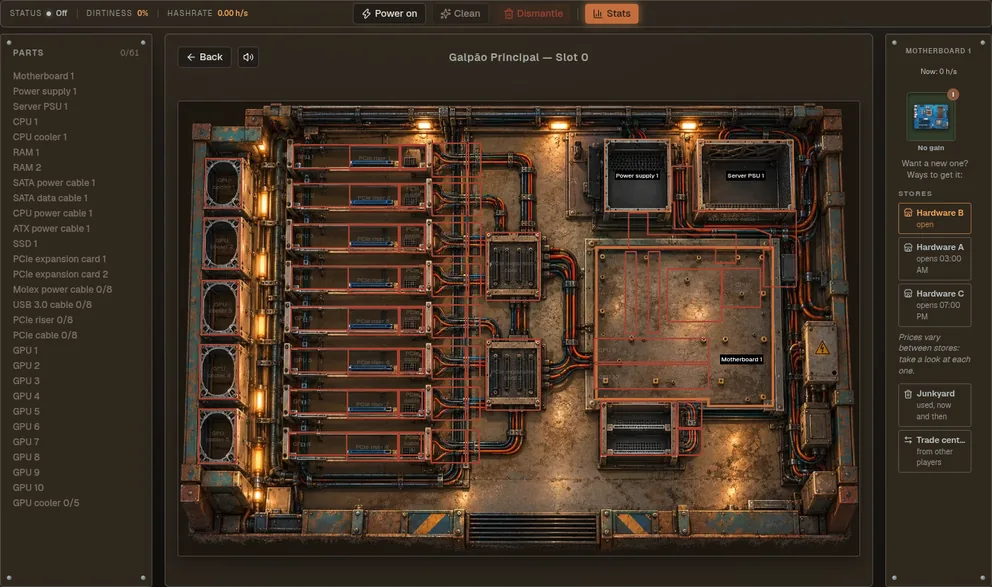
Fig 2.3Motherboard slot selected (highlighted). The tier-I motherboard waits in the right panel, with where to get another below it; drag it onto the slot. As soon as the board is in, the slots that depend on it unlock: CPU, both RAM slots, the PCIe expansions and the SATA data cable (the SSD's). With the power supply in too, the two power cables go in: the CPU's 8-pin and the board's wide 24-pin ATX, each running from the power supply down to the board.
- Fill in the rest
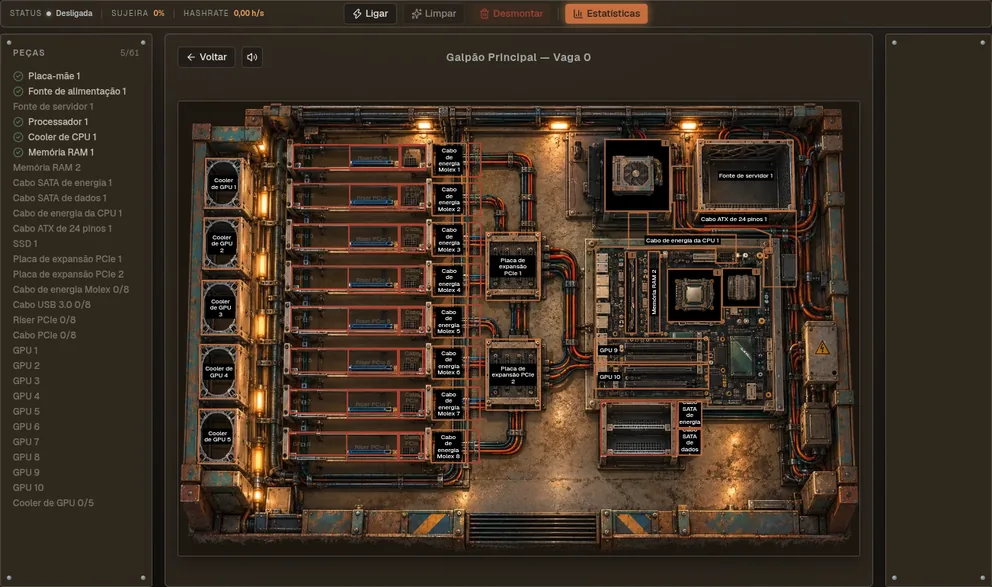
Work outward from the board: power supply, CPU, CPU cooler, RAM, then the two SATA cables. The SSD unlocks once its cables are in. Put the video card in GPU 9 or GPU 10: those two are wired straight to the board and never pay the riser penalty (chapter 05).
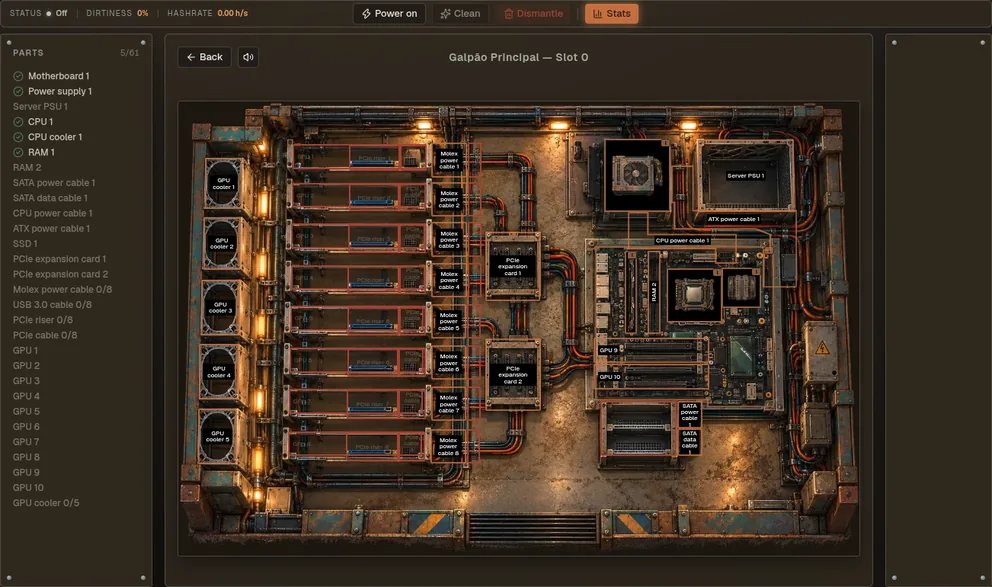
Fig 2.4Halfway: checkmarks in the parts list show what is in. Installed parts are drawn with their real art. - Power it on
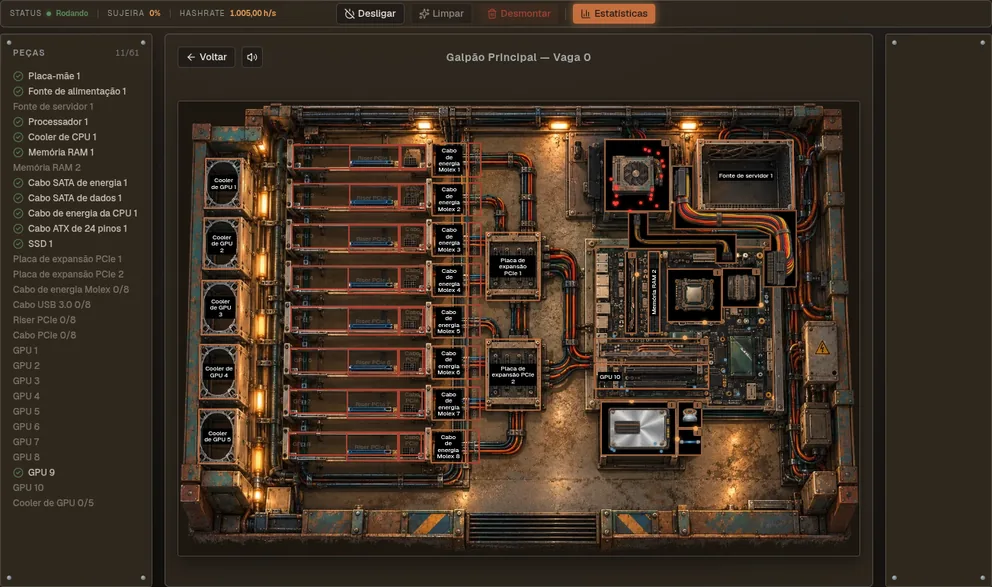
With the 11 parts in place, press Power on (1 stamina). The status turns Running, hashrate jumps to about 1,000 h/s and small lights start orbiting the powered parts.
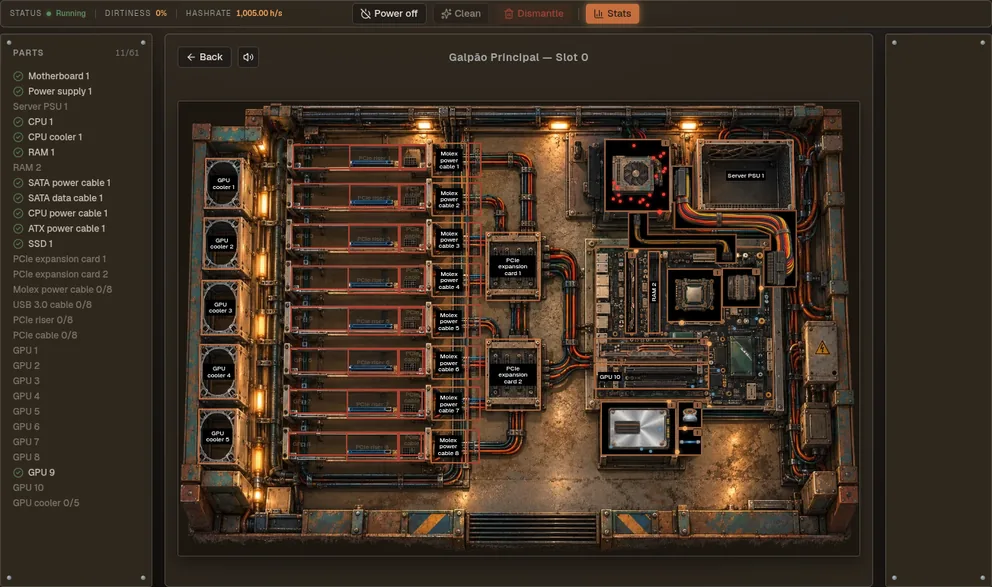
Fig 2.511/61 parts, Running, 1,005.00 h/s (the RAM adds 0.5%). Your first rig is mining. - Check on it and collect
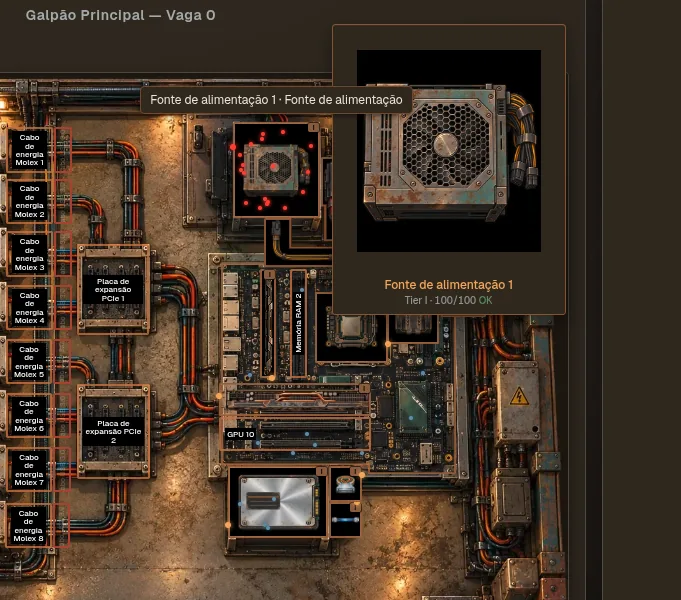
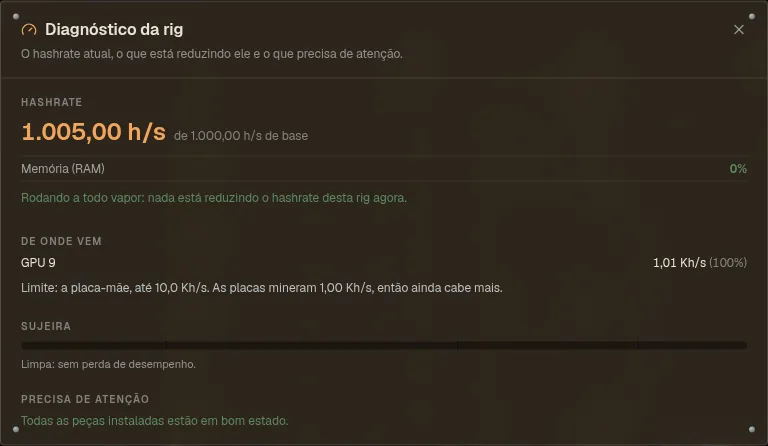
Hover any installed part to see its art and durability. Stats opens the rig diagnostics: what it is earning and what, if anything, is cutting into it. A part that turns faulty inside a rig still looks fine on the rig's screen until you run its diagnostics; from then on it shows striped. Until then the rig warns that something is off; click the warning to run them. Come back later and press Collect on the Rigs page to move the mined RGC into your wallet. Collecting is free.
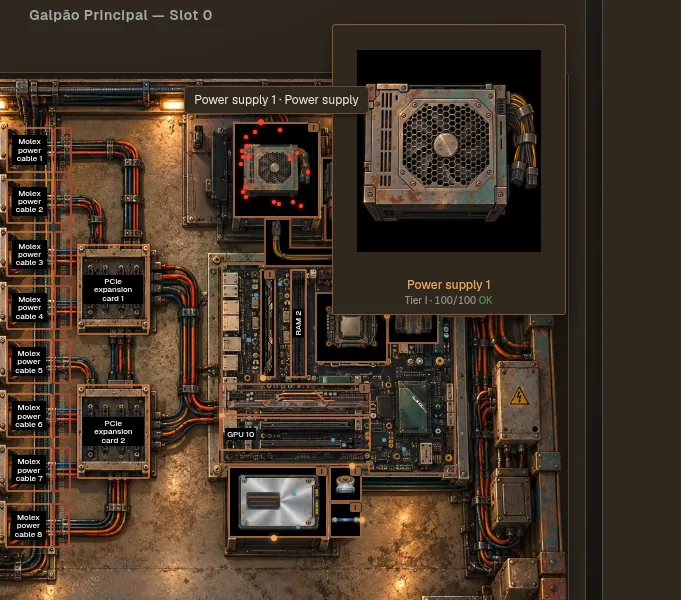
Fig 2.6Hover: Power supply 1, Tier I, 100/100, OK. 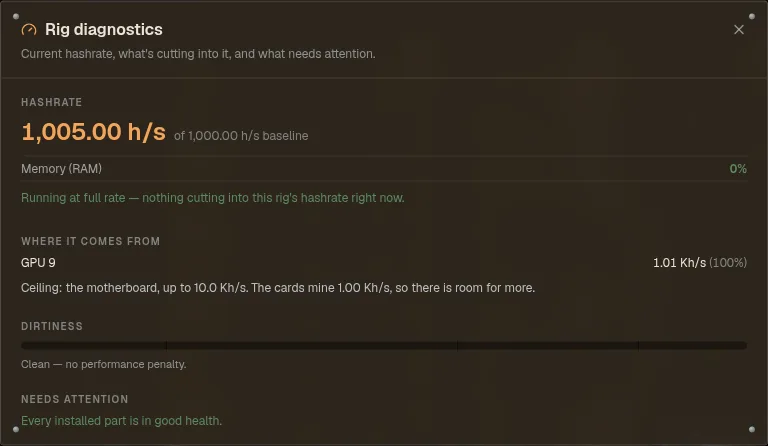
Fig 2.7Rig diagnostics: full rate, where the hashrate comes from (GPU 9, under the motherboard's ceiling), clean, every part healthy.
Building it by hand took about 34 of your 100 stamina (33 for the 11 parts, 1 to power on); during the guide's first step installing is free, so only the 1. Stamina refills completely in about 6 hours, and twice as fast while resting at the Tavern. While you wait, visit the Junk yard and the Stores.
The starter loan
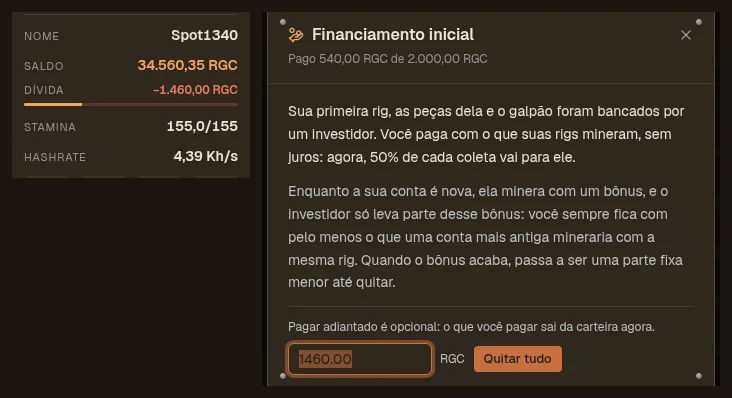
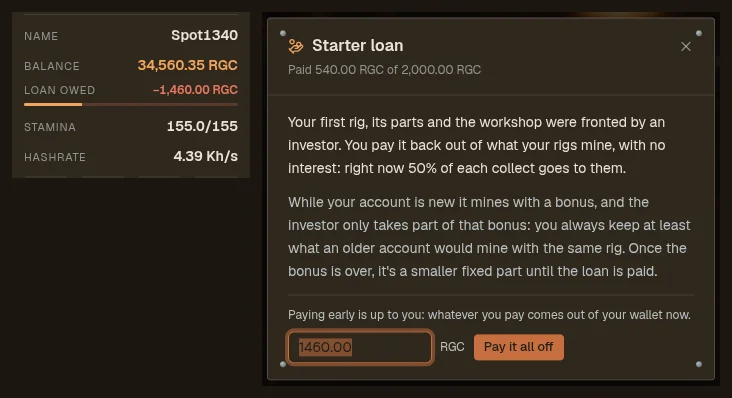
Your first rig's parts and your workshop weren't a gift: an investor fronted them, and you start out owing it. The line Loan owed under your balance shows what's left, with a bar of what's paid.
No interest, and nothing to do: every collect pays part of it. While your account is new it mines with a bonus, and the investor only takes part of that bonus (at most half a collect), so you always keep at least what an older account would mine with the same rig. Once the bonus is over, it's a smaller fixed part of each collect until the loan is paid. Click the line to see the part it takes right now, or to pay some or all of it early from your wallet.
Until it's paid, the starter kit's parts are bound to your account: no selling or trading them. Pay it off and they're yours to sell, along with the Operation Paid Off achievement.
Finding your way
The left column is always there: your level, name, balance, stamina and total hashrate on top, and every section of the game below. The strip across the very top shows who is online, the whole network's hashrate, the clock (in your own time) and live events. World map, Game Info (this manual) and your notifications sit top right.
Under your hashrate, four icons open your inventory, attributes, achievements and missions. Some menu entries carry a small shortcut at their end: Repair the technicians' counter and the test bench, Power the power surges, Store the underground shop. A dimmed shortcut in a dashed outline is something still to come. The Release notes link at the top lists what changed in each version.
Most sections are places you look at: a scrapyard, an electrical room, a bar. Everything you can use carries a small brass pin; point at it and a nameplate says what clicking does and what it costs. The numbers and the actual buttons sit in the panel on the right. On a narrow screen (a phone, or a window under about 1180 px wide) each section shows the same things as a plain list instead.
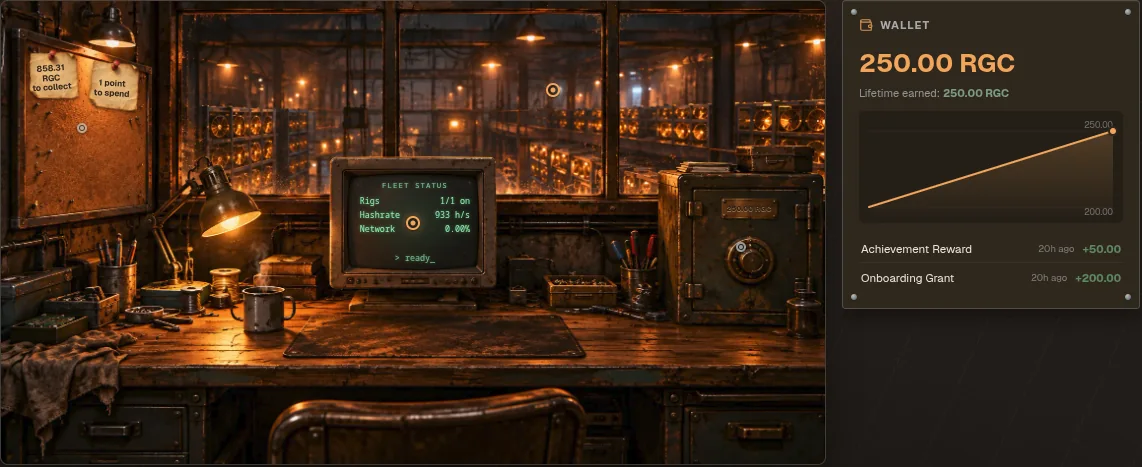
The dashboard is your office above the workshop floor. Every note pinned on the cork board is something that needs you now (a rig that is off, RGC waiting to be collected, an unspent attribute point, a power cut, a jail sentence): click it to go deal with it. The CRT monitor shows your fleet (rigs on, hashrate, your share of the network), the safe's brass plate your balance, and the Wallet panel on the right charts it and lists the latest money movements.
Keyboard shortcuts
On a computer, one key opens each of the main screens: I inventory and M the world map (press either again to close), A attributes, O achievements, Q missions, R rigs, D dashboard, S stores, H hacking, T tavern, P power, C clans, J junk yard, B the repair bench and L the activity log. ? lists them. They are off while you type in a field or a window is open, and pointing at an icon shows its key.
Your level, celebrations and history
The icon next to your level (the same marker your workshops wear on the world map) zooms when you point at it; click it to open your own showcase (chapter 25). When you level up, the new level is soldered in with a burst of sparks; when your level crosses into a new marker band, the old marker charges up first and turns into the new one. A finished mission drops a banner at the top: click it to open Missions, or leave it and it goes away by itself after 5 seconds.
Activity log in the menu is your history, one tab per area: general, hacking, battles, rigs, repairs, junk yard, trades, store, clan, achievements and jail. The bell at the top right holds your notifications.
Your account
Signing up, your language, your password, fair play, and the Account page.
The Invite a friend panel on the dashboard holds your invite code. Copy link or Share (WhatsApp, Telegram, X, email) sends a link that opens the sign-up page with your code already filled in. Sign-up is invite-only during the alpha, so this link is how friends get in. You get the Referrals reward when they play on 5 different days (a day counts when they collect their mining). The sign-up form also has a quick human check (a Cloudflare box above Create account): most of the time it ticks itself, now and then it asks for one click. The button unlocks once it passes; if creating the account fails, the check runs again on its own.
Confirm your email. Right after signing up, an email from CryptoRigs brings a link: open it to confirm the address is yours. You play straight away meanwhile; what waits for the confirmation is the Trade Center (listing, bidding, buy orders and the seized-goods lots), and a friend you invited only counts once their email is confirmed. Without it, after the account's first week it pauses: you can look around, but not act, until you confirm. If the email didn't arrive, look in the spam or promotions folder; the strip at the top of the screen sends it again or fixes a mistyped address.
The game speaks Portuguese and English. Switch with the PT / EN buttons at the top right, or on the login page. The page reloads in the new language.
Forgot your password? Click Forgot your password? on the login page and type your email: a link to choose a new one arrives by email, valid for 1 hour and only once. Saving the new password signs you out on every device.
Fair play: the game watches for bots and for one person playing several accounts (the Terms say what is not allowed). Nothing is decided by the machine alone; a person always reviews it. If your account is ever suspended and you think it's a mistake, try to sign in as usual: under This account is suspended you can write an appeal. A person reads every one.
Account (top right) shows your name, email and the terms you accepted, your top level marker, a View my showcase button, and Delete my account: that erases your personal data for good and cannot be undone. Report a problem sends a note straight to the team.
Workshops & the world map
Every rig lives in a workshop (galpão). Each workshop holds up to 20 rigs, has its own power protection and its own power bill. Creating a new rig in a free slot is free; you pay for the parts.
- Your first workshop is free and starts as "Galpão Principal". You can rename it once, by the pencil icon on its card.
- Extra workshops get pricier each time: 50,000 RGC for the second, then 100,000, 200,000 and so on. Buy one from the Buy workshop card at the end of the workshop list on the Rigs page. You name it when you buy it, and that name is final.
- A rig belongs to its workshop for good. To move hardware, dismantle and rebuild.
The world map
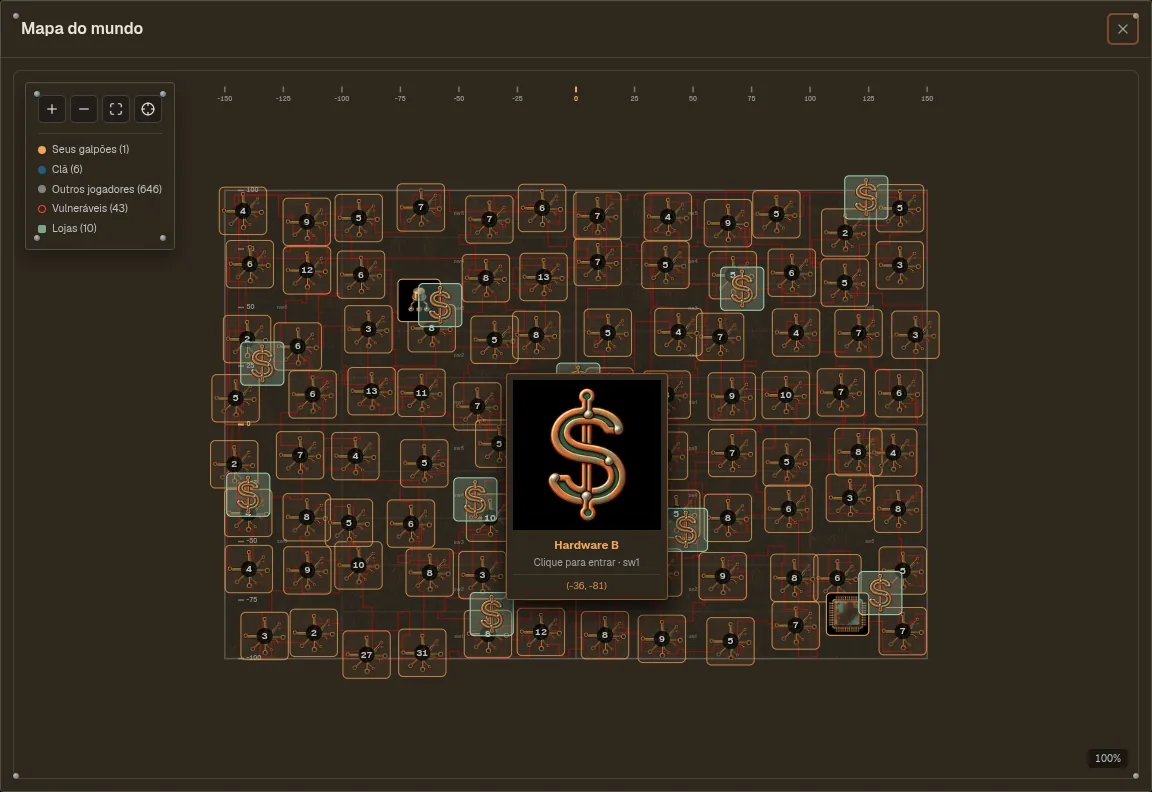
All workshops of all players share one map: a grid from −150 to +150 across and −100 to +100 up and down, one workshop per point. The centre point (0, 0) is the Central Plaza and is never taken. The map splits into 4 territories (north-east, north-west, south-east, south-west) of 6 zones each. Where you are matters: the odds of a regional blackout vary by territory and zone.
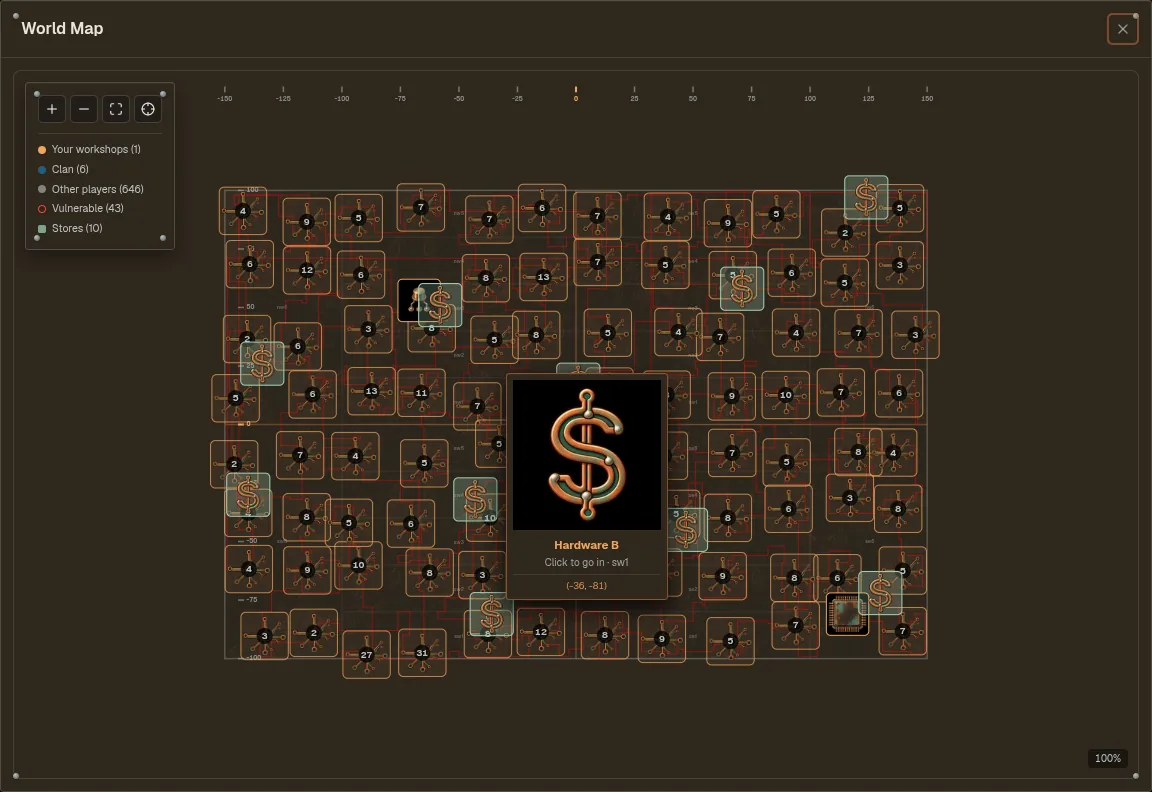
Click another player's workshop for its menu: Visit workshop opens that player's showcase (chapter 25), and Attack appears only when they can be raided.
New workshops land in a random free point, weighted toward emptier zones. You do not choose where, and you cannot move later.
Mining rigs
A rig mines while it is powered on and slowly wears itself out doing it.
Minimum build
GPU coolers, power (Molex) cables, PCIe 8-pin cables, USB 3.0 cables, risers, expansion cards and a PSU server all have their own prerequisites, and none of them block powering on.
GPU coolers: the five fan positions cover GPU 1 to GPU 8. A card in those slots with no fan over it wears 50% faster, and so does one under a faulty fan. GPU 9 and GPU 10 sit on the board itself, with no fan, and never pay that. The game asks before you put a card in an uncovered slot.
Install order
Slots unlock as the parts they plug into arrive. The rough order: power supply / PSU server / motherboard → CPU, RAM, PCIe expansions → CPU cooler, SATA cables, USB 3.0 cables, GPU coolers, Molex power cables → SSD, GPU positions, risers. Point at a locked slot and its tooltip names the parts still missing to open it.
Click an installed part and choose Compare and swap: the side panel lists your parts that fit there, each with what it would do to this rig's hashrate (+/− h/s, or "no gain" and which part holds the rig back), and picking one swaps them in one step (the stamina of taking the old one out and putting the new one in, by the part's size). Empty slots show the gain too.
Power the rig off before pulling a part out. Removing from a running rig is allowed but can damage that part on the spot. The same goes for installing a video card, riser or expansion card into a running rig. Everything else installs safely either way.
Hashrate
Raw hashrate is the sum of your video cards. Some parts set a ceiling: the weaker of the motherboard and CPU caps the whole rig, the PSU server caps GPU 1–8 (the cards it feeds) and the power supply caps GPU 9–10. Hashrate above a ceiling counts at a quarter and can never exceed 1.5× it. Each of these parts carries a full rig of its own tier, so a rig all of one tier is never held back; the ceiling only bites once your cards out-tier the board or the power.
RAM adds a little on top, after the ceiling: each working stick +0.5% of the rig's hashrate × its tier multiplier (I 1.0 · II 1.25 · III 1.6 · IV 2.1), and a pair another +1% × the weaker stick's multiplier (dual channel). Two tier I sticks give +2%, two tier IV sticks +4.2%; a broken stick gives nothing.
Each card behind a PCIe riser (GPU 1–8) loses part of its own hashrate, less the better the riser: 2.5% on a tier I riser, 1.5% on II, 0.75% on III and 0.1% on IV. The expansion card holding that riser's USB 3.0 cable (the first serves GPU 1–4, the second GPU 5–8) takes a little more on top: 1% at tier I, 0.8% at II, 0.6% at III and 0.05% at IV. A worn expansion card slows only its own 4 cards, not the rest of the rig. GPU 9 and GPU 10 connect straight to the board and lose nothing, so seat your best two cards there.
Dirt
Above 20% dirt the rig loses hashrate steadily, reaching nearly zero at 100%. Press Clean in the rig view. You need an air blower: Ferro & Solda and Bancada do Mestre sell it, and it turns up in the junk yard.
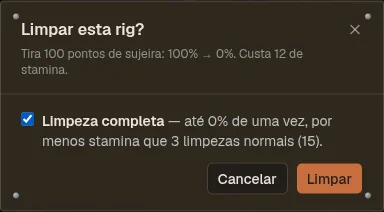
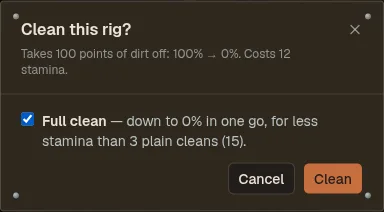
A very dirty rig would take two or three cleans. Tick Full clean in the confirm box instead: the rig goes straight to 0%, for 4 stamina per 40 points instead of 5. A rig at 100% costs 12 instead of 15; at 80%, 8 instead of 10. When one plain clean already gets it to 0%, the box doesn't show.
Wear & damage
Installed parts lose durability every hour, slower for higher tiers. Video cards, coolers and power supplies wear fastest, the PSU server and the CPU a little less, and the motherboard and the rest (RAM, SSD, risers, expansion cards, cables) far less. A new video card reaches the point where it wants service (about 55 durability) in about 6, 9, 16 or 26 days, tier I to IV. The parts repaired by hand with a kit (video cards, motherboards, power supplies, server PSUs, risers and expansion cards) can also burn a component at any time while the rig runs: a video card about once in 50 days, the others less, all of them less on a higher tier and more on a dirty rig. The part turns faulty until you fix it at the Manual Repair bench; a faulty video card mines only 70% of its hashrate until it's repaired. Your first one comes two days after the guided trail, with whatever that repair needs and you don't have yet. Below 50% durability the chance of a damage event climbs, made worse by dirt. A damage event burns several components inside the part: 2–3 in small parts (coolers, RAM, risers), 2–5 in mid-size ones (CPU, SSD, power supplies), 3–10 in video cards and motherboards. Cheap parts like capacitors and resistors burn most, but chips go too: a video card loses a VRAM chip in about a third of its damage events and its GPU chip in about one in five. The part turns faulty and needs a repair. Faulty parts show red hazard stripes on the chassis.
Coolers are the exception to "a part at 0% stops the rig". A CPU cooler or GPU cooler that wears out (or breaks) leaves the rig running, but the parts it was cooling now wear much faster: the CPU three times as fast, the video cards it covered up to twice as fast. A faulty cooler already speeds them up by half. You get a notice when a cooler drops below 20% and another when it stops. Replace it before the CPU or the cards go with it.
Better coolers pay. A basic cooler only keeps its parts from wearing faster. A working mid GPU cooler also makes the cards it covers mine 1% more and wear 10% slower; an industrial one 2% more and 20% slower. Higher tiers give more (tier IV: ×2.1). A mid or industrial CPU cooler gives half that hashrate bonus to every card in the rig and the same wear cut to the CPU. A faulty or stopped cooler gives none of it. The part's Info shows the numbers for every tier.
Collecting & dismantling
What a rig mines depends on its effective hashrate, how long it ran and the network difficulty. There is no cap on time away, but dirt and wear bring yield toward zero long before that matters. Collect opens once the rig holds about an hour of its own mining; until then its card says how much it needs ("Collect opens at … RGC"). A rig that is off can always be emptied. Collect all, in the Actions header of the Rigs list, collects every rig of that workshop that is ready, in one go. Dismantle returns every part to your inventory with −3 durability each and frees the slot. Dismantling a rig that is on pulls every part out live, with the same risk of damage as removing one part from a running rig: turn it off first.
Parts & quality
A part has the tier of its components, and a repair always uses replacements of that same tier. Higher tiers mine more, hold more durability and wear more slowly.
| Tier | Hashrate | Max durability | Repair tries (auto) |
|---|---|---|---|
| I · Common | 1.00× | 1.00× | 2 |
| II · Uncommon | 1.25× | 1.25× | 3 |
| III · Rare | 1.60× | 1.60× | 4 |
| IV · The real deal | 2.10× | 2.10× | 5 |
Electronic components
Every non-cable part is built from a fixed bill of materials. These counts are also what a repair can find broken inside.
| Part | Resistor | Sm. cap | Lg. cap | Transistor | Inductor | Transformer | Chips |
|---|---|---|---|---|---|---|---|
| Power supply | 20 | 12 | 2 | 3 | 2 | 2 | — |
| PSU server | 30 | 18 | 1 | 6 | 2 | 3 | — |
| Motherboard | 110 | 64 | — | 20 | 10 | — | — |
| Video card | 46 | 24 | — | 22 | 24 | — | 12 VRAM + 1 GPU |
| PCIe expansion | 8 | 4 | — | 1 | — | — | — |
| PCIe riser | 10 | 8 | — | 1 | — | — | — |
Triage: the test room
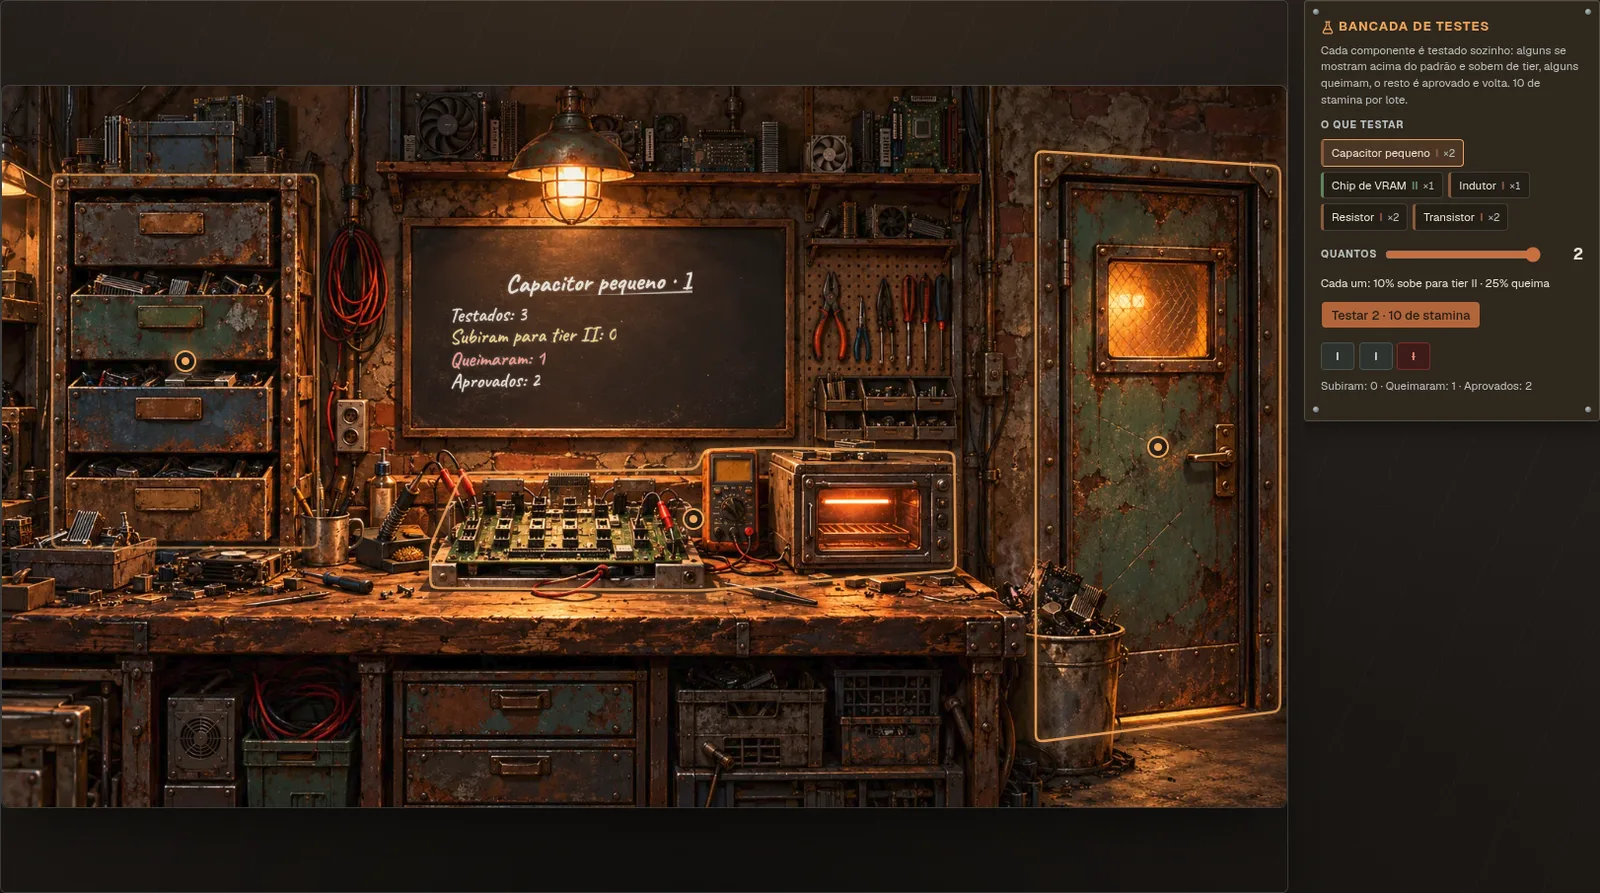
Components can move up a tier. Behind the repair station's bench a door leads to the test room: put a batch of 1 to 20 loose components of the same type and tier (I to III) on the test bench. Each one is stress-tested on its own. A few turn out above spec and move up a tier, some burn and are gone, and the rest pass and come back as they were. The oven heats up and the slate writes the result in chalk.
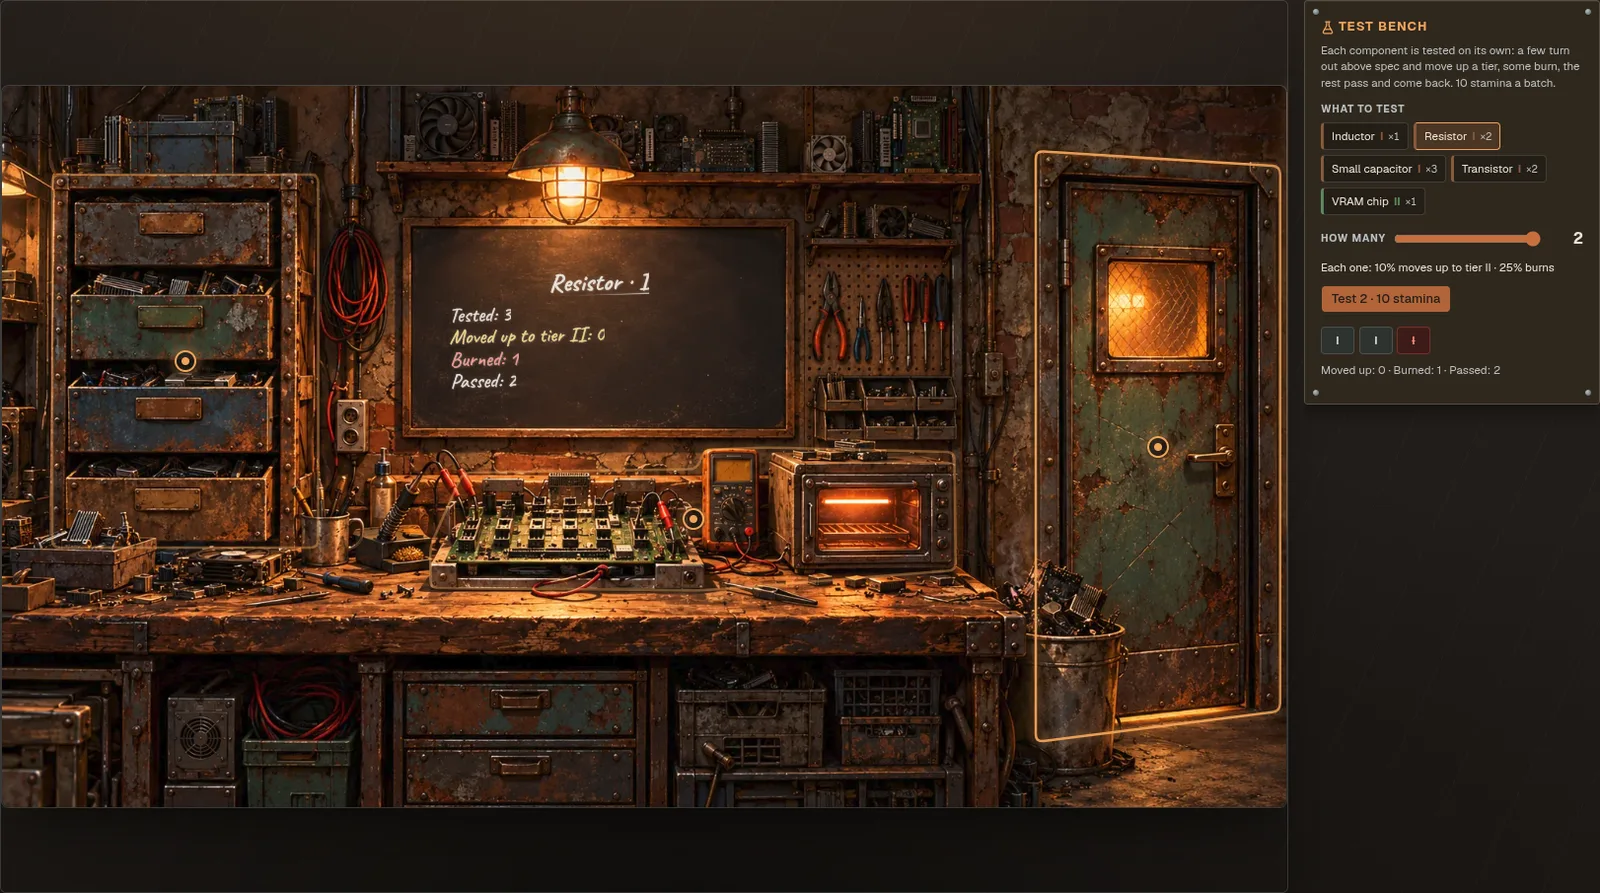
| Tier tested | Moves up | Burns |
|---|---|---|
| I → II | 10% | 25% |
| II → III | 7% | 28% |
| III → IV | 4% | 36% |
- A batch costs 2 stamina plus 0.4 a component, rounded up: 3 for one, 6 for ten, 10 for twenty. Bigger batches are a bit cheaper per component.
- You need a multimeter. It is not used up.
- Accuracy above 5 lowers the burn chance a little, up to a quarter of it. The panel says so when it applies.
- A component that moves up keeps its durability.
- Tier IV can't be tested: it's the top. No store sells it, so testing is the regular way to get it.
Three ways in: the door on the left of the repair bench, the flask at the end of the Repair row in the menu, or Test at the bench on a component in the inventory (that type comes already picked). Every batch is listed in the Activity log's Repairs tab.
Moving a component up always costs more than buying the tier above, and stores buy back at 55%. Test the components you have spare.
Inventory
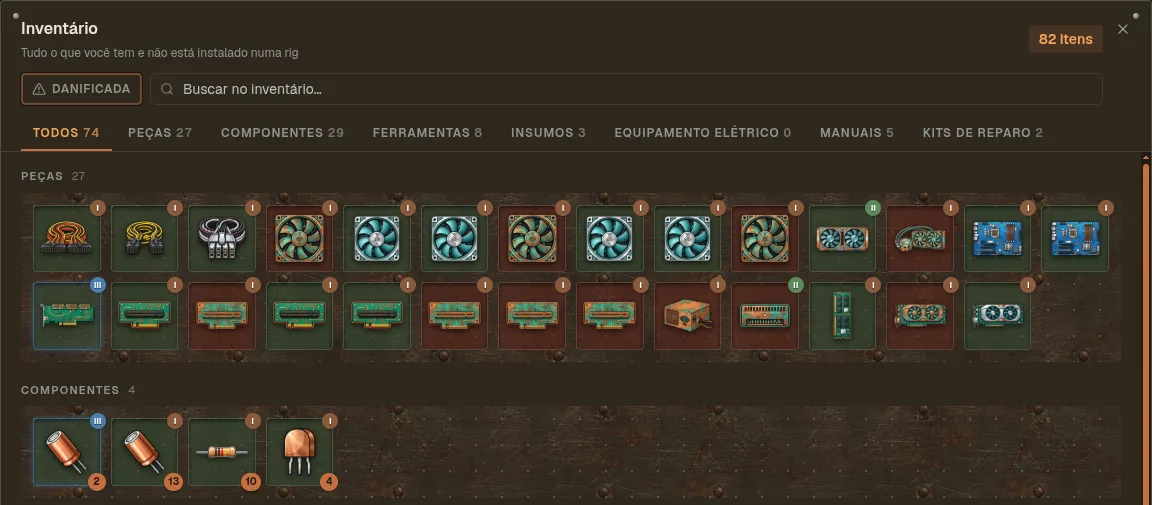
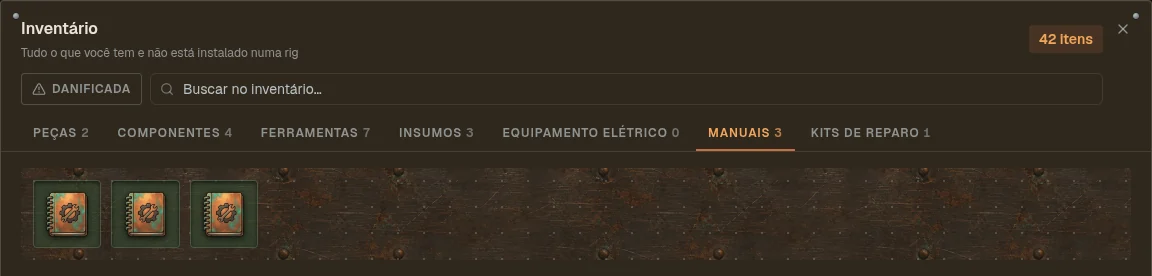
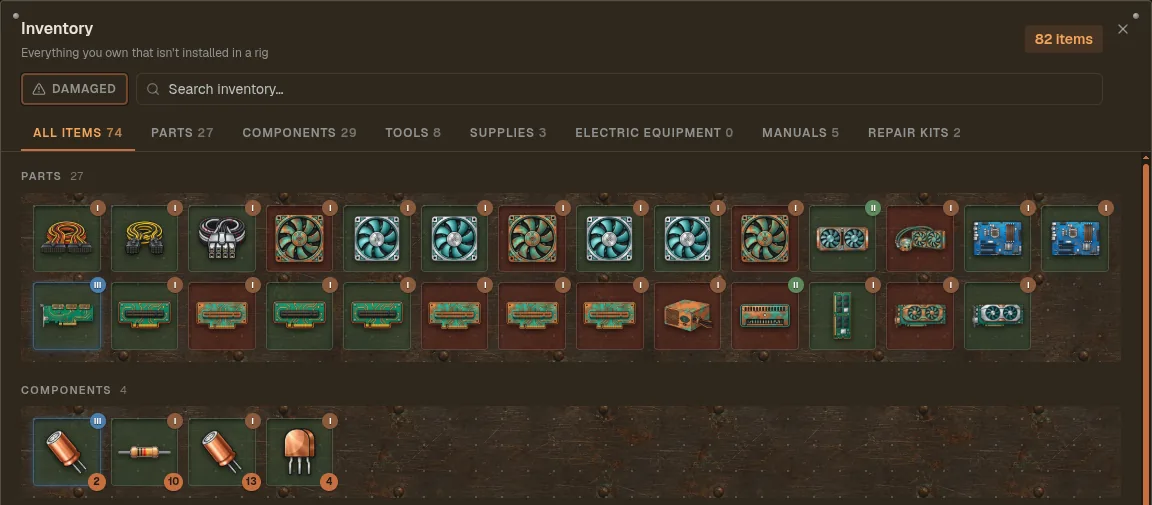
Everything you own that is not installed in a rig. Open it from the first icon (the box) in the player panel at the top left, under your hashrate; the icons next to it open your attributes, achievements and missions. An All tab shows the whole account at a glance, with components stacked by type and tier (click a stack to see its units); the other tabs split it into parts, components, tools, supplies, electric equipment, manuals and repair kits; Damaged filters to what needs repairing. Click any item for its menu: Info (a part's Info also has a table of what each tier gives, with its own tier highlighted); Study on an unread manual; Send for repair on a damaged part, which takes it to the technicians (chapter 13); Test at the bench on a tier I–III component, which opens the test room (chapter 07); Maintenance on a part with no defect worn below 75% of its durability (see below); and Destroy on parts, components, tools and supplies (a destroyed part gives back some of its components; anything else is just thrown away, and you choose how many of a stack). Nothing in the inventory wears out.
Maintenance. A part that is only worn (no burned components) can't be repaired, but it can be maintained, from the inventory, or from the rig: the part's Maintenance there removes it like Remove does (same stamina, same risk on a running rig) and takes you to its maintenance at the repair station. Putting it back is up to you: Back to the rig at the top opens that same slot, and installing it costs the usual. With its manual learned, 1 solder, 1 flux and the tier's repair stamina (plus one common Repair Kit for the boards Manual Repair handles: video card, motherboard, power supplies, riser, expansion card) it goes back to full durability. It always works, gives a little repair XP, and lowers the part's ceiling by 5% each time, so a part still wears out for good in the end. When an installed part (not a cooler) drops to 25% you get a Part worn notice, even with the game closed: the rig is mining less, and its diagnostics show which part it is. Your first daily missions ask you to learn the power supply and video card manuals, which their maintenance needs; they stay on the board every day until you know them.
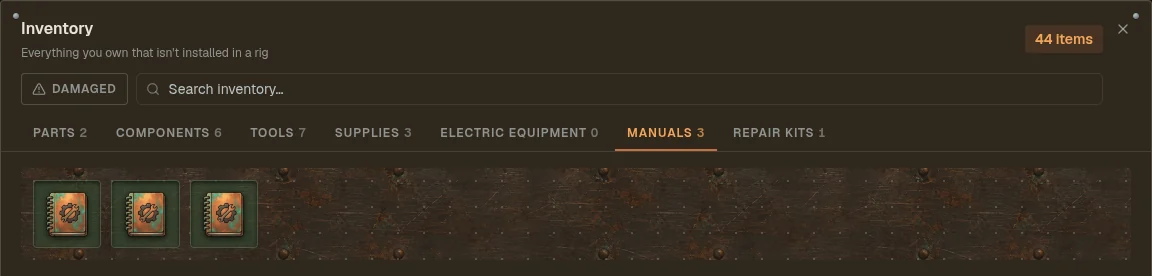
A manual you buy or find arrives unread. Click it in the Manuals tab and choose Study. Studying takes time, by how complex the part is: 15 min (coolers, RAM, SSD, riser), 1 h (industrial coolers, CPU, PCIe expansion card, power supply) or 4 h (motherboard, video card, server PSU). Each point of Intelligence takes 1% off, up to 40%. You study one manual at a time and keep playing meanwhile; the manual's slot shows the time left, and a notice tells you when it's done. Stop studying puts the manual back unread and the time spent is lost. Only learned manuals count, and a learned manual is yours forever.
Everything you can own
Computer parts
tiered I–IV

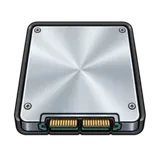
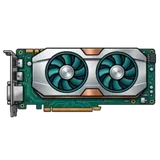

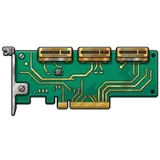
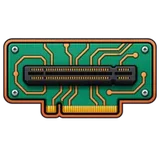
Electronic components
tiered I–IV
Repair tools
permanent, never break


Supplies, equipment & paper



The repair station
A damaged part is not lost. Repairing it means finding the component that broke, replacing it, and putting the part back together. How you do that depends on the part.
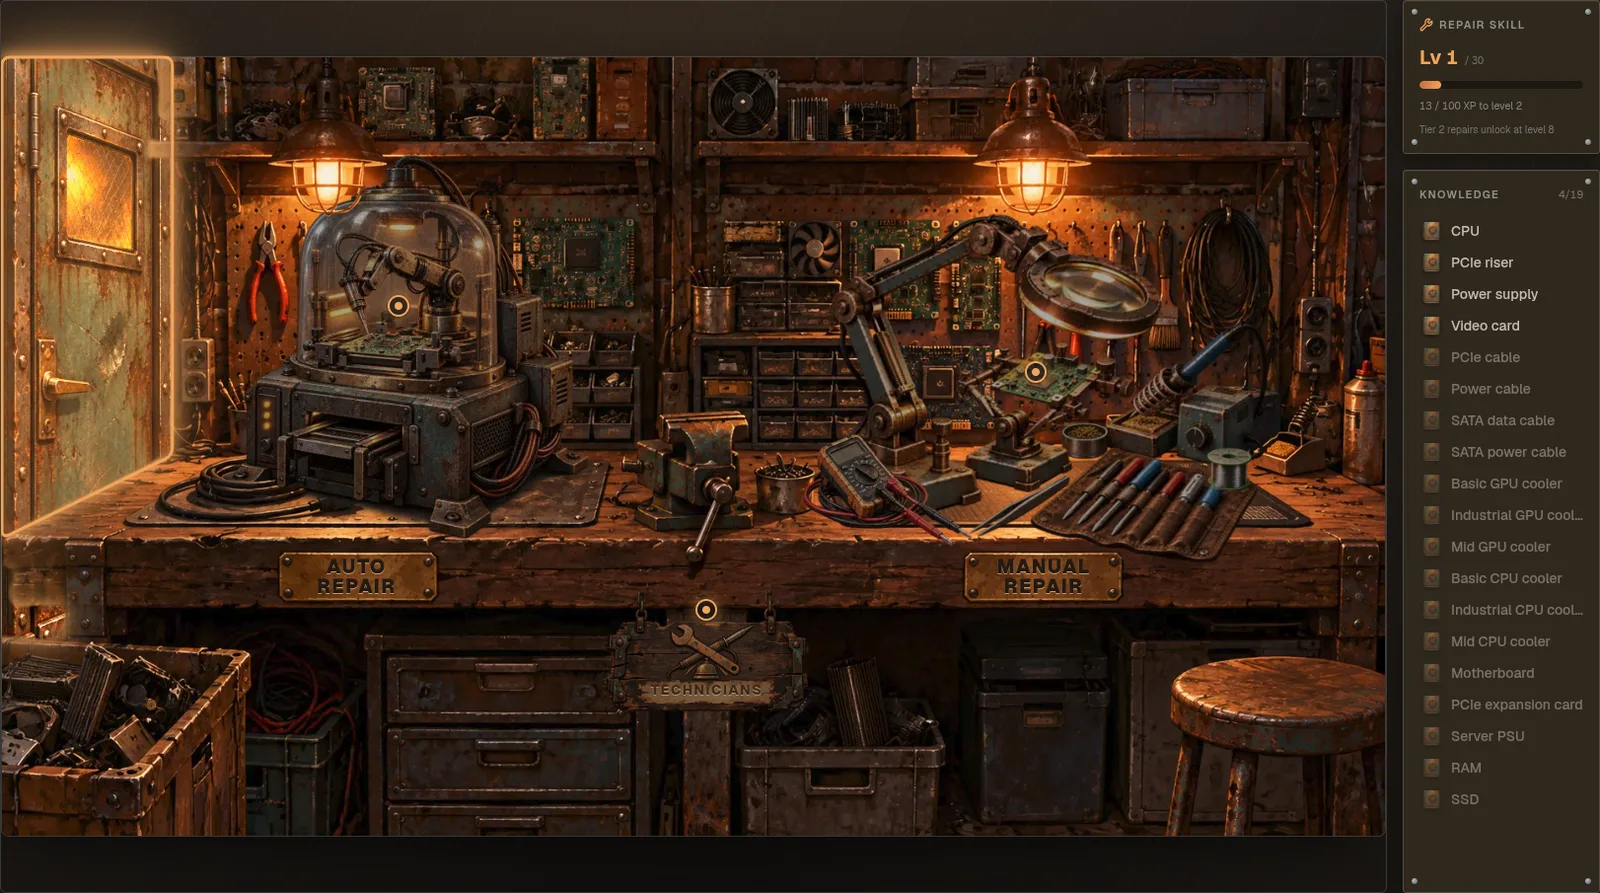
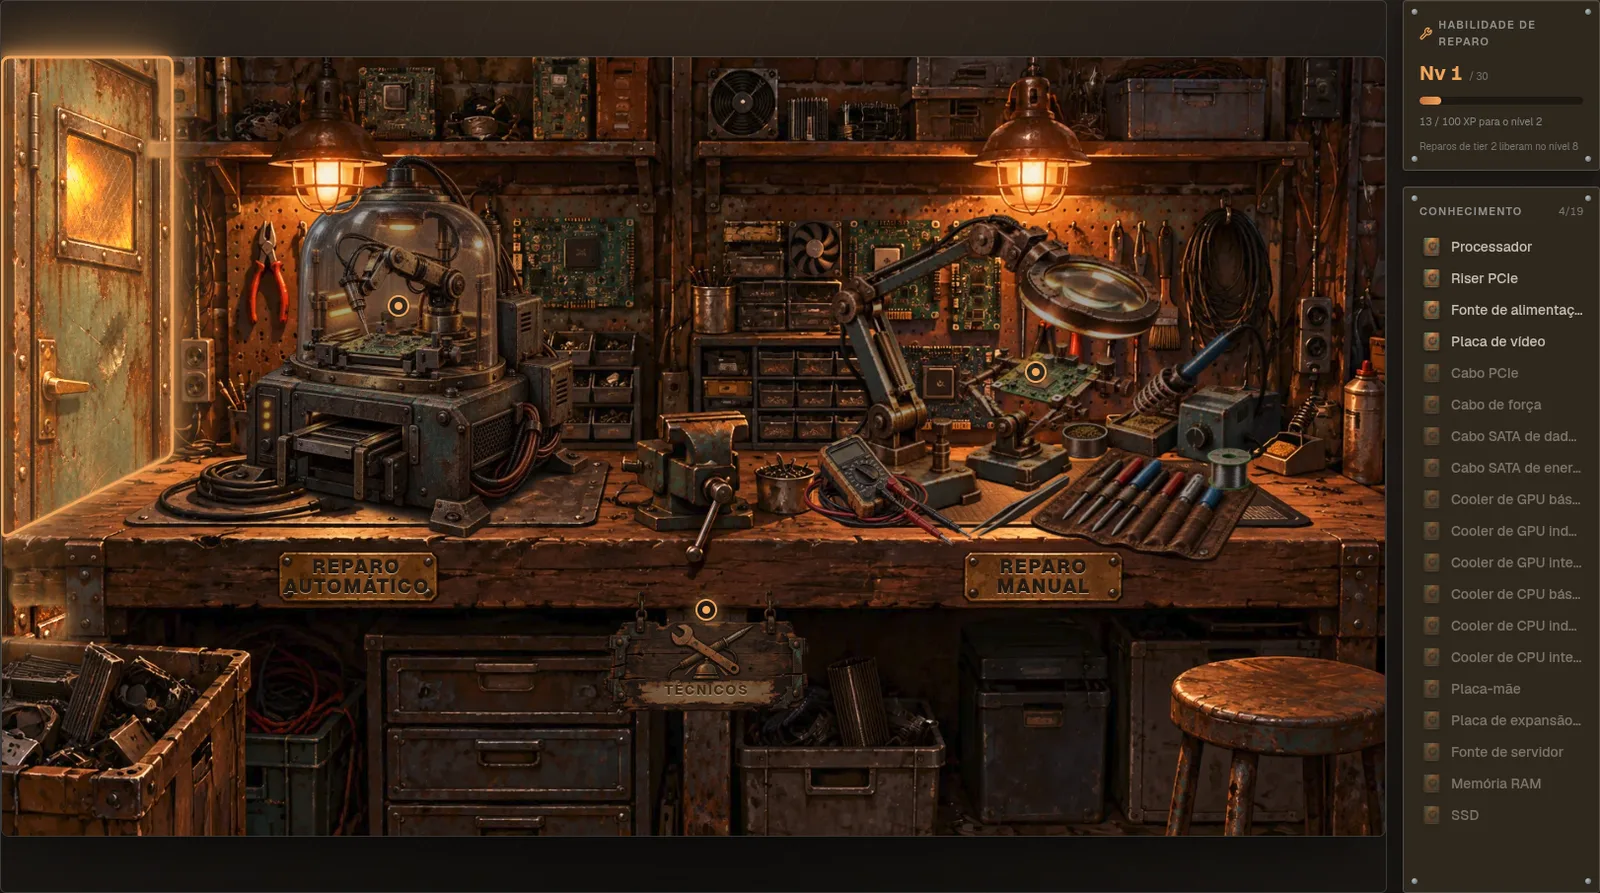
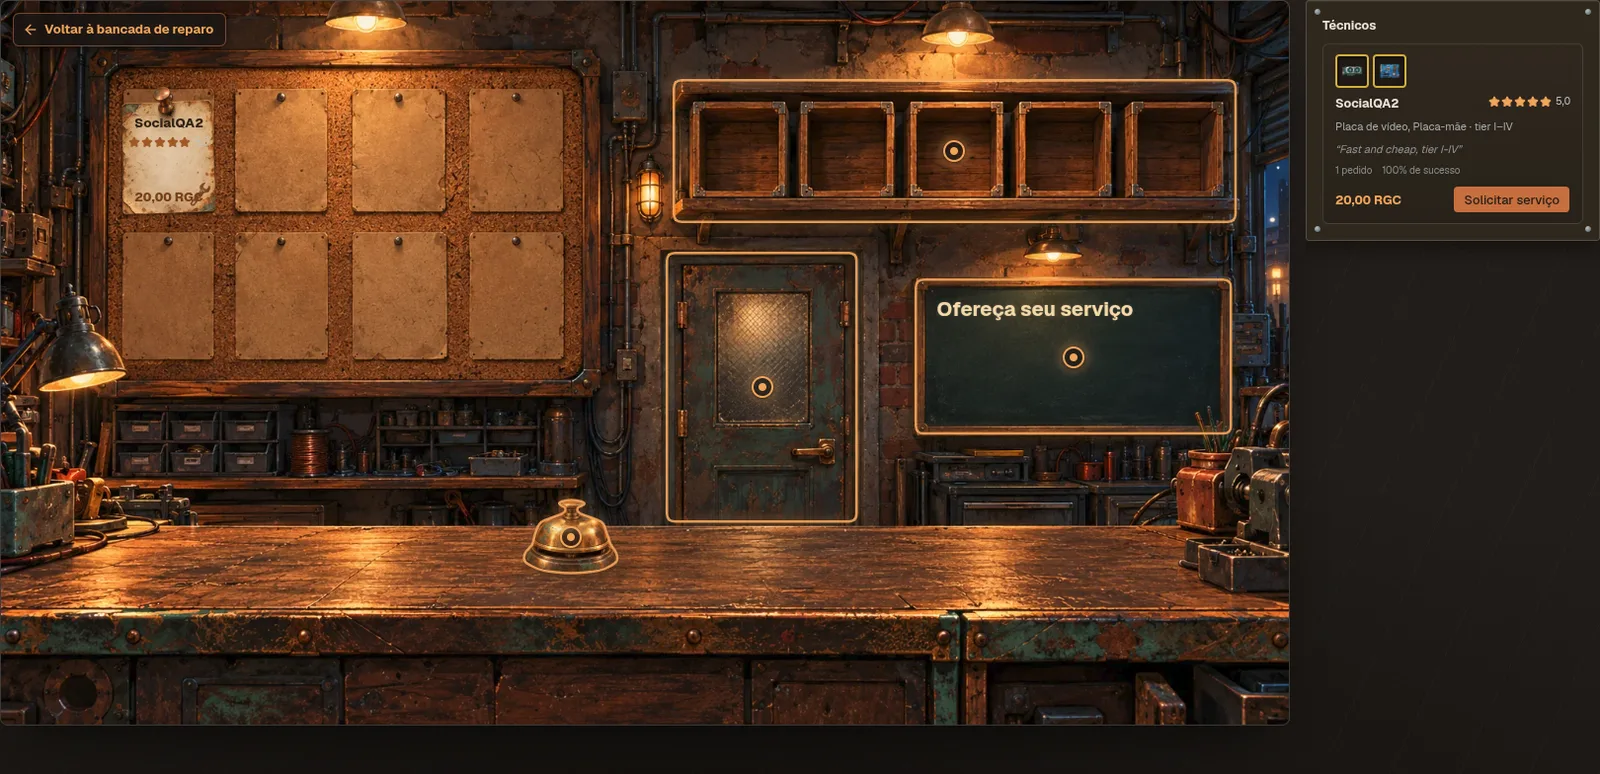
The bench has three spots. The Auto Repair machine and the Manual Repair corner fix a part yourself (chapters 10 and 11); the Technicians sign hires another player to do it, or lets you sell your own repair service (chapter 13). The door on the far left opens the test room, where loose components are tested to move them up a tier (chapter 07).
| Mode | Parts | How it plays |
|---|---|---|
| Auto Repair | CPU, RAM, SSD, GPU coolers, CPU coolers | One click. The station rolls the result for you. |
| Manual Repair | Power supply, PSU server, motherboard, video card, PCIe expansion, PCIe riser | You diagnose with a multimeter, then perform the repair step by step, guided by a Repair Kit. |
What every repair needs
- The part out of the rig and damaged.
- That part type's manual, learned (see Inventory).
- Enough repair skill and Intelligence for the part's tier.
- Replacement components of the right type and tier, loose in your inventory.
- 1 solder and 1 flux in stock (used only when the repair works), and stamina per attempt by the part's tier: 8 for tier I, 12 for II, 16 for III and 20 for IV, less as your repair skill grows.
| Part tier | Repair skill | Intelligence | Auto attempts |
|---|---|---|---|
| I | 1 | 0 | 2 |
| II | 8 | 8 | 3 |
| III | 16 | 18 | 4 |
| IV | 25 | 30 | 5 |
Repair skill levels up on its own as you repair: a success teaches more the higher the part's tier (10, 15, 20 and 30 XP for tiers I to IV at the auto-repair machine, half again by hand at Manual Repair), a recoverable failure a little. Your level's XP from a repair grows the same way: 10, 18, 30 and 50 at the machine, 15, 27, 45 and 75 by hand.
Auto Repair
- Choose Auto Repair and add the part
Add item opens your inventory already filtered to damaged parts that use Auto Repair.
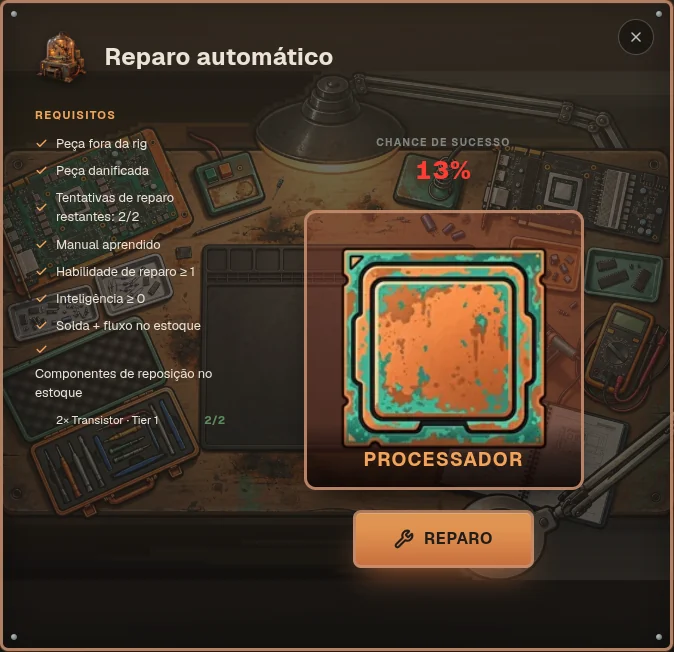
- Read the checklist and the odds
Each requirement turns into a check when met. Success chance is the real probability for your current accuracy, skill and the part's tier.
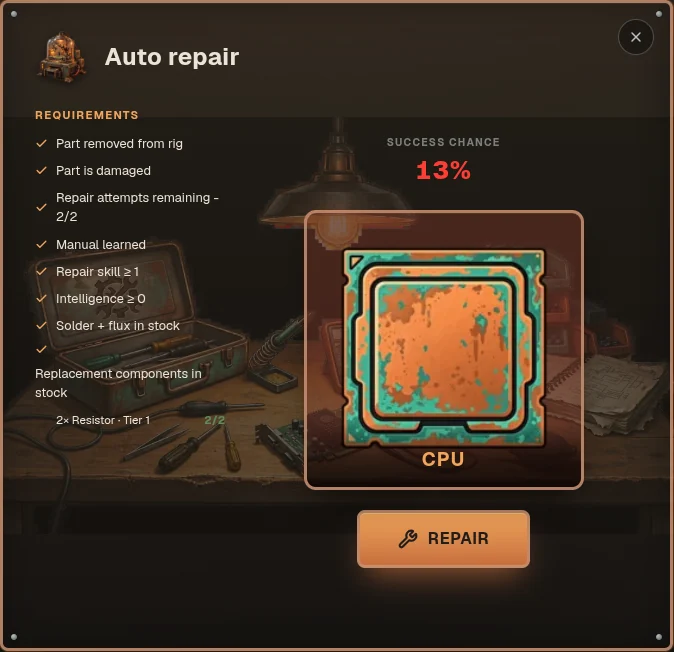
Fig 10.1A damaged tier-I CPU, every requirement met: 13% success for a repair-skill-1 player with Accuracy 5. - Repair and see what happens
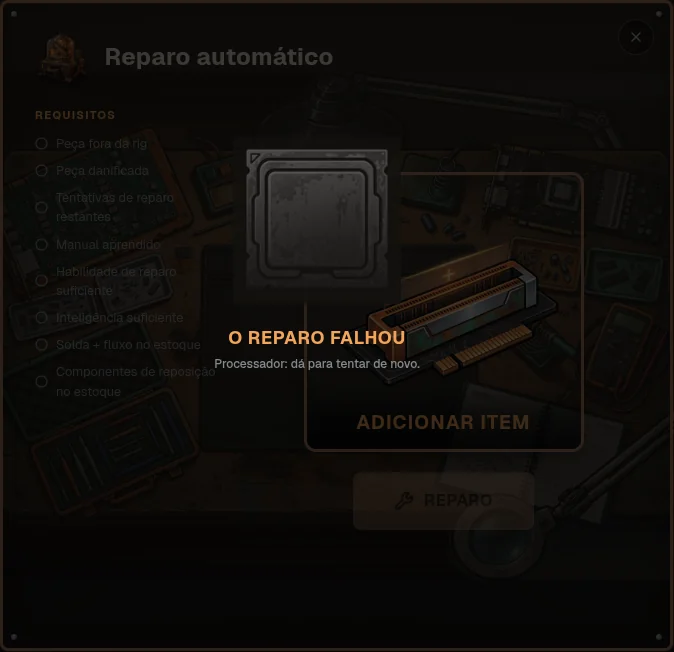
Confirm the stamina cost. After a short suspense the result appears.
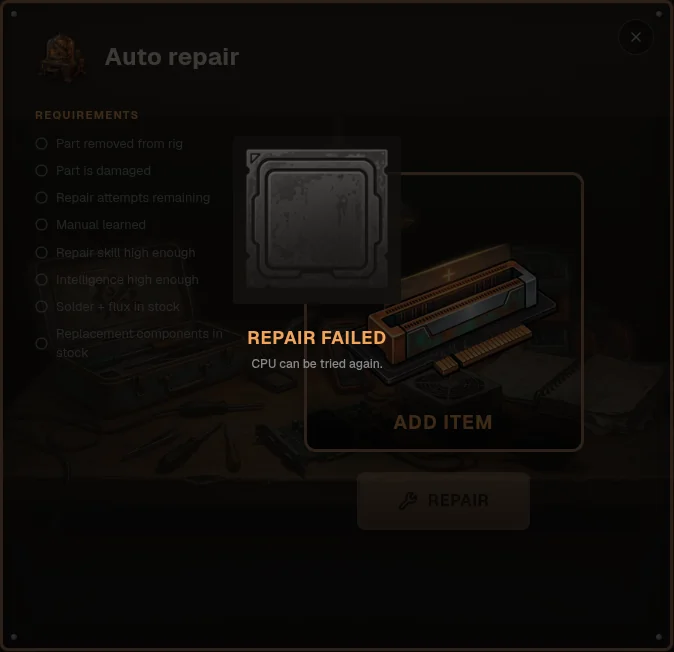
Fig 10.2"Repair failed — CPU can be tried again": a recoverable failure.
| Outcome | What happens |
|---|---|
| Success | Faulty components replaced, durability restored, but the part's ceiling drops by 10% (×0.9 per repair). |
| Recoverable failure | One attempt and the stamina used; the solder and flux stay with you. Run out of attempts and the part becomes scrap. |
| Fatal failure | The part is scrapped at once. |
Each repair has one or two critical steps. Your odds on them rise with Accuracy and repair skill and fall with the part's tier; repair skill also lowers the chance that a failed step is fatal.
Low odds early on are normal. Each point of Accuracy adds 2% per step, and each repair skill level adds 1% and cuts the fatal chance. Practise on cheap parts.
Manual Repair, with a Repair Kit
The big boards are repaired by hand. First you find what is broken with a multimeter, then you perform the repair one action at a time. The Repair Kit tells you exactly what to do; getting it right is up to you.
Before you start
- A Repair Kit for that part type. Common kits lower the ceiling 5% and restore the part to 90% of it. Unique kits restore it to 100%, do not count as a repair cycle, and raise the ceiling by 5% (up to 120% of a new part's). Common kits are sold at Ferro & Solda and Bancada do Mestre; unique ones only turn up in the Junk yard.
- The hand-repair corner opens once you own a multimeter: that is all the diagnosis needs. Each bench item you own (multimeter, soldering iron, tweezers, screwdriver, magnifying glass, solder) is laid out on the bench in colour; without the multimeter the corner stays dark with a padlock, and clicking it lists what is missing with links to the stores that sell it (a back button there returns you to the bench). The other tools are the repair's: its checklist asks for them.
- Every tool that part's repair calls for (the BGA station for VRAM and GPU chips, for example). The checklist tells you which ones you are missing.
- 3 solder and 1 flux (a PCIe riser or expansion card takes just 1 solder), and replacements for what you will mark as broken.
- Pick the part and the kit
Choose Manual Repair and add the damaged part. Diagnosing is free: no stamina, no kit, no manual, just the multimeter. You can pick the kit now (the kit slot) or when you start the repair.
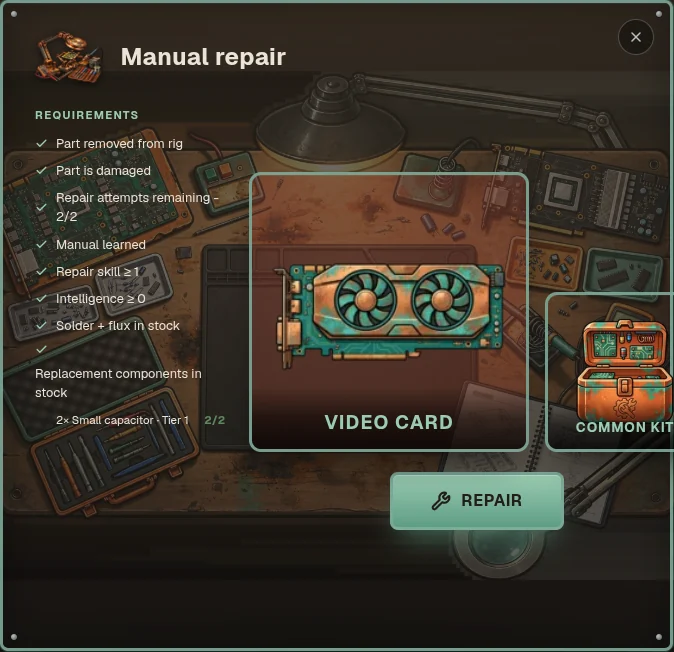
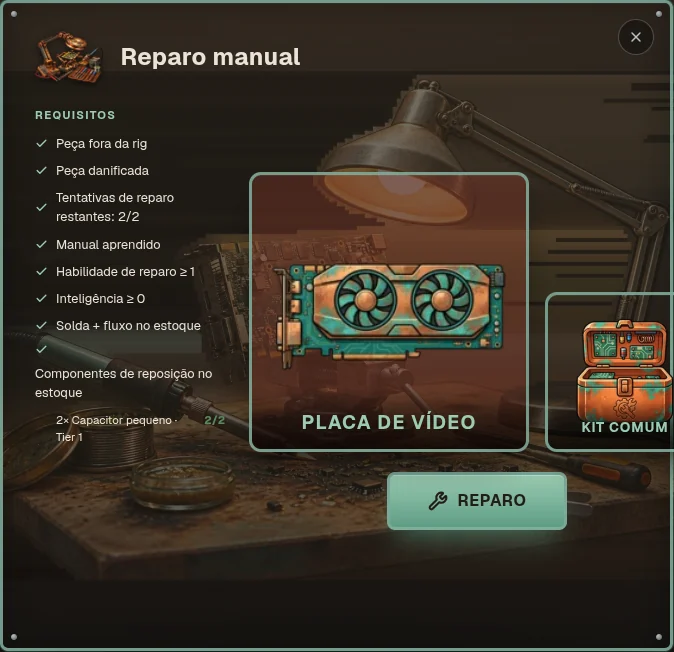
Fig 11.1A damaged video card and a Common kit, ready. Diagnose opens the diagnosis, free: the stamina is only spent when you confirm it and start the repair. - On big boards, pick a section
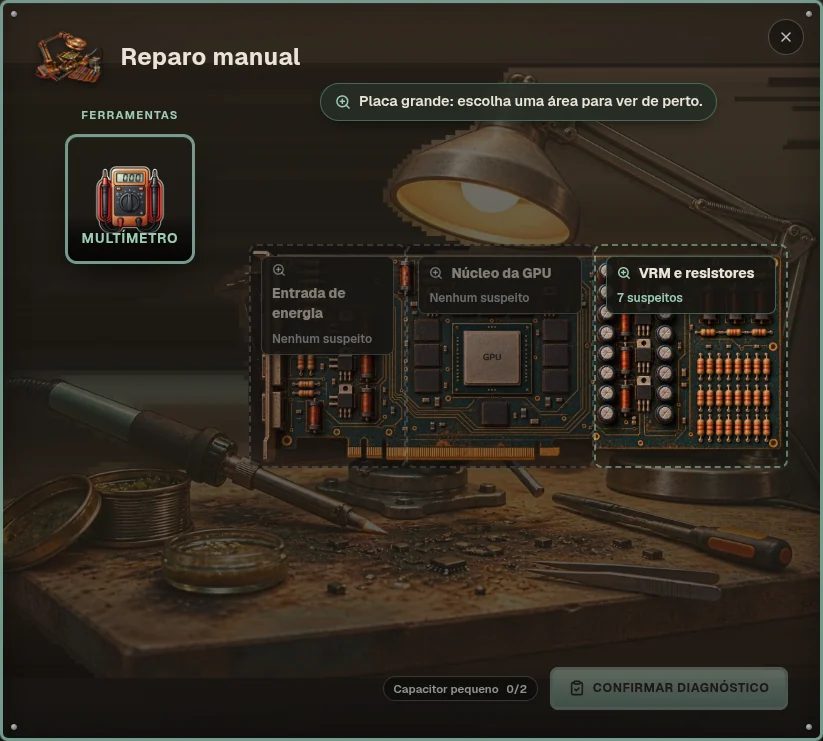
Video cards and motherboards are too dense to inspect whole. The diagnosis opens on the full board split into sections, each showing how many suspects it holds. Click one to zoom in. ← Full board takes you back.
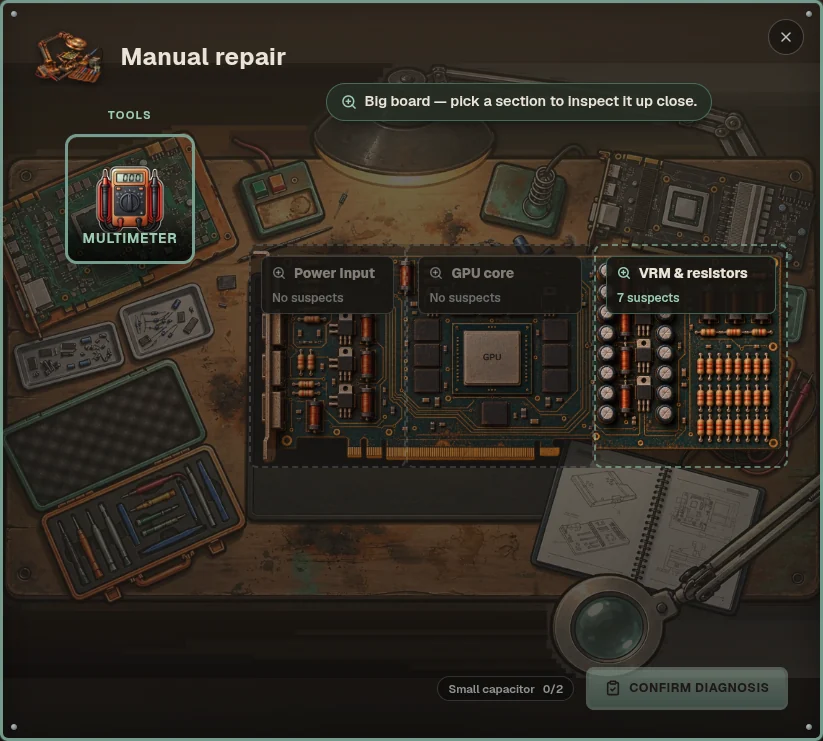
Fig 11.2Power input and GPU core: no suspects. VRM & resistors: 7. Bottom: the kit says to find 2 small capacitors. - Pick up the multimeter and choose a range
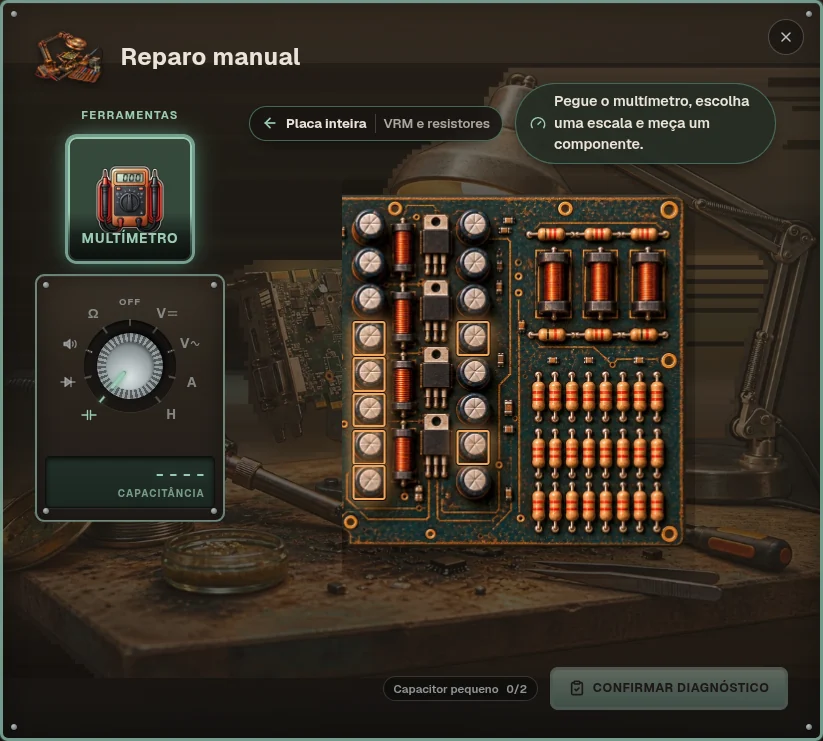
Click the multimeter. Its rotary switch slides out below it. Turn it to the range that matches the component you want to test (see chapter 12): a capacitor is tested in F (capacitance). With the meter in hand, the pointer becomes the test probes over the board.
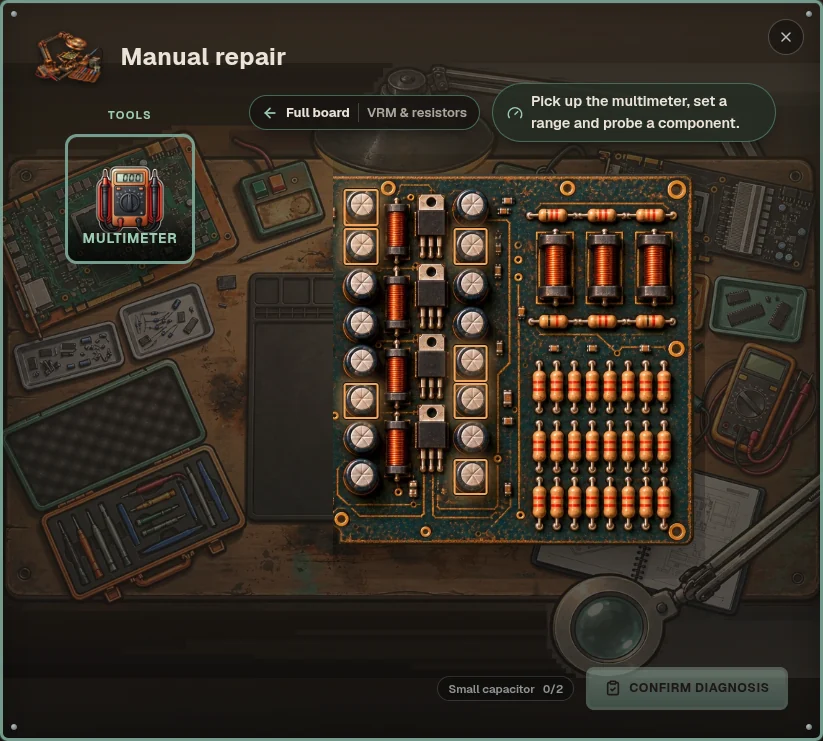
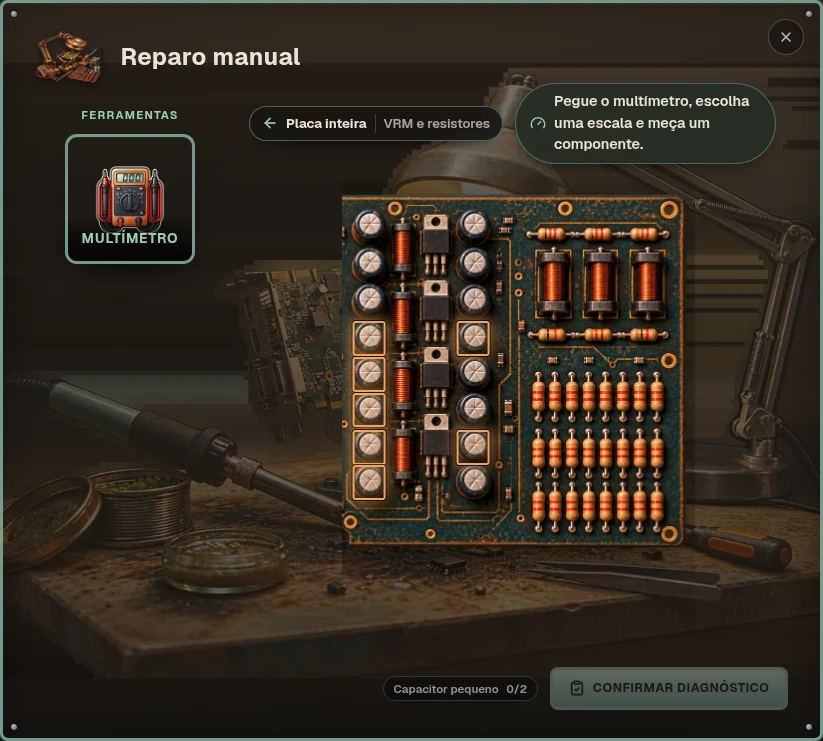
Fig 11.3Zoomed into VRM & resistors. The seven suspects glow copper. 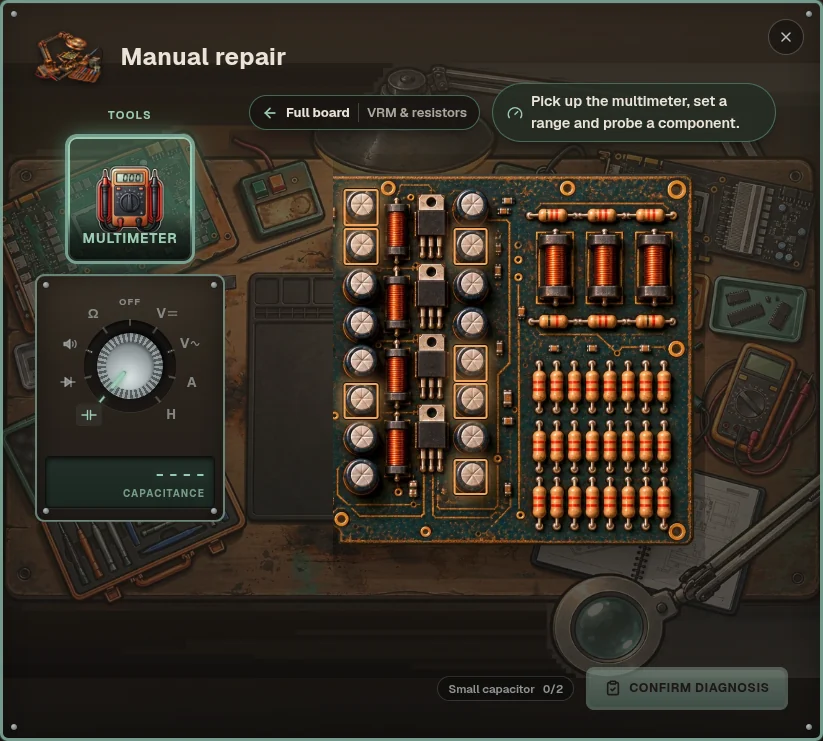
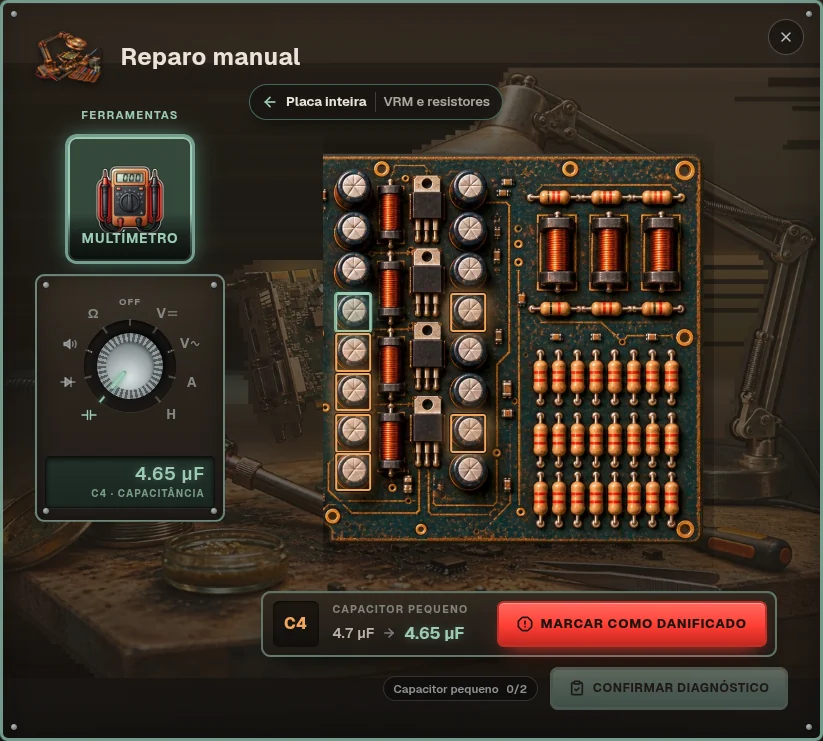
Fig 11.4Meter in hand, switched to capacitance (F). - Probe the suspects and compare
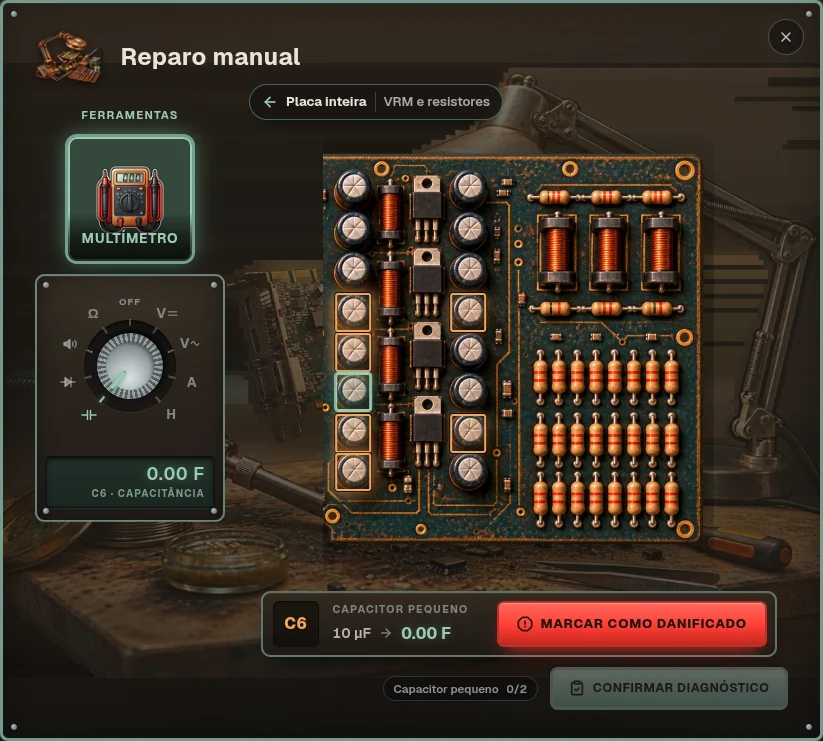
Click a suspect. The LCD shows the reading, and the bar under the board puts it next to the value the component should read. A healthy part reads close to its reference; a broken one reads open (OL), shorted (about 0) or far off.
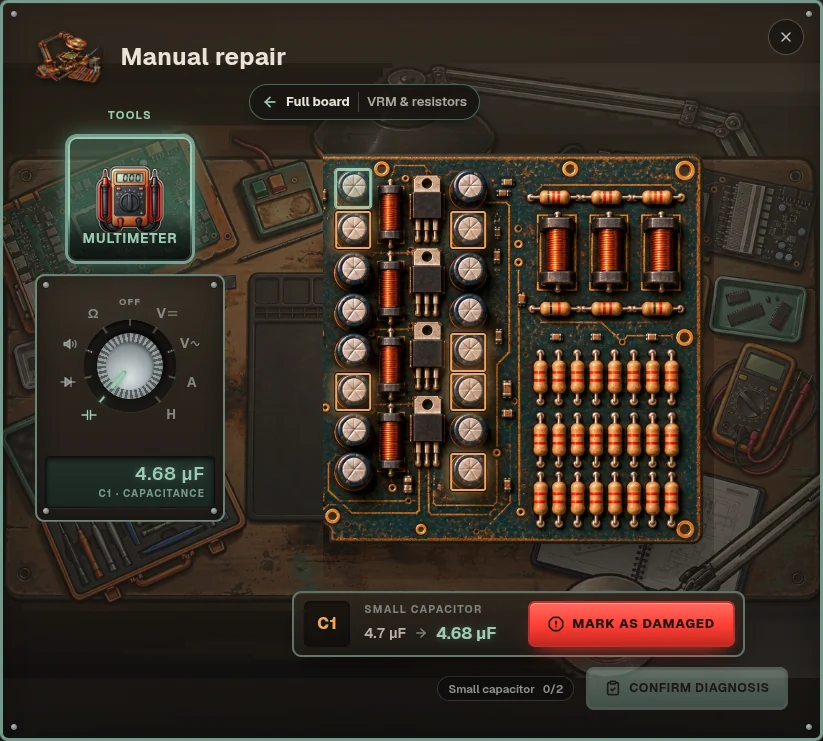
Fig 11.5C1: rated 4.7 µF → 4.68 µF. Close enough: healthy. 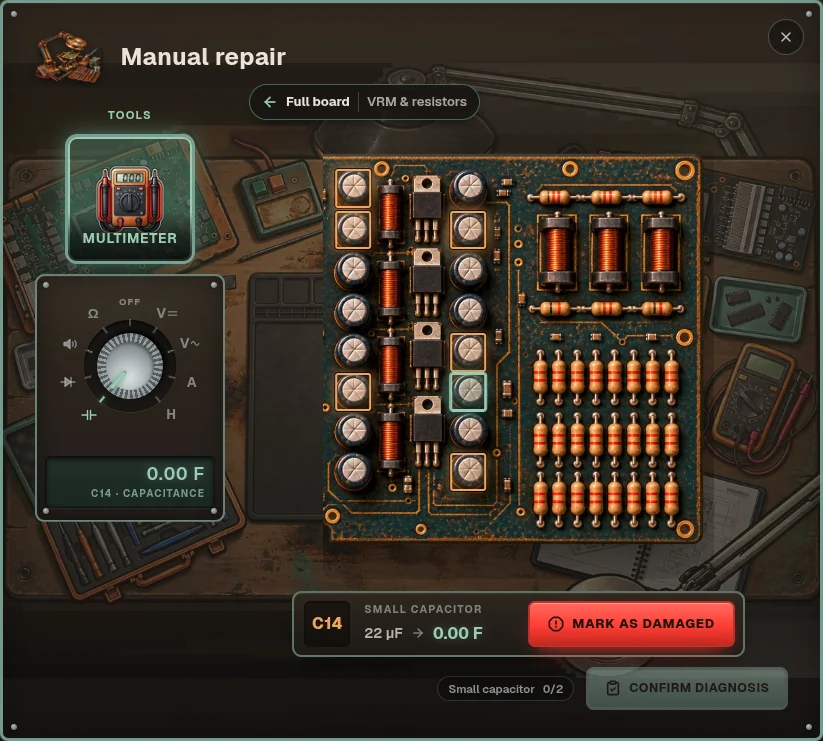
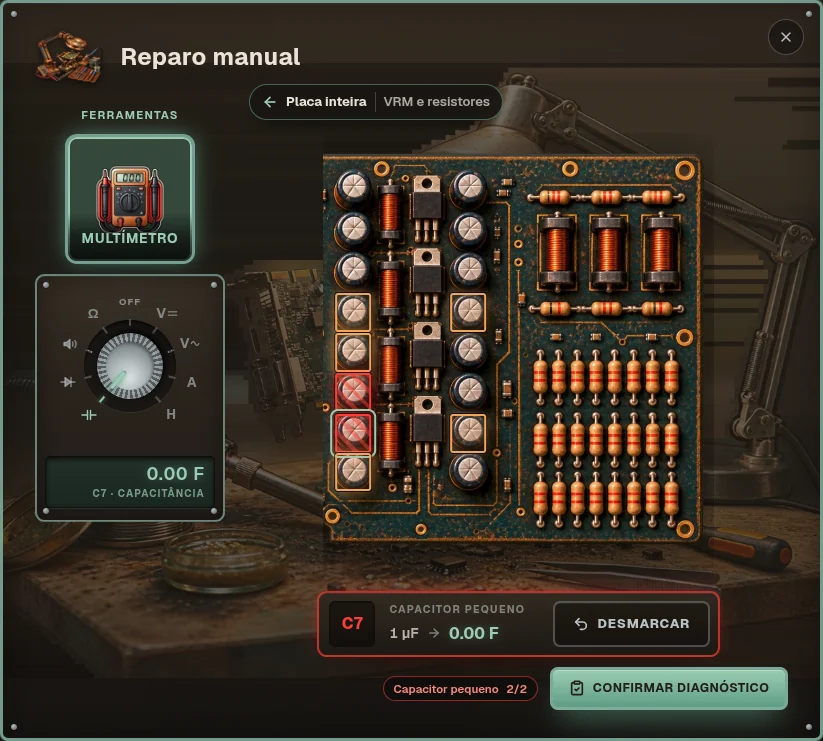
Fig 11.6C14: rated 22 µF → 0.00 F. Shorted: this one is broken. - Mark what is broken
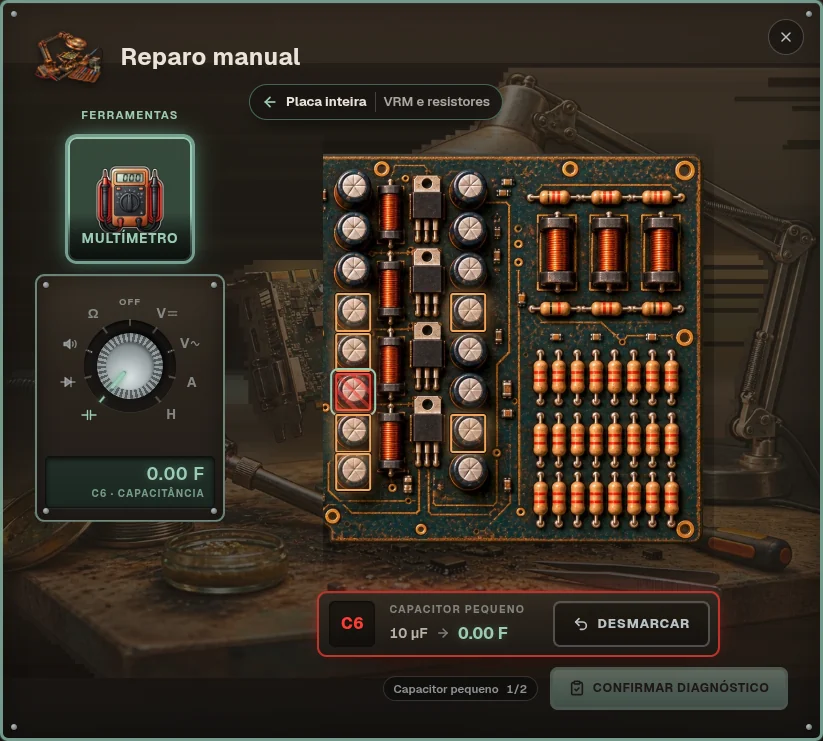
Press Mark as Damaged. The component gets red hazard stripes and its counter at the bottom goes to 1/1. Unmark undoes it. Once a type's count is full you cannot mark another of that type until you unmark one.
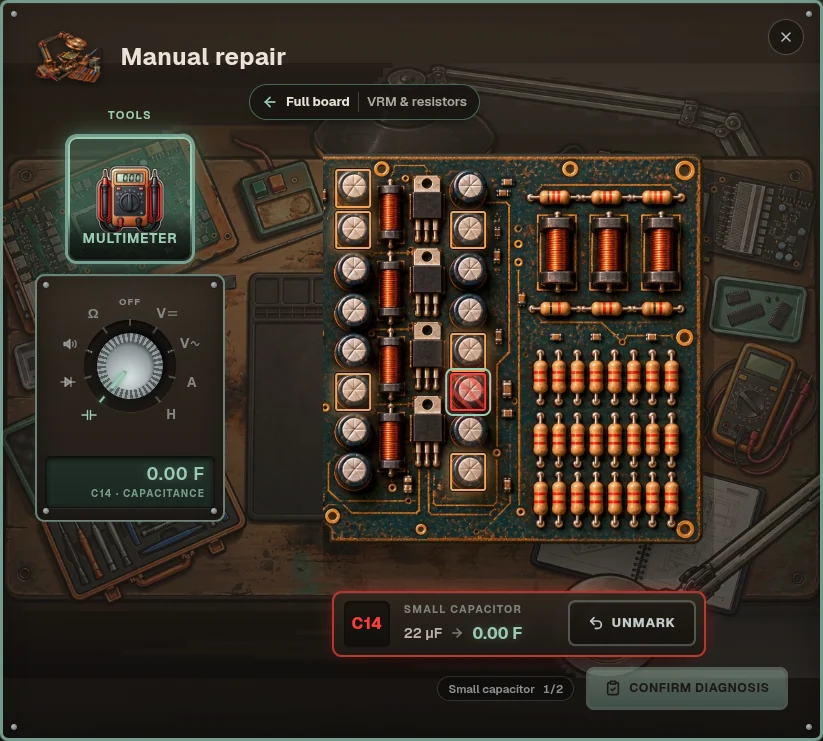
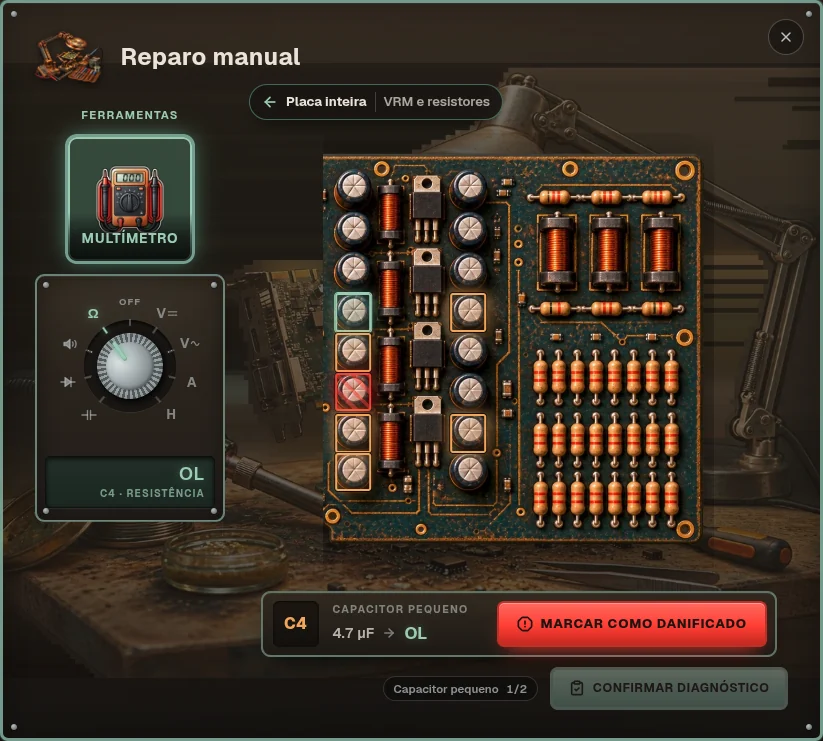
Fig 11.7C14 marked. Small capacitor 1/2. TrapThe wrong range also reads OL. Here a perfectly healthy capacitor probed in Ω mode reads OL, as if it were open. Always check the range first.
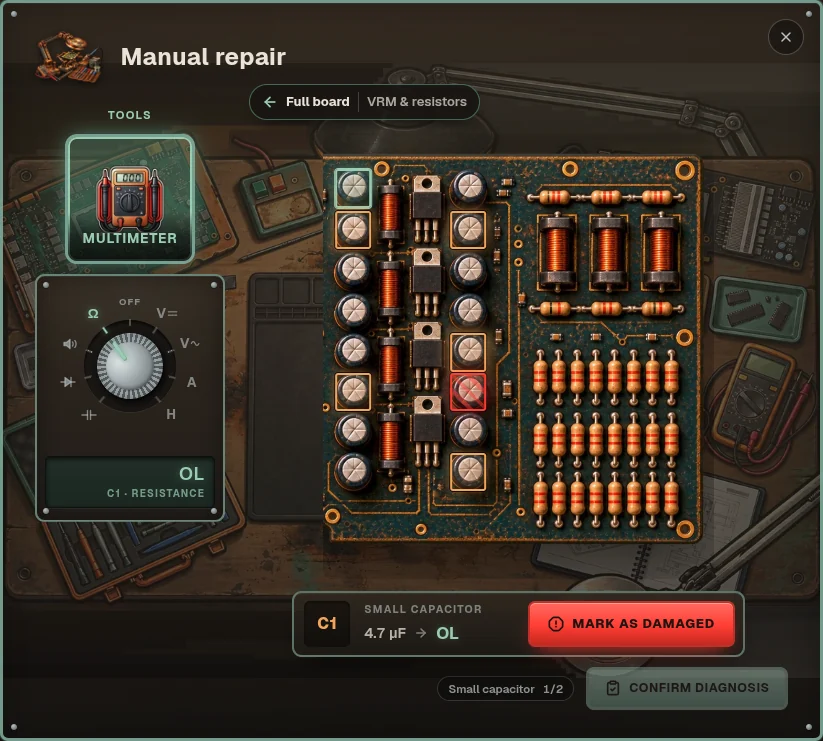
Fig 11.8C1 in Ω mode: OL. Nothing is wrong with C1; the meter is on the wrong range. - Find the rest, then confirm
Go back to the full board (your marks stay visible), open the next section, switch to the right range and keep probing. Every mark is saved as you make it: you can leave and come back later (the button then reads Continue the diagnosis), even with no stamina left. When every count is full, Confirm and repair lights up. That is when the repair starts: it checks the manual, the kit, the tools, the supplies and the replacements for what you marked, and spends the stamina. Confirming is final.
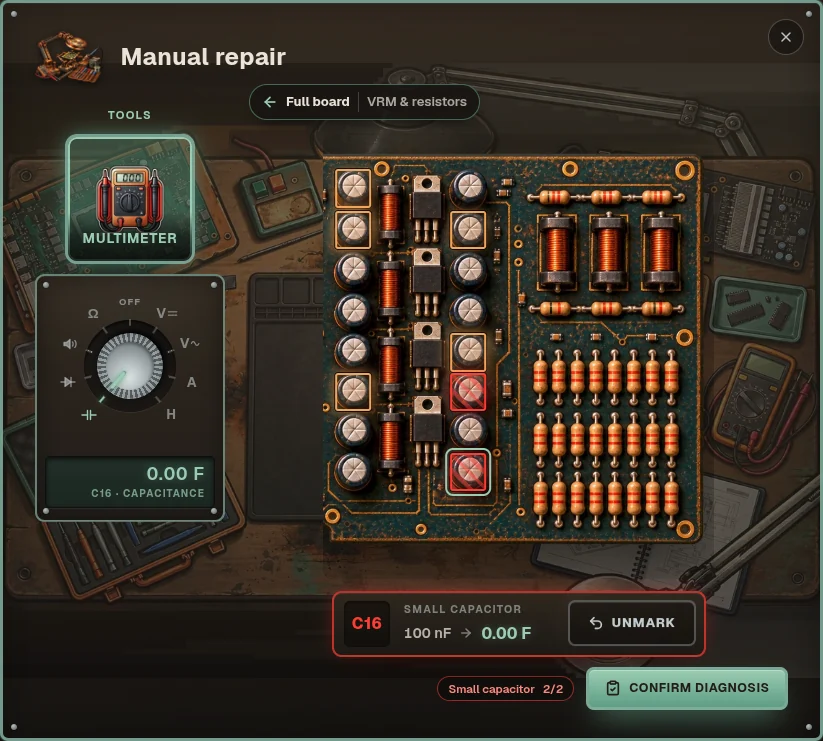
Fig 11.9C16: rated 100 nF → 0.00 F, marked. Small capacitor 2/2. Ready to confirm. - Follow the kit, action by action
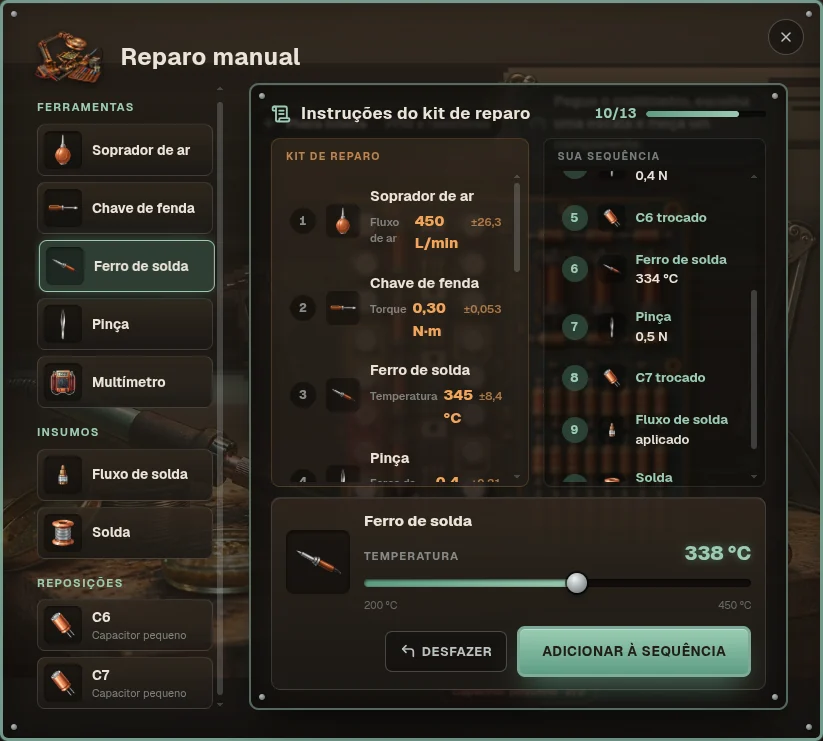
The kit's instructions appear on the left of the sheet, with every target value and how far off you may be (the ± tolerance). Your sequence on the right lists what you actually do, in the order you do it. The two are deliberately not lined up: keeping them in step is your job.
To perform an action: pick the tool, supply or replacement on the left, set its dial(s) under the sheet, press Add to sequence. Undo removes your last action.
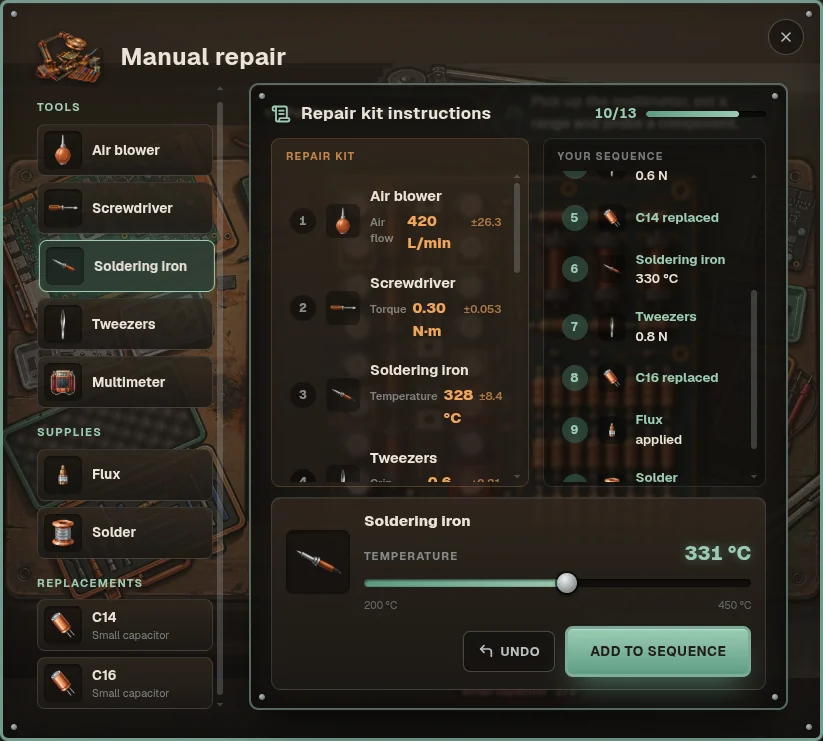
Fig 11.10Step 11 of 13: soldering iron set to 331 °C (the kit says 331 °C ±8.4). - Finish the repair
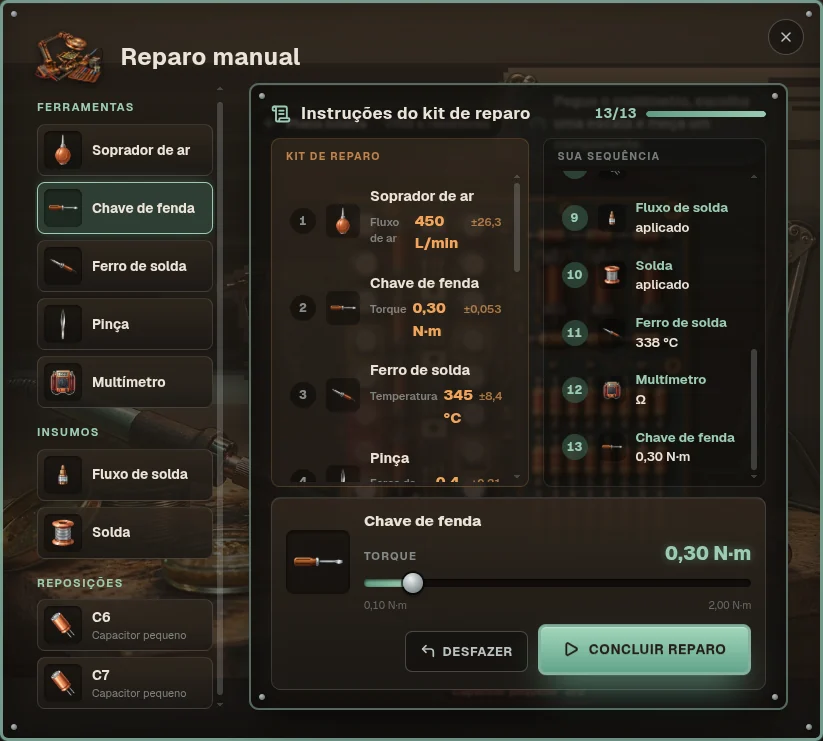
When every position is filled, Finish repair asks for confirmation and sends the whole sequence at once. The kit, the solder and the flux are used up either way. If the repair works, you get half of its stamina back.
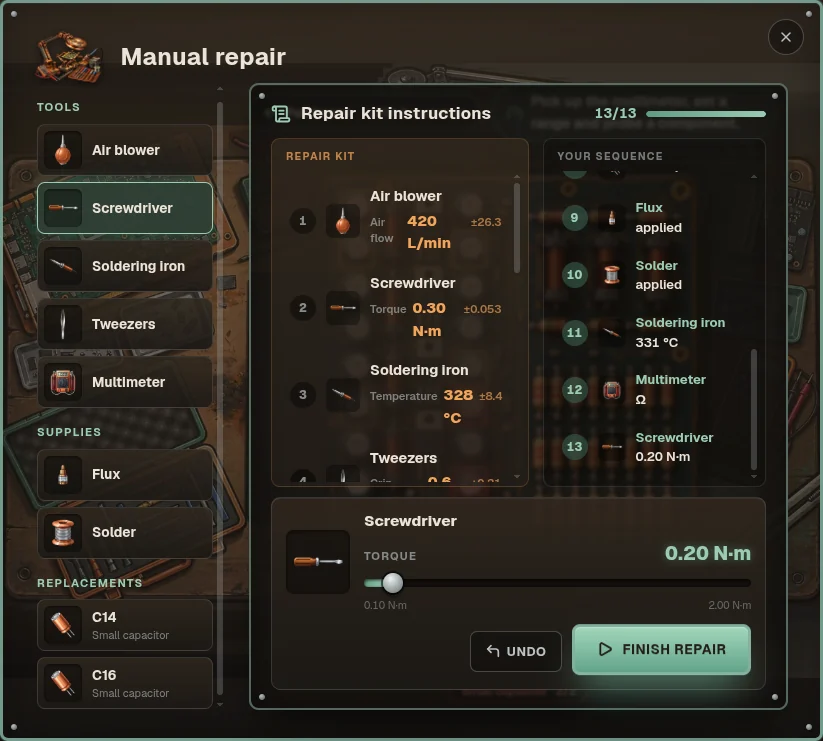
Fig 11.1113/13. Finish repair is armed. 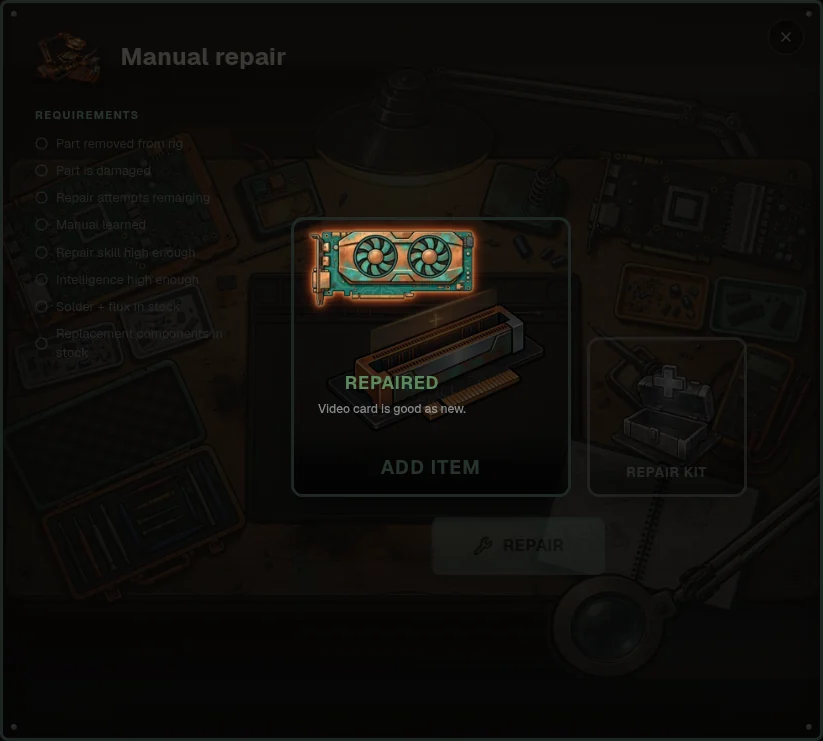
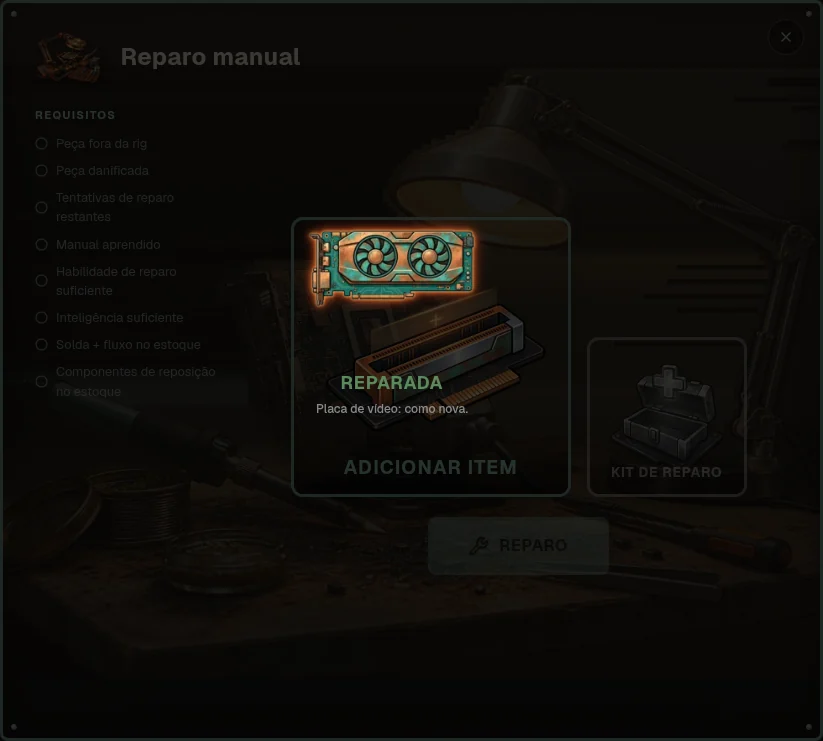
Fig 11.12"Repaired — video card is good as new."
The practice board
No broken part on hand, or not sure of your readings yet? Practice board, under the bench's button, gives you a board of any Repair Kit part with its faults rolled on the spot. It is the same diagnosis, with one difference: as soon as you check it, you see every suspect, whether it was broken, what the right range reads on it, and what that reading meant (open, shorted, worn, drifted). It costs nothing and earns nothing: it is there to learn the meter. You only need the multimeter, and it is open in jail too (a button on the jail's screen).
How a manual repair is scored
Nothing is graded while you work. When you finish, each position is compared with the kit. A wrong tool at a position, or a dial outside the tolerance, adds that step's risk weight to a total. Heavier steps (BGA reflow on a GPU chip) weigh far more than a screw. The total becomes one roll for scrap:
Each risk point raises the chance the part ends up as scrap, and repair skill lowers it. A perfect sequence carries no risk at all.
A repair that doesn't scrap the part can still fail to take: 12% of the time at repair skill 0, down to 3% at skill 30. The kit and the supplies are spent, and the part stays as it was, ready for another try.
No need to rush, and no way to: a sequence sent too quickly comes back as Too fast. Nothing is spent and the repair stays open; check it and send it again.
| Outcome | What happens |
|---|---|
| Success | Marked components replaced, durability restored (common: 90% of a ceiling 5% lower; unique: 100% and a higher ceiling). |
| Scrap | The part is destroyed. |
| Didn't take | Nothing changes: the part stays as it was, and the kit and supplies are spent. Try again. |
| Success, wrong diagnosis | A healthy component you marked was replaced for nothing (the replacement is spent). A broken one you missed is still broken: the part comes back faulty and you are told how many faults were missed. |
Tool settings
Each tool has a dial with its own range and step. The kit gives a target inside a realistic window for that job; your tolerance grows with Accuracy. From repair skill 16 you may type exact values instead of sliding.
| Tool | Setting | Dial range | Step | Tolerance |
|---|---|---|---|---|
| Soldering iron | Temperature | 200–450 °C | 1 | ±8 °C |
| Tweezers | Grip force | 0.1–5.0 N | 0.1 | ±0.2 N |
| Screwdriver | Torque | 0.1–2.0 N·m | 0.05 | ±0.05 |
| Air blower | Air flow | 50–600 L/min | 10 | ±25 |
| Magnifying glass | Magnification | 1–40× | 1 | ±2 |
| BGA station | Top + bottom heater | 100–400 / 50–300 °C | 1 | ±5 °C |
| Multimeter | Range | 8 positions | — | exact |
The windows follow real bench practice: SMD resistors desolder around 320–350 °C, big transformer pins need 370–400 °C, lead-free BGA chips reflow around 235–260 °C on top, and you grip a ceramic capacitor gently (0.3–0.8 N) or it cracks.
The six boards
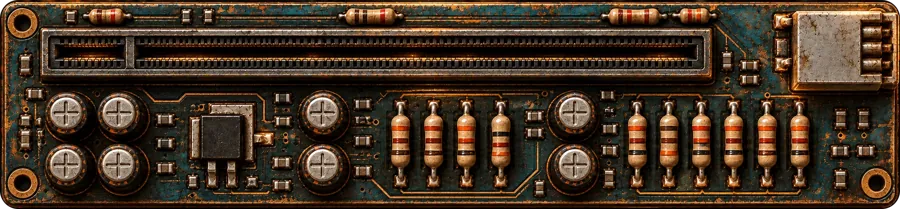
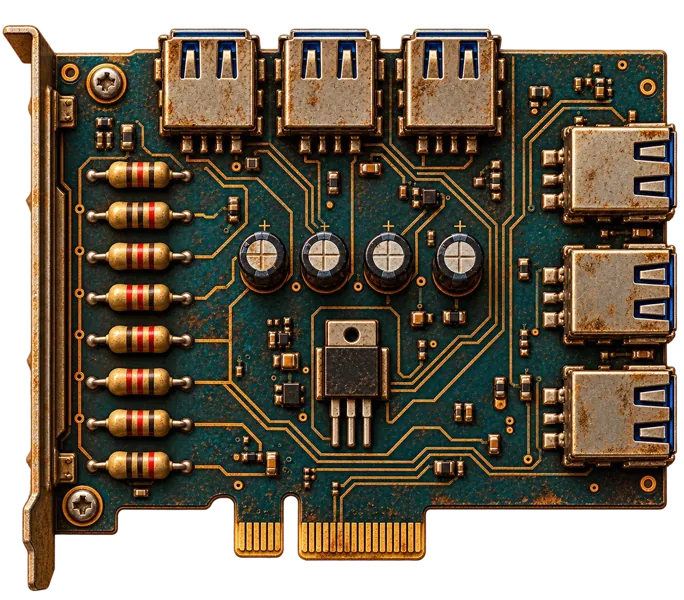
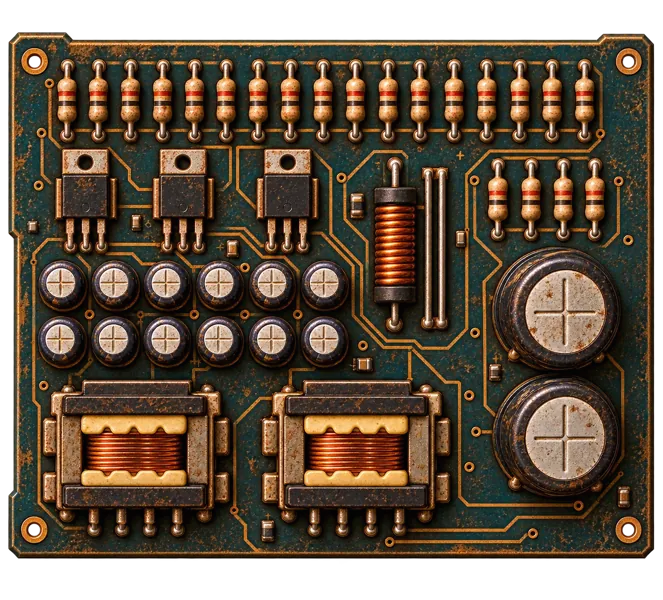
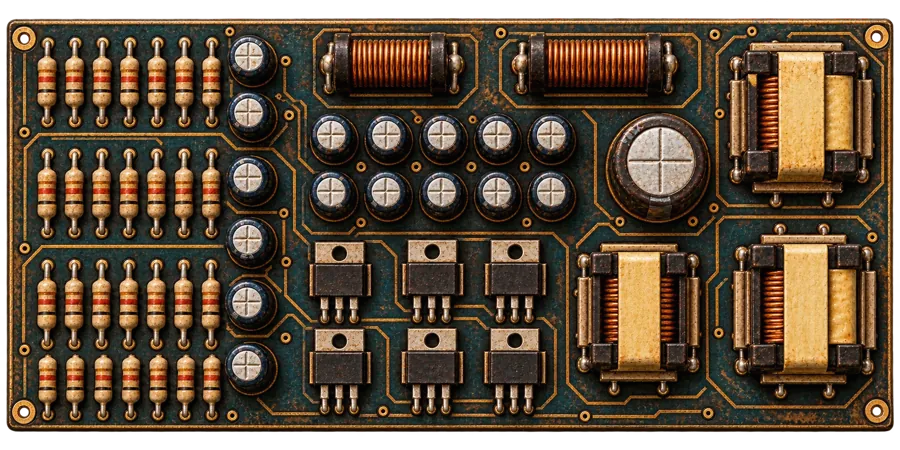
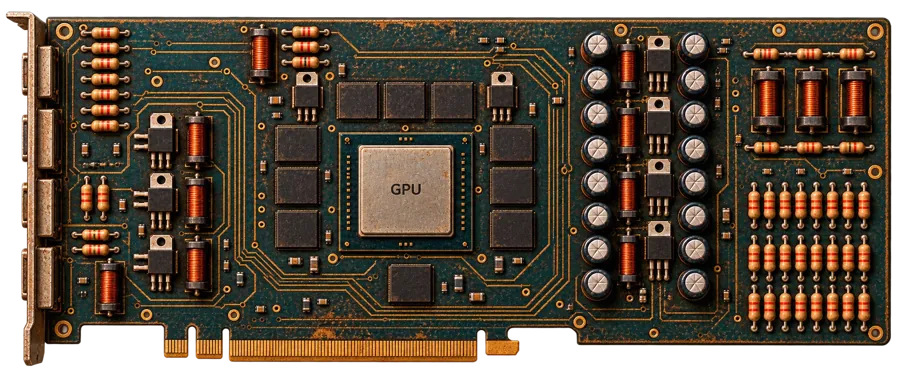
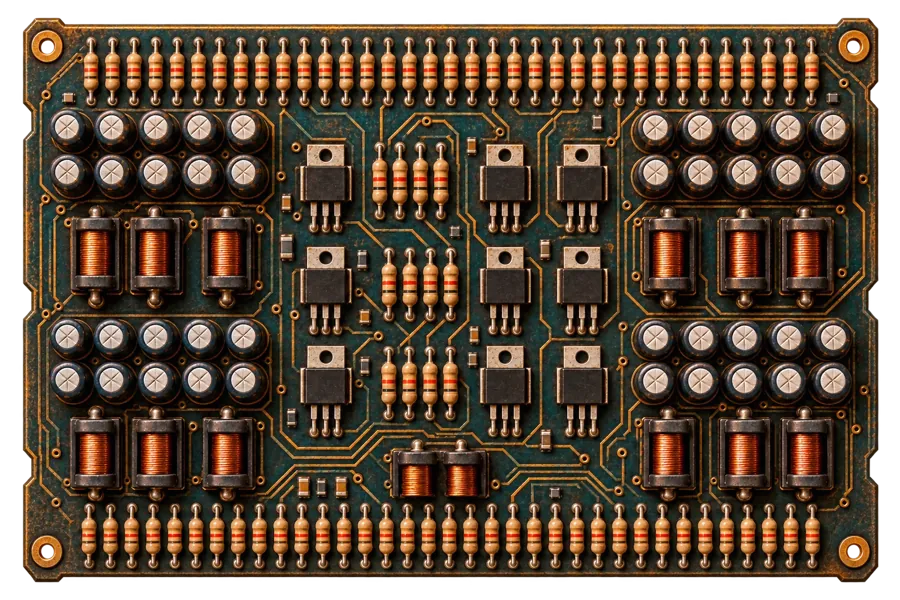
Which components are suspects changes every attempt, including which of the board's extra drawn components act as decoys.
Reading the multimeter
One rule: right range, then compare with the reference. Every suspect shows its rated value (resistors, capacitors, inductors) or a known-good reference reading (transistors, chips, transformers). Healthy parts read within a small tolerance of it.
| Component | Range | Healthy reads | Broken reads |
|---|---|---|---|
| Resistor | Ω | within ±5% 2.2 kΩ → 2.21 kΩ | OL or 2–5× too high |
| Small capacitor | F | within ±10% | 10–50% of rated, or 0 |
| Large capacitor | F | within ±20% | dried out: 10–50%, or 0 |
| Transistor | Diode | 0.55–0.70 V (±8%) | 0.000 V short or OL |
| Inductor | H | within ±10% | OL or 10–50% |
| Transformer | Continuity | beep · ~0.5 Ω | OL, no beep |
| VRAM chip | Diode | 0.38–0.48 V | 0.000 V or OL |
| GPU chip | Diode | 0.30–0.40 V | 0.000 V short |
On the wrong range the meter shows nothing useful: 0.000 V on V⎓ and V~, 0.000 A on A, and OL everywhere else. Measuring costs nothing and you can probe as often as you like. Turning the switch clears the display.
Many kits end with a multimeter test of the repaired part itself: V⎓ on power supplies (checking the output) and Ω on boards and cards (checking for shorts).
Technicians
Can't repair a part yourself, or would rather not risk it? Hire another player. Good at repairs? Sell your service.
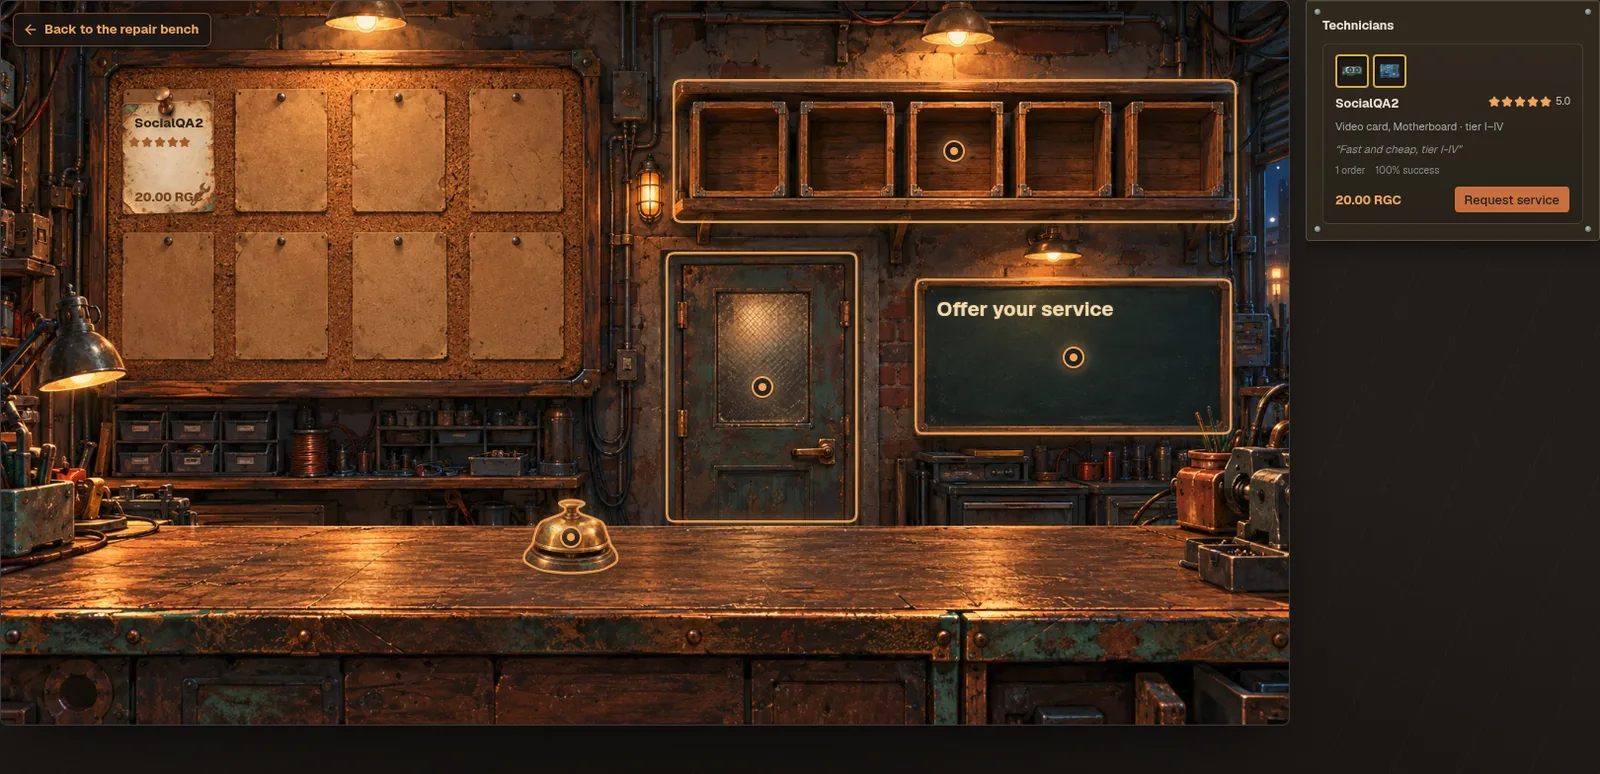
Get here from the Technicians sign at the repair station, or straight from a damaged part's Send for repair in the inventory: then the technicians who take that part come first and the part is already picked.
Hiring
Click a card (or ring the bell for the full list) to see the technician's part types, tier range, fee, stars and past orders, then Request service. Choose the part: the game works out every number. The fee is the technician's; the part's reference value is what it is worth as it is, broken and worn. You pay up front and the money waits in escrow. You can't hire someone playing from your own connection or device.
- The part stays yours. It leaves your inventory and sits on the shelf as a tagged box until the order closes. Until the technician accepts, you can Cancel and get everything back.
- The technician repairs it for real, at their own bench, with their own skill, tools, components and stamina. Nobody just says how it went: the result is the repair's.
- Back working: the technician is paid and the part comes home.
- Still damaged after an attempt: the order stays open and the technician can try again before the deadline. Attempts the part used up stay used up.
- Scrapped: the scrap is yours, and you get the service fee plus the reference value back, from the technician's guarantee or, if you insured it, from the platform.
- Not done in time: the order expires, your part (as it is) and all your money come back, and the technician's reputation takes the hit.
- Once it is over, leave stars and a comment: they show on that technician's card.
Only Auto Repair parts (coolers, CPU, RAM, SSD) can be insured, because there the result is luck. Its price depends on how likely that technician is to scrap that part: cheap with an expert, close to the part's value with a beginner. Manual Repair parts have no insurance; the technician's guarantee covers you.
Offering your service
Click the chalkboard, pick the part types you repair (from what you own), the tier range and your base fee, and post. Orders arrive behind the back door. You can only Accept what you could repair yourself (skill, Intelligence and the manual for that tier). Accepting an uninsured order holds the part's reference value from your balance as a guarantee; without that much RGC you can't accept. Then Repair at the bench takes you to the repair station with the client's part already on it: Auto or Manual Repair, exactly as with your own parts, with your own tools, components, kit, supplies and stamina. You are paid, and the guarantee comes back, when the part comes back working. If it turns to scrap in your hands, the guarantee goes to the client. A failed try that leaves the part whole keeps the order open: try again, or Hand back the part unrepaired. Handed back untouched, it costs you nothing; after failed tries, the client gets 10% of the part's value per try out of your guarantee, and it counts as an order you didn't finish. Both sides get a notification when a request comes in and when the order ends, and the technician gets a reminder 12 hours before a deadline. Repairs done for others give you repair XP as usual.
Power & the bill
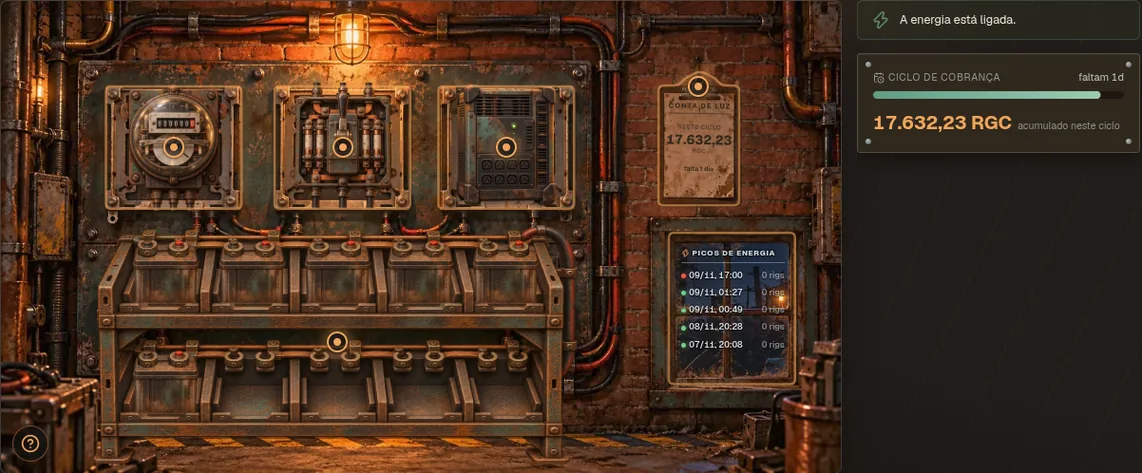
Each workshop's rigs run up an electricity bill, priced by a tariff that changes with the time of day (UTC). Power costs 10 RGC per kWh before the time-of-day tariff. Only rigs that are running draw power: 0.25 kW for the rig itself, plus each video card by its tier: 1.0, 1.2, 1.45 or 1.8 kW (tier I to IV). A better card draws more, but mines more per kW: 1,000, 1,042, 1,103 and 1,167 h/s per kW. Energy is the biggest running cost of mining, roughly half of what a rig mines. A rig that is off or stopped costs nothing, and so does a workshop with no rig built yet.
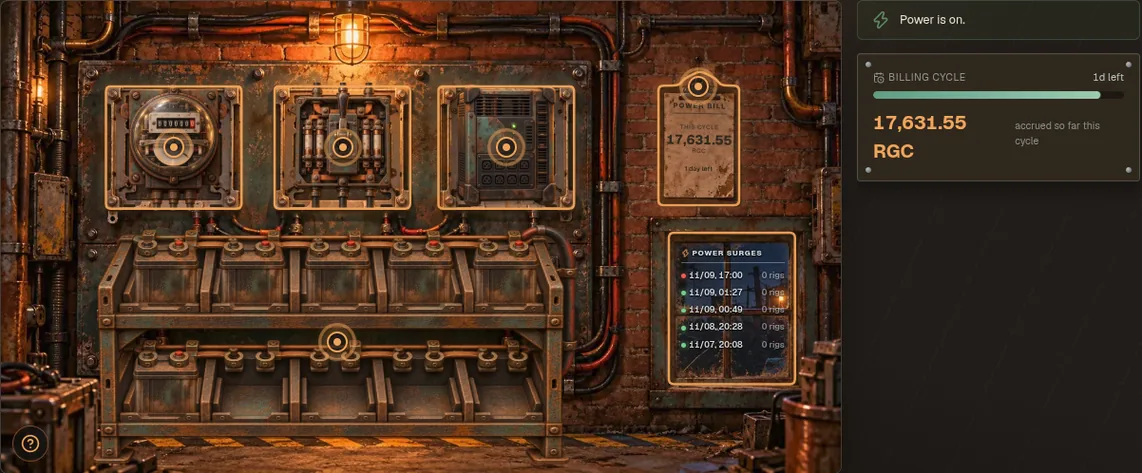
Click a mount to install a spare from your inventory or take the installed one down. The battery rack opens only with a no-break installed; there you add batteries one by one, see its slots and power used, and take any one out. The breaker's panel has the switch that takes the workshop off the grid; switched off, the breaker drops into shadow with a red outline and an OFF stamp. Click the clipboard for the bill and the Pay button. When the power is cut the room goes dark and a red lockout tag hangs on the breaker.
A bill is paid whole. From the moment it arrives until it is paid, its amount is reserved in your wallet: you can only spend what is above it. If you have the money and leave the bill unpaid a full day past its due date, the power is cut (you get a notice a few hours before). If you don't have the money by then, the power is not cut: your rigs keep mining, and the bill pays itself as soon as your collections cover it. Nothing is billed while the power is cut. Once the overdue bill is paid the power comes back and stopped rigs restart right away, from the moment you pay.
| Equipment | Without it |
|---|---|
| Energy meter | Every bill is padded 5–25% above what you used. Installing one makes the bill exact from the current cycle on. |
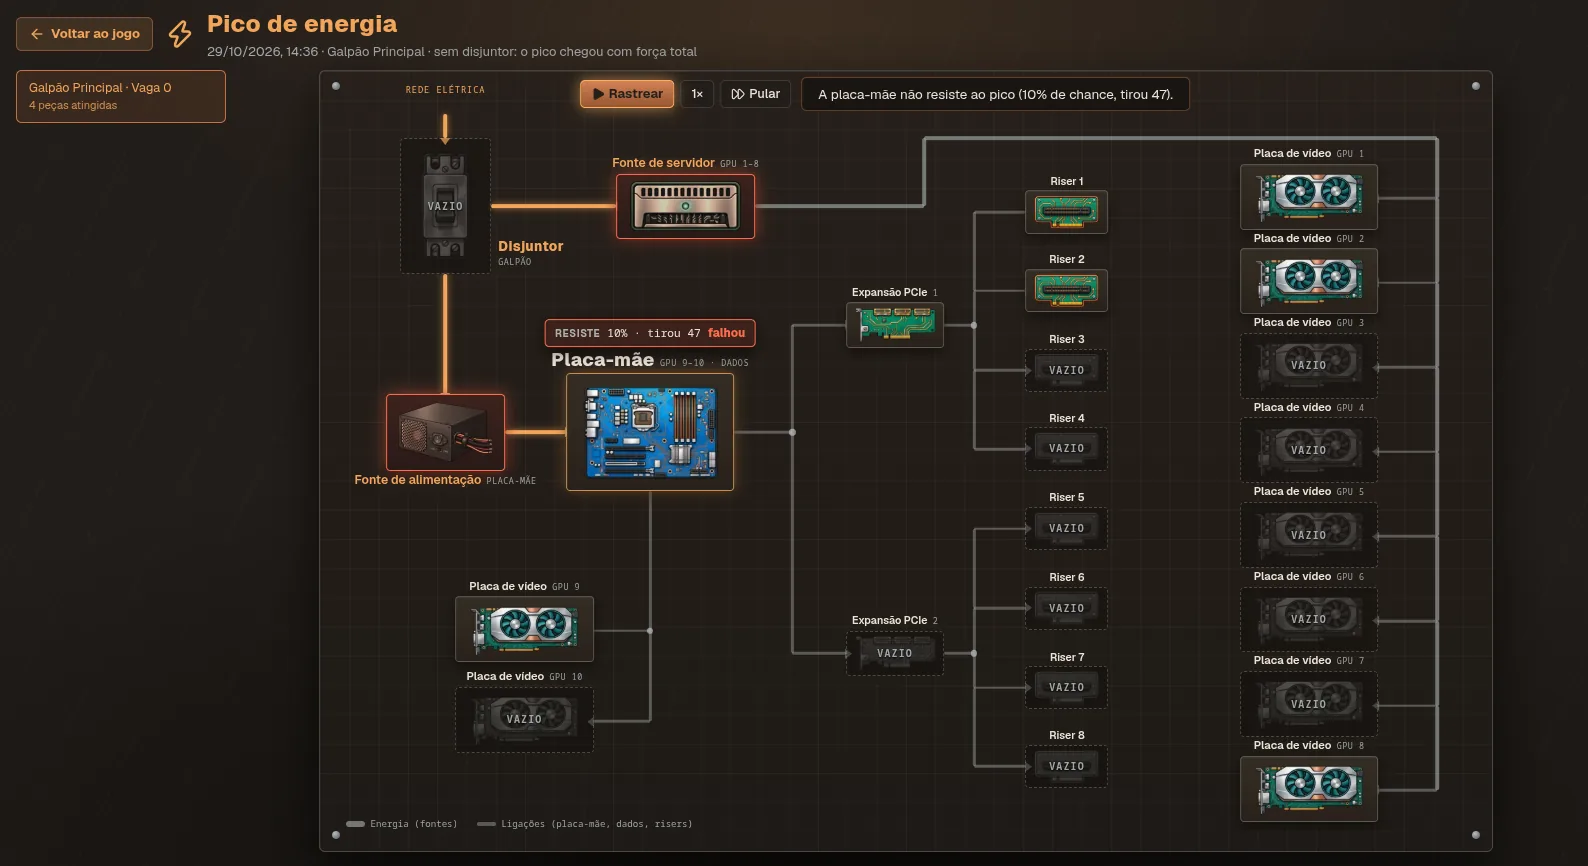
| Circuit breaker | Power surges hit a region of the map now and then (about once every 1.5 days, never more than 2 days apart, and up to twice as often where more rigs run). Without a breaker, a surge runs through the workshop's circuit and reaches each of your rigs 20% of the time, on or off (a rig switched off is still plugged in, on standby), coming in through both of its supplies, which share the grid. The power supply holds it more often the better it is (tier I 10%, II 20%, III 40%, IV 75%), still burning one component as it does; one that doesn't hold burns more and may pass it on to the motherboard (which holds it by its own tier) and from there to GPU 9 or 10; now and then it also rides the data lines from a burned motherboard into an expansion card (10%) and, rarely, on to one of its risers (10% of that), never to the card on it. The server PSU, if the rig has one, is far tougher (tier I 40%, II 55%, III 70%, IV 90%) and holds it clean; when it doesn't, it burns components and may pass it straight to one of the cards on the risers (GPU 1–8). A breaker holds most surges, but no circuit breaker holds them all: its class lets some through, weakened, so the supplies hold them more easily (tier I lets 25% through, II 15%, III 8%, IV 3%; stores sell tiers I to III for 400, 900 and 2,000 RGC, while tier IV only turns up in the junkyard or from another player). 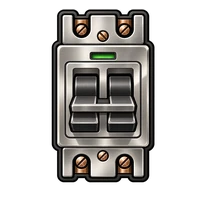 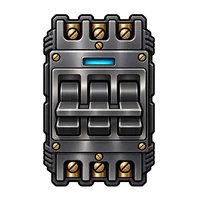 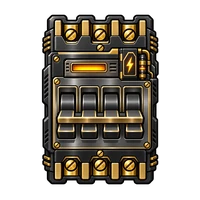 It also wears with every surge, and its class sets how many it lasts: tier I burns out on the 3rd, II on the 5th, III on the 8th, IV on the 20th. Then install a new one. It is also the workshop's main switch: switch it off on the power board and the workshop is off the grid. No surge gets in, not even the jolt when a blackout ends, and nothing is billed, but only the rigs the nobreak carries keep mining, on the battery; the others stop until you switch it back on, and then they resume on their own. |
| No-break | Blackouts hit each region about once every 4 days and last from 20 minutes to 3 hours (short ones are far more common). If you have rigs running there you get a notice when one starts, with a forecast of when the power comes back (a window, like a power company's, never the exact time) and how much your no-break covers. Without power the rigs mine nothing until it's back, and when it comes back it hits every rig that wasn't on the no-break, on or off, like a power surge (the circuit breaker limits it, as it does a surge). A no-break with batteries in it keeps the running rigs going through it. It is a rack: it holds up to 10 batteries of any tier, as long as their summed power stays under its limit, which is 10 batteries of its own tier: 110, 220, 330 or 550 kW (tier I to IV; ≈ 122, 244, 367 or 611 kVA at a 0.9 power factor, as on its nameplate). A tier I no-break full to its limit carries 10 full tier I rigs, half a workshop; a tier IV one, a whole workshop of tier IV rigs. In a blackout it keeps the running rigs that fit the batteries' power, in slot order, and the rest stop and take the jolt when the power comes back. Stores sell tiers I to III for 3,200, 7,100 and 12,100 RGC; tier IV (24,100 RGC) only turns up in the junkyard, under the street, in a seized-goods lot or from another player. The Energy room shows how many of your rigs it carries, how long the batteries hold them and, off the grid, how much battery is left, with a countdown. On the Rigs screen a rig with no power says why: Blackout (with the forecast of the power's return), Breaker off, or On battery with its charge; it stays running and mines again on its own when the power is back. Power that doesn't come from the grid isn't billed: nothing goes on the bill while a blackout lasts, battery or not. |
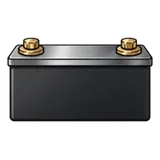 Battery bank | The no-break has nothing to run on. A battery goes in its rack and gives it power for 1 h 30 at full power, longer under less load: tier I 11 kW (a full tier I rig), II 22 kW, III 33 kW, IV 55 kW, so 16.5, 33, 49.5 or 82.5 kWh (≈ 344, 688, 1,031 or 1,719 Ah at 48 V). Stack them: their power adds up and sets how many rigs the no-break carries, and the more you add over the rigs' load, the longer they last. Any tier fits any no-break, under its limit: a tier I no-break takes 10 tier I batteries, or 5 tier II, or 3 tier III and a tier I. Stores sell tiers I to III for 2,600, 5,700 and 9,700 RGC; tier IV (19,300 RGC) only turns up in the junkyard or from another player. Taking the no-break out brings its batteries back to your inventory. Why kW and not kVA? The rigs draw kW and the bill is in kWh; the kVA (apparent power) and the Ah (charge, which depends on the voltage) are on the equipment's nameplate, but to work out how long the no-break holds, kWh ÷ kW is all it takes. |
Following a power surge
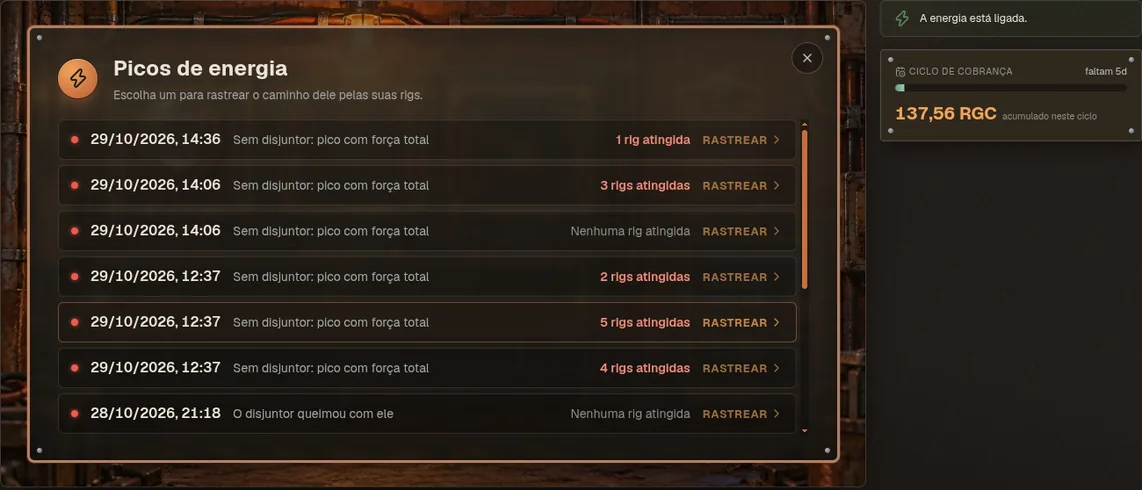
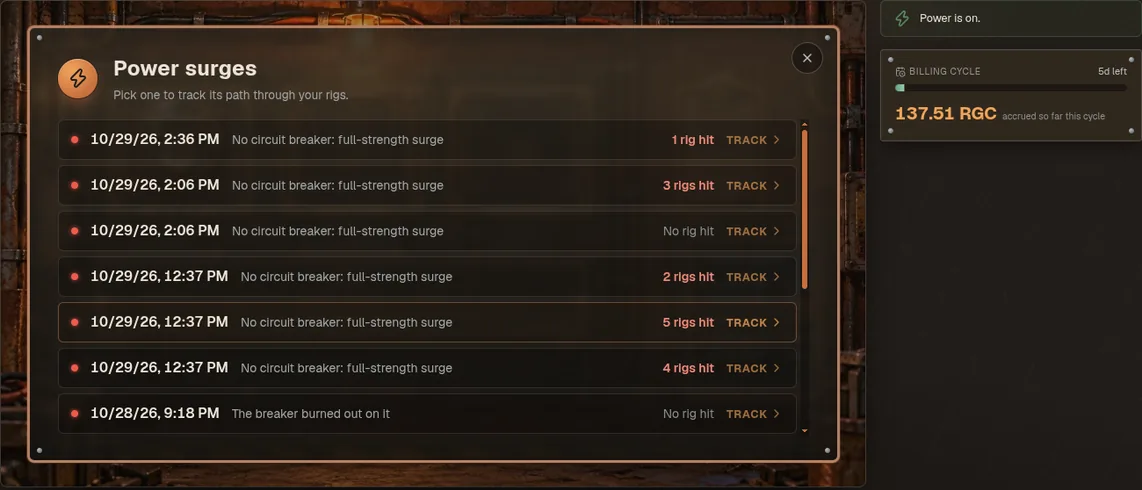
The electrical room's window lists the workshop's last 5 surges on its glass: when, how many of your rigs it burned something in, and a dot for what the circuit breaker did (green: it limited the surge; amber: it let it through, weakened; red: there was no breaker, or it burned out). Click the window, or the shortcut at the end of Power in the menu, for every surge of the workshop, and pick one to open its scene.
The scene lists the rigs the surge burned something in down the left and draws the rig's power tree: the grid, the breaker, the two supplies, the motherboard, the expansion cards, the risers and the video cards. Track plays the surge: the energy fills each wire behind a spark, one part at a time, and every part shows its roll (the chance it had and what it rolled) and what came of it. 1×/2× sets the pace and Skip jumps to the end. Point at a part for everything that happened there; a slot the rig had no part in shows grey, marked Empty. The scene says a part burned components, not which ones or how many.
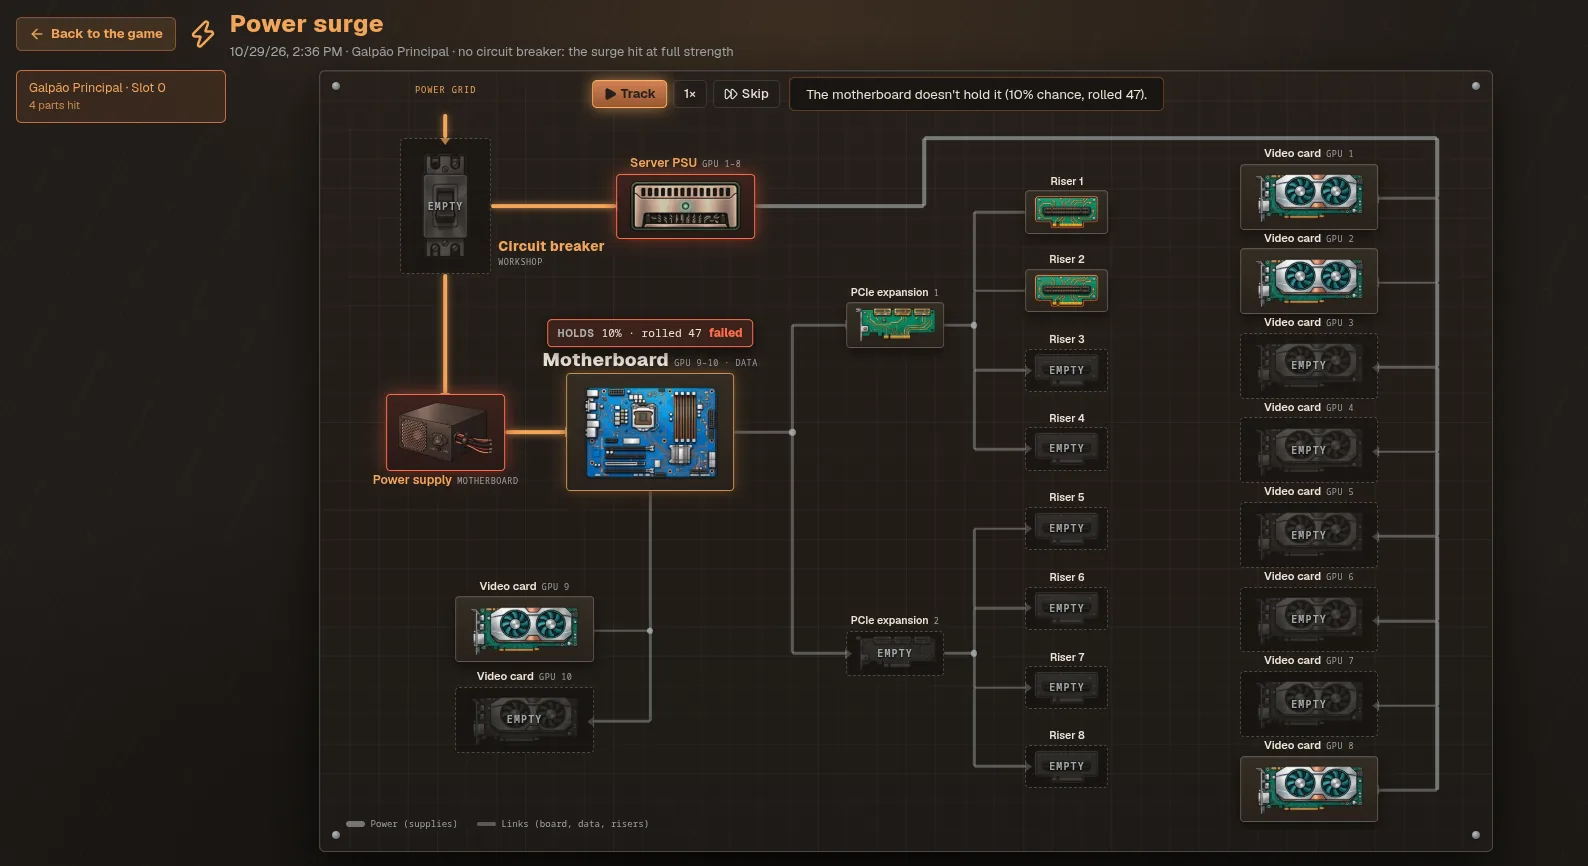
A rig's path opens once you have run that rig's diagnostics (Stats on the rig) after the surge. Until then its card wears a lock; Go to the rig takes you there, and the rig's Back to the surge brings you back.
Stores
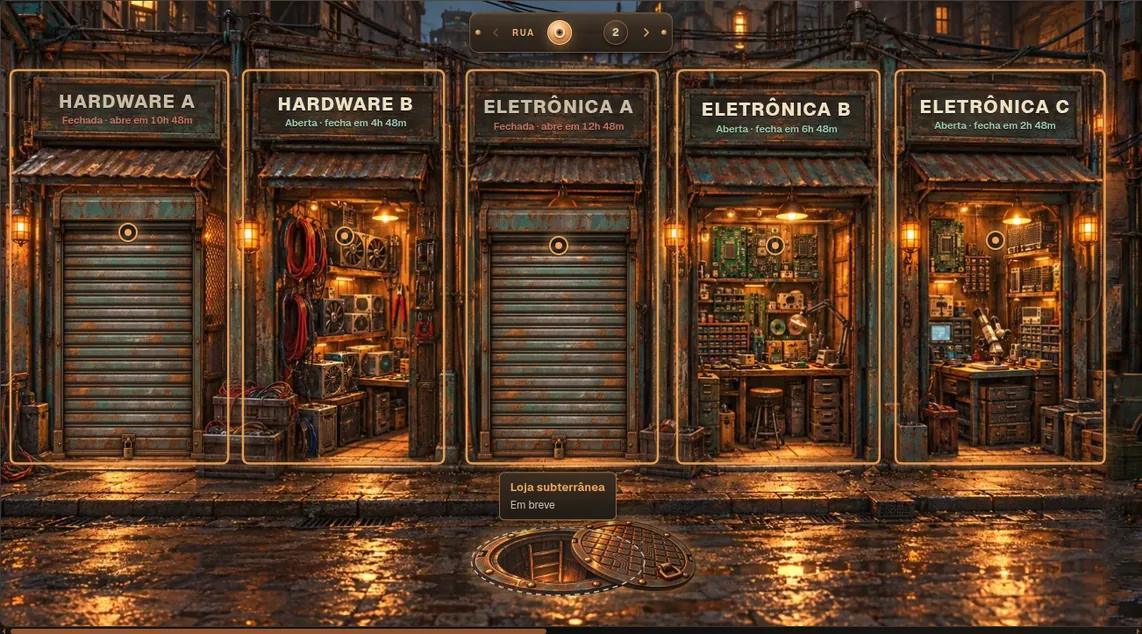
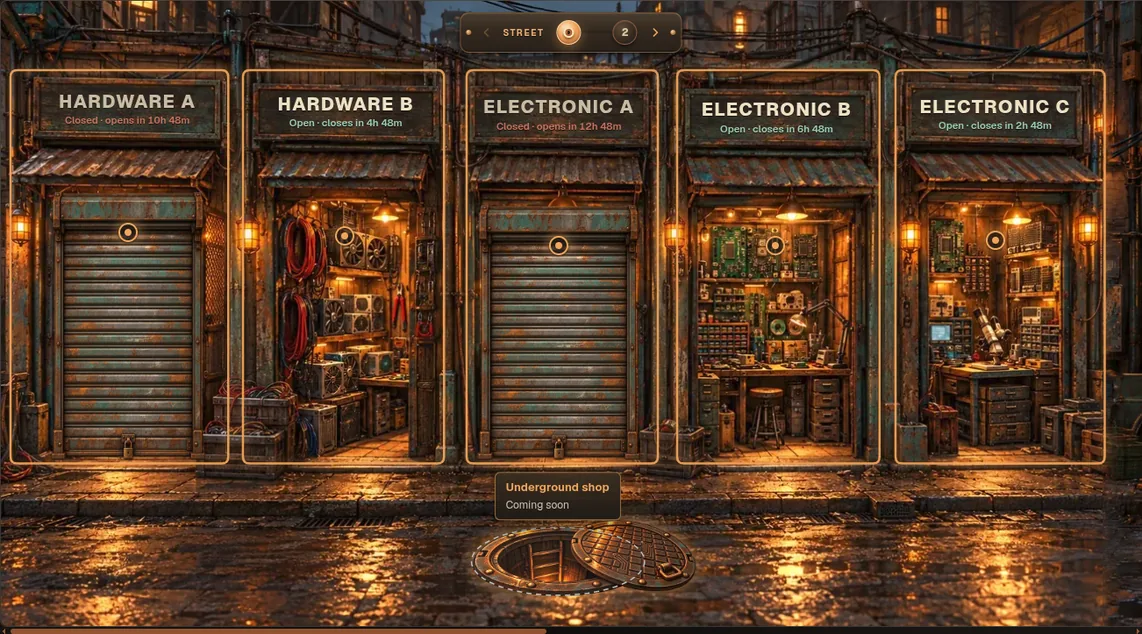
Ten stores share the day in shifts, so every kind of item has at least one store open at any hour. A closed store can be browsed but not bought from. Four of them are specialists that carry only part of their trade, in bigger lots.
| Store | Sells | Open (UTC) |
|---|---|---|
| Byte Bazar | Parts, cables, electric equipment | 06:00–16:00 |
| Silício & Cia | Parts, cables, electric equipment | 14:00–00:00 |
| Casa da Rig | Parts, cables, electric equipment | 22:00–08:00 |
| Volt & Vento | Power supplies, server PSUs, coolers, cables, electric equipment | 18:00–04:00 |
| Ohm Sweet Ohm | Components | 08:00–18:00 |
| Casa do Capacitor | Components | 16:00–02:00 |
| Transistor Express | Components | 00:00–10:00 |
| Chip Raro | Transformers, VRAM chips, GPU chips | 12:00–22:00 |
| Ferro & Solda | Tools, manuals, repair kits, supplies | 10:00–22:00 |
| Bancada do Mestre | Tools, manuals, repair kits, supplies | 22:00–10:00 |
The table is in UTC (in Brasília, three hours earlier: Byte Bazar opens at 03:00). In the game you don't need to convert: the street counts down to each store's opening and closing, and a closed counter tells the hour it opens in your own time.
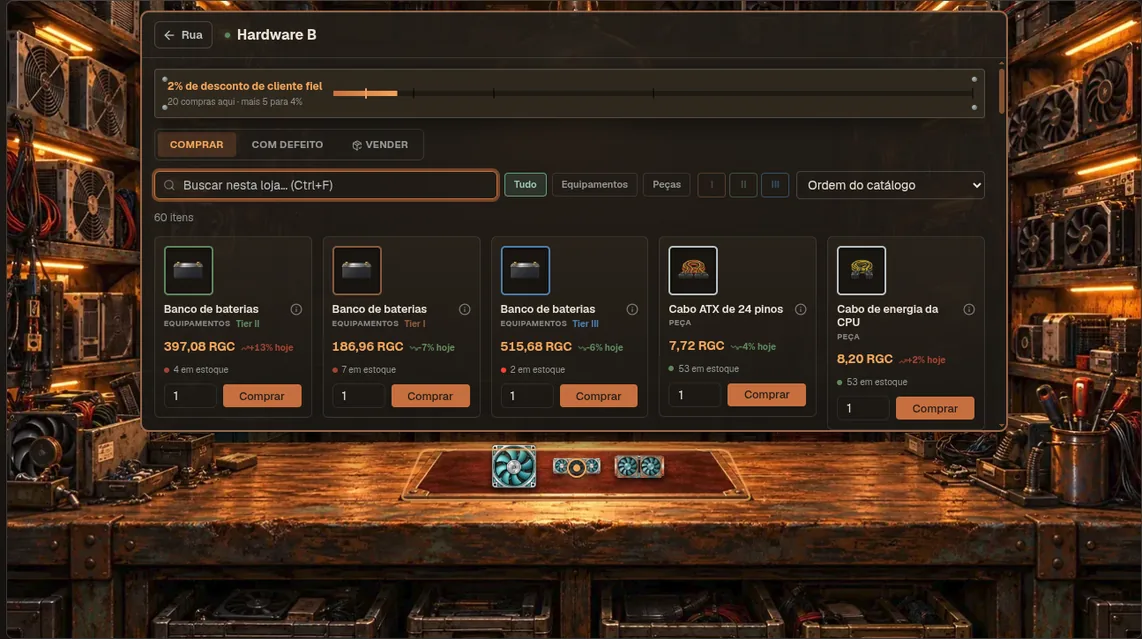
The World Map shows each store at its own point (chapter 04); clicking it there takes you straight to its counter. Inside a store the cursor starts in its search, and Ctrl+F jumps back there from anywhere in the store. The I, II, III chips over the catalog (and over the Faulty tab) show only those tiers, and your pick stays as you walk from store to store.
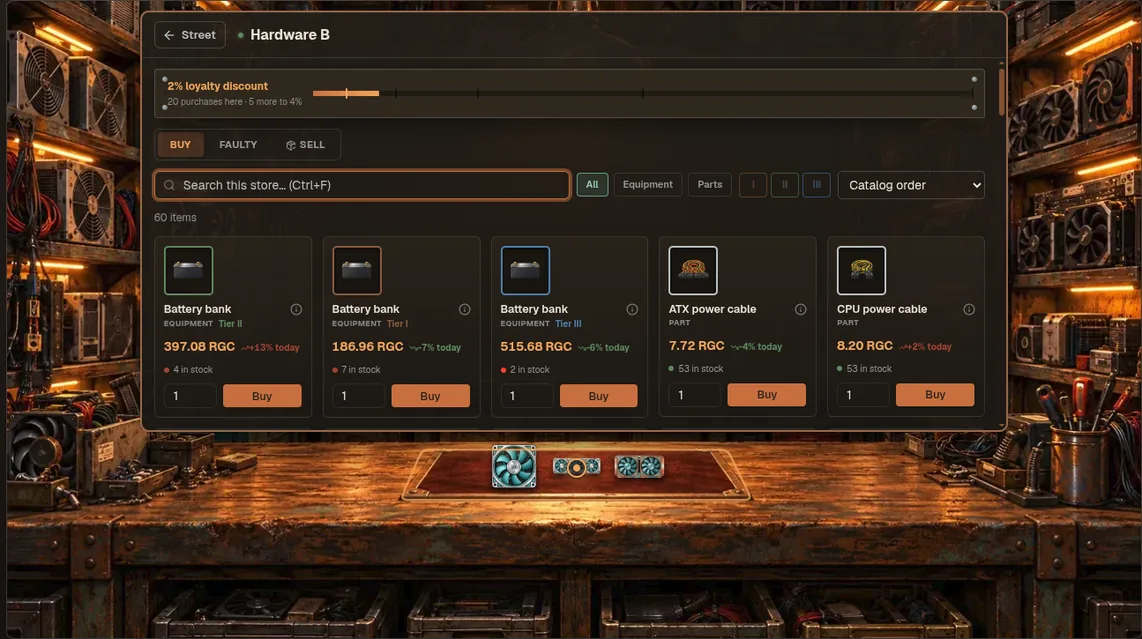
- Each item has a limited daily stock. Prices drift up to ±15% once a day, and each store rolls its own: the same item can cost more in one store than in another, so it pays to look around before buying.
- Solder and flux are the exception: they cost the same in every store, every day. When a repair or a maintenance is short of them, a Buy button right on its checklist gets what's missing (or 5 or 10 of each) from whichever store selling them is open.
- About 5% of stock is a special copy, laid out on the red carpet. It costs the same as the card. Some come one tier up; from a tier III card that would be a tier IV no store sells, and that is rare. And a special component also has its attributes rolled at random, where a normal copy always has the lowest. Take it with Claim, one at a time: first buyer wins it.
- Sell tab: stores buy back for 55% of the current price. A store only buys back what it sells, except tools: every store takes those, so a spare tool from the junk yard always has a buyer.
- A part with a defect sells back for 30% of what a working one would.
- Faulty tab (hardware stores only): broken parts at half the day's price, most of them tier I (easy to repair, good practice). What's burned stays hidden until the bench; no returns. A fresh shelf twice a day, at 00:00 and 12:00 UTC (21:00 and 09:00 in Brasília), with more parts the more people are playing; the tab shows when the next one arrives, with a countdown. Up to three a day per store, and one video card a day across all stores.
- Friendship: repeat purchases at the same store earn a discount: 2% at 10 purchases, 4% at 25, 6% at 50, 8% at 100, 10% at 200. A criminal record eats into it: each jail sentence in the last 7 days takes 2 points off, up to 6, and the discount never goes below zero.
A Manual and a Repair Kit for a video card are not a video card. Check the label under the item name before you buy.
Under the street
There is a manhole in the street. Some say someone down there sells parts no store has. Cash only: what you take down is all you can spend there, and the sewers are no place to linger. The rest is for you to find out.
Junk yard
Cheap, random, and the reason to log in every day.
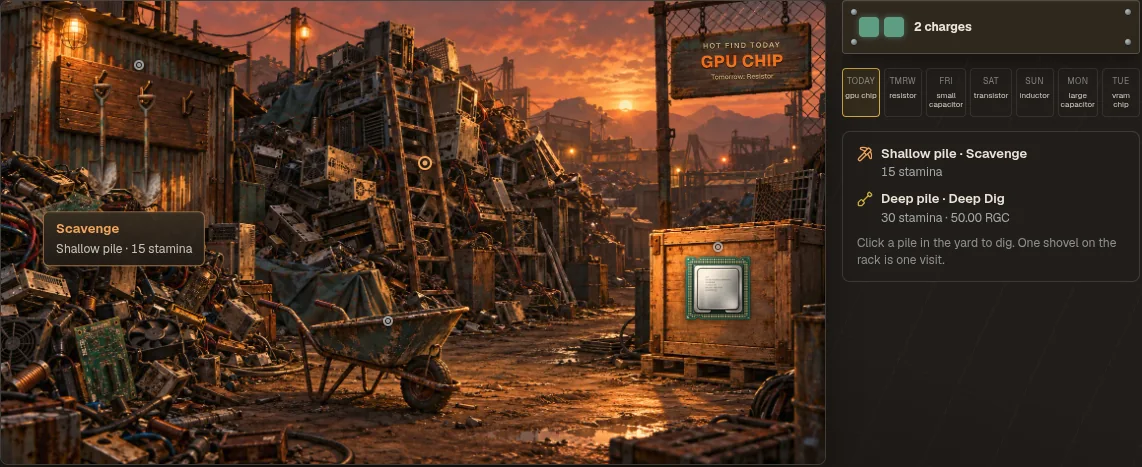
Click the shallow pile to scavenge or the tall heap to deep dig: the click digs right away. With no charges left both piles are under a tarp. Your last haul waits in the wheelbarrow, and the week's rotation and the costs are in the panel on the right.
Base loot odds by tier: 60% common, 25% uncommon, 12% rare, 3% the real deal. Lucky shifts up to 40 points toward the rare end and raises your odds of a double find and of finding things "like new". Parts and components never come more than one tier above what your Intelligence can install: a new player finds tiers I and II, Intelligence 8 opens tier III finds and Intelligence 18 opens tier IV. Most finds are loose components; used hardware, tools, supplies, equipment and repair kits make up the rest. About 1 find in 50 is a repair kit, most often for the dearer parts (video cards, motherboards). The junk yard is the only source of unique kits: a normal visit's kit is unique only on a the-real-deal roll, and every kit a deep dig finds is unique.
Broken finds. A good share of the used parts come with a defect: one to three burned components, and you only find out which at the repair bench. To make up for it, a broken find leans a little toward the better tiers. It can't power a rig as it is: repair it, sell it, or put it up in the Trade center. In your first days, by your 3rd visit at the latest, the yard hands you one broken part to practice on.
If a damaged part has been waiting a while for a manual you don't own, the junk yard gets steadily more likely to turn that manual up for you.
Trade center
Player-to-player auctions, held in escrow, open for 1, 3 or 7 days: the seller picks. Shorter sells sooner but reaches fewer bidders. A bid in the last 5 minutes pushes the end 5 minutes out, so nobody wins by bidding at the last second.
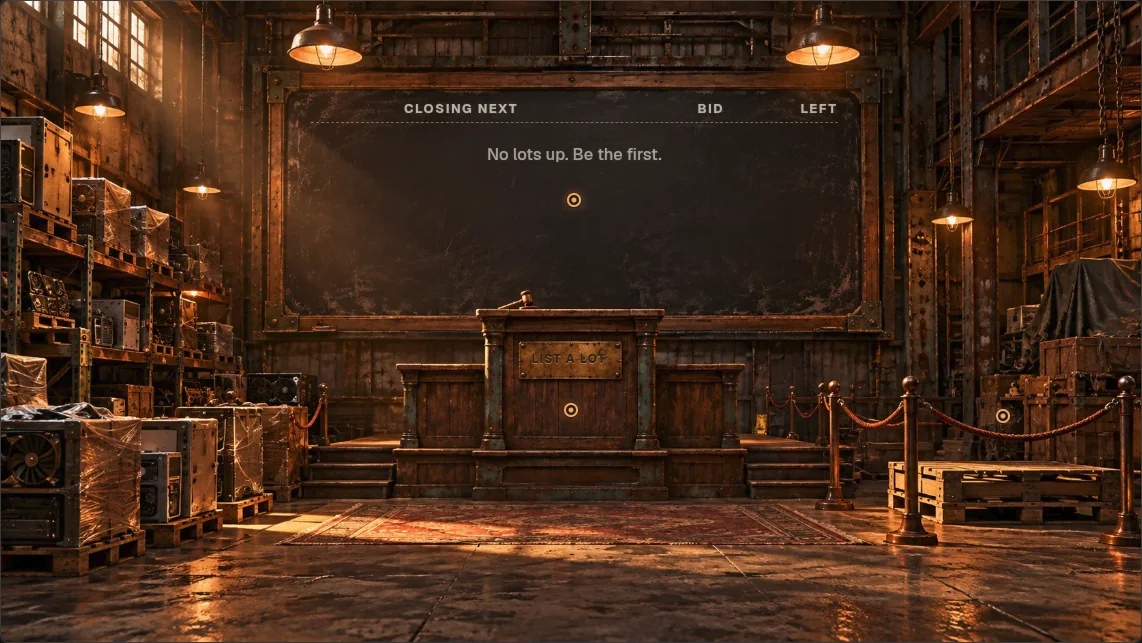
Click the slate for the full board, 20 lots a page: a search (ready to type as it opens), filters by category, type, tier, price and durability, Ending soon (24h) and My listings, a sort (ending soonest, price, highest tier) and the bid controls on every lot. In a lot's bid field the first ↑ fills in the minimum bid and each next one adds the minimum raise; min. fills in the minimum with one click, and Enter places the bid. While your bid leads, the lot says so in place of the field: you can't outbid yourself, only take the lot at its buyout.
Set a start price and an optional buyout, which must be above the start price plus the minimum raise (5%), so no plain bid lands on it. You can edit both freely until the first bid. An outbid player's RGC is returned at once. No bids by the deadline and the item comes home; the listing fee stays spent.
A big bid (from 5,000 RGC; the bar rises as the game's mining grows) first asks for the same quick human check as sign-up. It holds for 10 minutes, and the bid goes out as soon as it passes.
Parts with a defect carry that label (not what burned), and the Condition filter separates them. A part that came broken and was fully fixed shows Refurbished.
Seized-goods auction
A few times a day the depot puts a lot of seized goods up for auction at the Trade center: click the pile in the front left corner of the hall (on the phone, the Lots tab). A new lot opens every 4 hours and takes bids for 3 hours.
Each lot shows 2 items (type, tier and state) and hides 2 to 5 more, each a "?". Point at a "?" to see the odds of what it holds: common, uncommon, rare or a find, and your Lucky raises the rare and find odds. The hidden items are drawn when you open a lot you won. Parts can come with a defect, ready for the repair bench, and the rarest finds are tier IV, never more than one a lot: a part, a component or, now and then, a tier IV no-break.
Your first bid on a lot pays a small credential fee, which isn't refunded. Bids work like the players' auctions: yours is held, you get it back at once if someone outbids you, and a bid in the last minutes pushes the end back. A lot nobody bids on goes to the Saldão for a while, sold outright at its minimum bid. Won it? Open the lot and everything goes to your inventory.
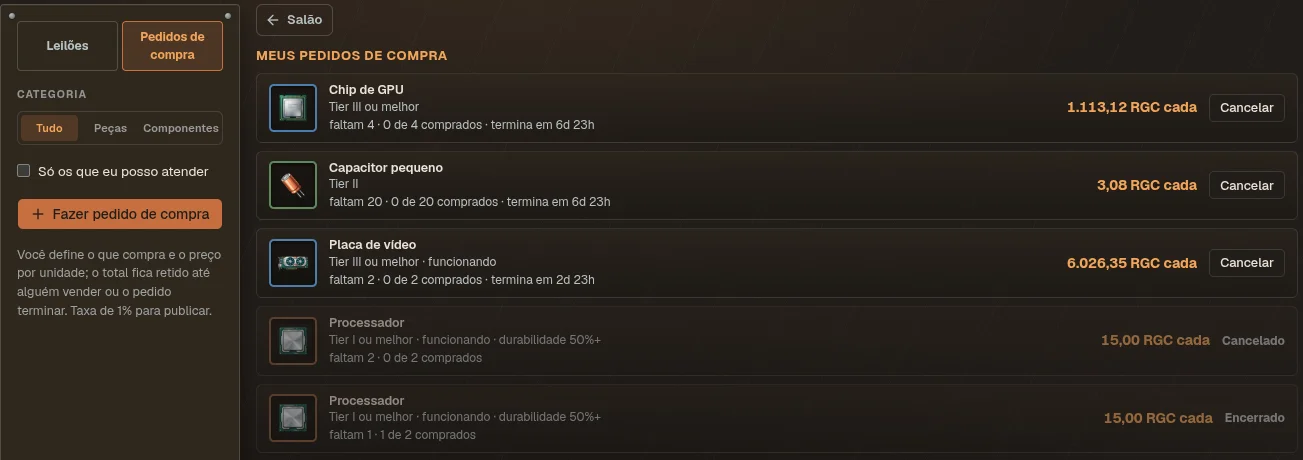
Buy orders
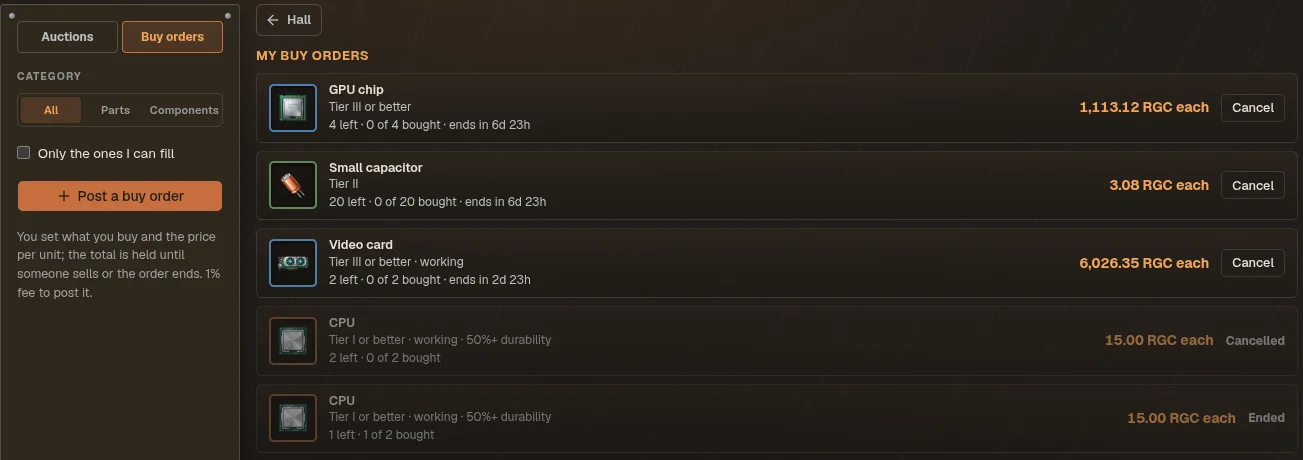
Instead of waiting for an auction, say what you want: "I buy X, I pay Y". In the Trade center pick Buy orders (or the shortcut at the end of Trade in the menu), then Post a buy order: a part or a component, its tier (exactly that tier, or that tier or better), for a part whether a damaged one will do and the least durability you take, how many, your price per unit, and 1, 3 or 7 days.
The whole amount is held from your wallet when you post, plus a 1% fee. Anyone holding a matching item can sell it into your order on the spot, one unit or several: the item lands straight in your inventory and they get your price less 1%. When the order ends, or you cancel it, what wasn't spent comes back to you.
To sell into someone else's order, tick Only the ones I can fill on the board: it lists the orders your inventory matches. In your inventory an item some order wants carries a mark, and its menu has Sell to the buy order at the best price on offer. Where a repair or a rig asks for something you don't have, Post a buy order sits next to the stores that sell it.
Hacking
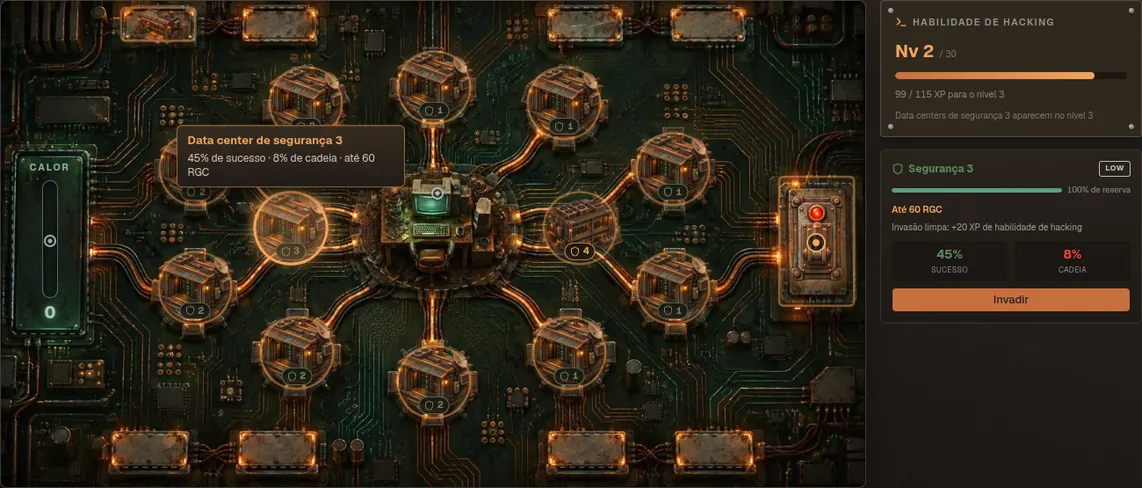
A daily pool of data centers to break into, each with a security level, a success chance and a catch chance shown up front.
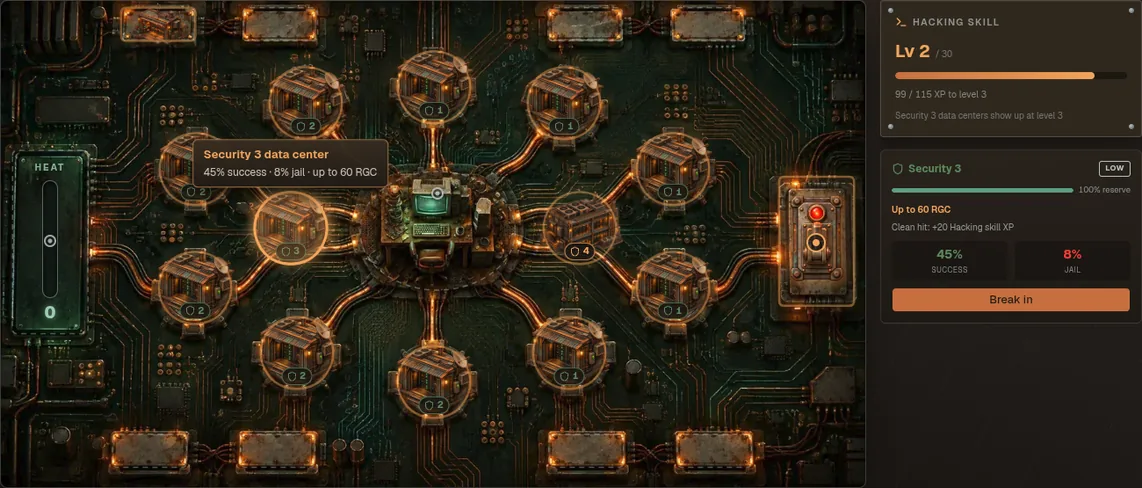
The thermometer on the left is your heat, the switch on the right your PvP exposure. After a hit the building keeps its result: green for clean, amber for traced, dark for failed, a red siren for caught. With exposure on, exposed players appear on the square pads along the top and bottom edges.
Every target shows its chance of success and its chance of jail before you try. Your Hacking attribute, your hacking skill (+1% per level) and a Courage drink raise success; a higher security level lowers it. The day's targets get tougher as your hacking skill grows. You can only be caught on a failed hit, and that is likelier on well-guarded targets and while your heat is high, and less likely as your hacking skill and your Hacking attribute grow (1% less per skill level and per attribute point above 5): only someone deep in both gets near the floor. Even at zero heat it never drops to nothing, so the jail figure (failures × the catch chance, which the card's tooltip shows on its own) is the real risk of each try.
Top left of the scene, the Courage shot's niche shows how many you own. Click it to drink one before a hack (it shows Ready while one waits for your next try), and the targets' odds update at once. They're bought at the Tavern; with none left, the niche points you there.
Data centers notice a busy hacker: your first 20 data-center hacks of a UTC day pay their full loot, the next 20 half, and any past 40 a quarter. It resets at 00:00 UTC (21:00 in Brasília), and the targets' loot already shows the cut. Hacks on players don't count.
| Roll | Result |
|---|---|
| Clean | Success by 20 points or more. Full loot, no trace. |
| Traced | Success by a thin margin. Loot, but +15 heat, which raises your catch chance and fades 5 points per hour (15 while you rest at the Tavern). |
| Failed | Nothing gained, and +5 heat: the attempt got noticed. Then a second roll against your catch chance… |
| Caught | …and you go to jail. Your heat goes back to zero. |
The harder the target, the more it pays: a full reserve holds 20 RGC at security 1, 60 at 3, 130 at 5, 240 at 7 and 540 at 10, and each card shows what it pays right now. A traced hit takes part of it. On top of the RGC, 4–6 adds a common component half the time; 7–10 pays RGC plus a component that is usually uncommon or rare, with a 5% shot at "the real deal".
Every attempt teaches your hacking skill, more on better-guarded targets: a clean hit gives 12 XP at security 1, 20 at 3 and 48 at 10 (the card shows it), a traced one half, a failed one a little, and getting caught nothing. Your player XP also grows with the target's security: a clean hit gives 6 + 2 × security (8 at security 1, 26 at 10), a traced one half, a failed one 2 and getting caught nothing.
Raiding players (PvP)
PvP is opt-in: turn on PvP exposure to raid other players, which also makes you raidable. A successful raid takes a slice of the target's wallet: 4% on a clean hit, 2% if traced, never more than 50 RGC. Rigs, parts and components are never touched. A player's security as a target comes from their own hacking skill, and the same roll, heat and jail risk apply as on a data center.
- Who you can raid: exposed players (also anyone who left jail early or just started a rest; see Jail and Tavern). Never someone in jail, inactive for 5+ days or more than 8 levels below you.
- Limits: you can hit the same player once every 12 hours, and not while they are shielded.
How an exchange between two players goes:
- A raids B
On a clean or traced hit, A takes the slice and B gets a 6-hour shield (nobody can raid B, except with a strike back) plus one strike back against A, for 24 hours. A failed raid or one where A is caught gives B neither, and a caught A goes to jail.
- B strikes back
One blow against A within those 24 hours, with +15% success and +50% loot. It goes through A's shield and the 12-hour limit and needs no exposure, but A still can't be in jail or more than 8 levels below. It is used up whatever the result, and a caught B goes to jail too.
- The exchange ends
A successful strike back gives A no strike back of their own and no shield: A started it. B keeps the shield from step 1, even while raiding others.
- Later
Unused, a strike back runs out after 24 hours. From then on, and once the strike back is used, the normal rules apply again: exposure, the 12-hour limit and the shield.
Without exposure, the pads only show the players you can strike back. Turning exposure off stops new raids on you, but a player you hit can still strike back.
The board has 8 player pads. Strike backs take them first, then the players exposed only for a while (resting at the tavern, just out of jail), then the rest by how close their level is to yours. Among players tied on that, who shows changes every 10 minutes, so with many exposed everyone gets a turn.
Jail
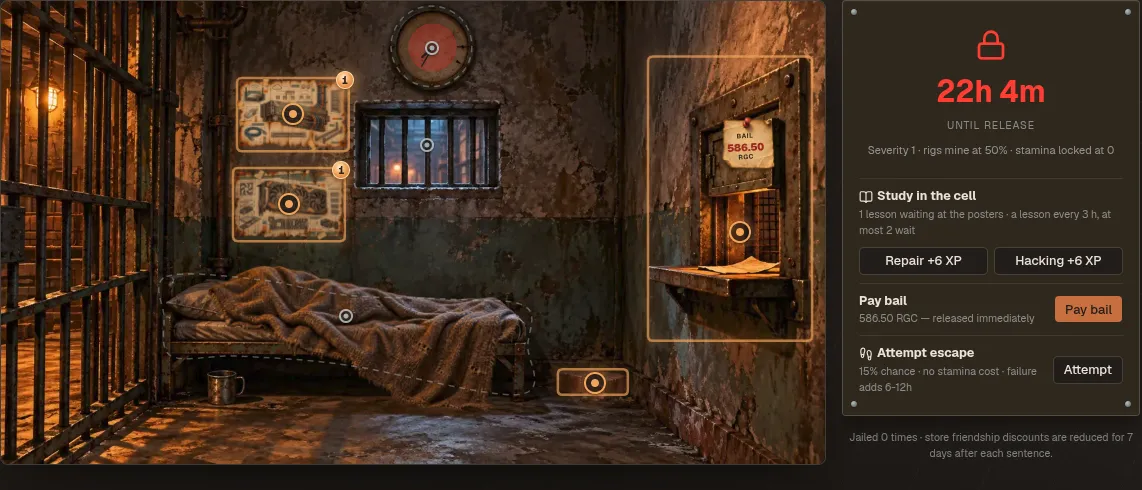
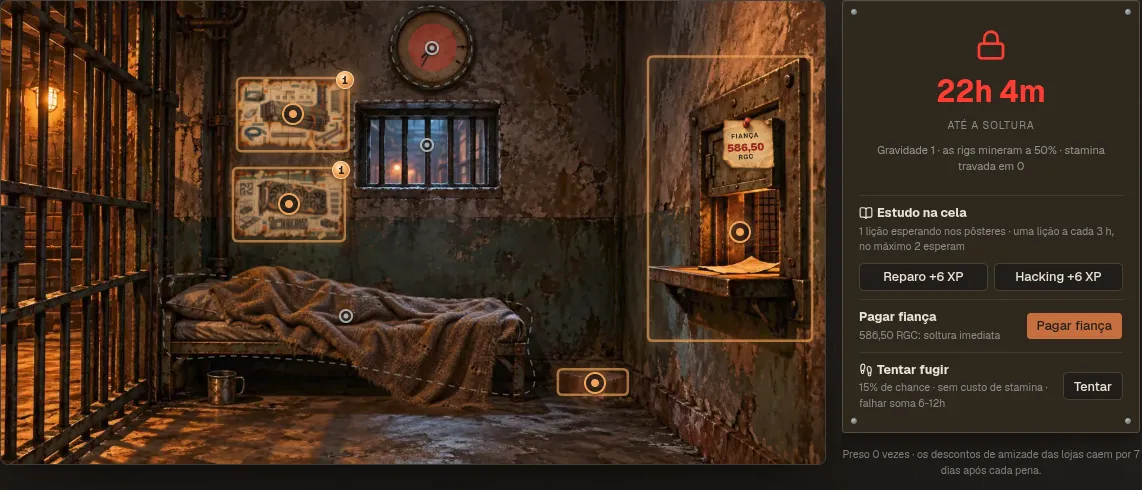
In jail you can't repair your own parts, shop, scavenge, hack, battle, trade or touch your rigs. Your rigs keep mining while you're in, but at half their hashrate (and they gather dust at half the rate too), and you can still collect what they mined. The sentence depends on how well guarded the target was: about 7.5 hours at security 3 and 18 hours at security 10, give or take a quarter. Bail also costs more after a better-guarded hack and as your level rises, and it drops as the sentence runs: walking out right away costs the full price, near the end it's almost free. The jail screen shows the amount right now. One escape attempt per sentence, with a 5–35% chance that grows with Hacking and Lucky; a failure adds 6–12 hours.
Leave early (bail or an escape) and you stay open to PvP hacks until 24 hours after you were jailed, even with your PvP exposure switched off. While you are inside, nobody can hack you.
Study in the cell
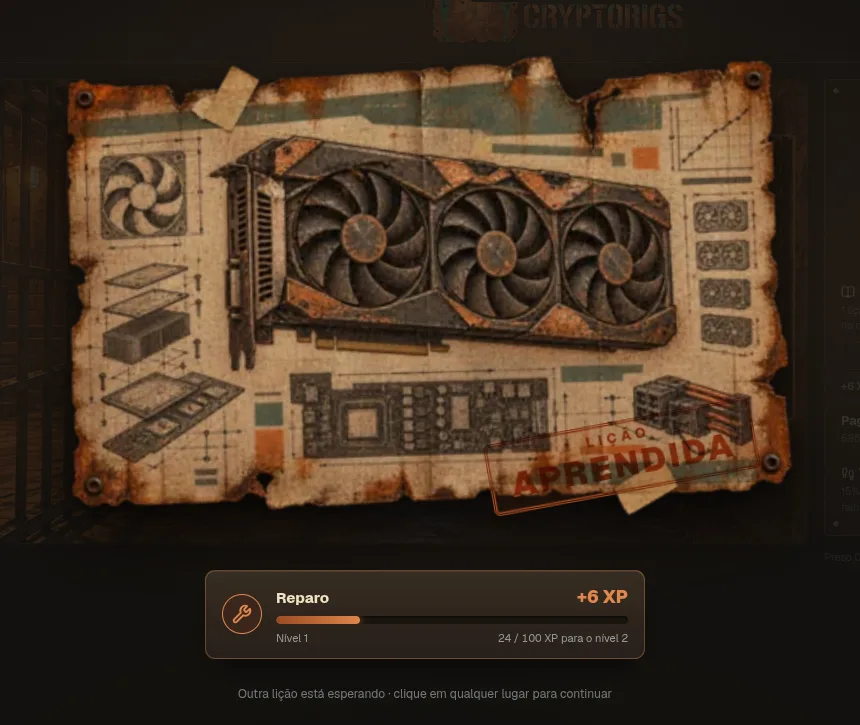
Time served isn't wasted: every 2 hours in the cell a lesson unlocks. Click a poster to study it: the network schematic teaches Hacking, the video card schematic Repair. A lesson is worth a tenth of your current level in that skill (at least 10 XP), and the poster shows how much. A brass pin on the posters counts the lessons waiting.
- At most 2 lessons wait for you. Lessons that unlock while two are already waiting are lost, so come back every few hours.
- After you study, a "New lesson in the cell" notification is set for the next one.
- Bail, an escape or the end of the sentence ends the lessons. There is no bonus for being jailed: a sentence is worth less XP than the same time playing free.
Work at the cell's bench
The jail has old parts that need fixing, and you can work on them while you serve. Each job takes 10% off your sentence; one job every 30 minutes, at most 3 per sentence (so at most 30% off). It gives a little repair-skill XP (5) and no player XP.
Repair the cell's old parts
The jail has old parts that need fixing, and you can repair them while you serve. Repair an old part shows 3 of the cell's parts you can repair: only part types whose manual you've learned, at a tier your repair skill and Intelligence allow (the lower tiers come up more often). With no manual learned the bench has nothing for you.
Pick one and it goes on the usual bench, Auto repair or Manual repair depending on the part, already filled in: the cell provides the replacement components, solder, flux, thermal paste, the repair kit and the tools, and it costs no stamina. Nothing leaves your inventory. Press Repair: at the machine you get the usual roll and result, by hand you measure and follow the kit's sequence as always.
How much a repair takes off depends on its kind: a manual repair that works takes 12% off, at any tier; an automatic one takes 6%, 7%, 8% or 10% off from tier I to IV (the higher the tier, the lower the machine's odds, and the more it's worth). One that doesn't work still counts and takes half. All together, the jobs take at most 30% off a sentence; each part shows what it takes off if it works. The part stays in the cell either way. You learn the repair's usual repair-skill XP, but no player XP, and it doesn't count for missions or achievements. One job every 30 minutes, at most 3 per sentence; leave the bench in the middle of a manual repair and it waits for you, until you're out.
Tavern
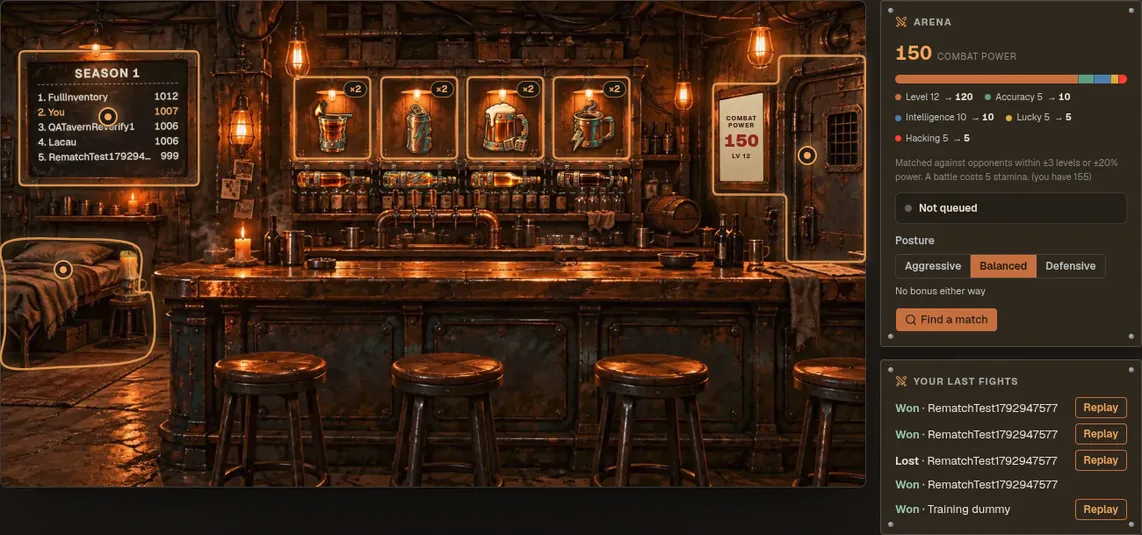
Click a drink to buy or use it, the cot to rest, the pit door for the arena. The candle on the stool burns down through your 2 daily hours of rest and is lit only while you rest.
Rest
Free. While resting, stamina refills twice as fast, up to 2 hours per UTC day. A rest counts toward the UTC day it started on: leave it running past midnight, or log off while resting, and the next day still has its full 2 hours. Resting is also lying low: your hacking heat fades three times as fast (15 points an hour). Breaking in or attacking someone gets you up from the cot and ends the rest.
Starting a rest leaves you open to PvP hacks for the next 30 minutes, even with your PvP exposure switched off.
Beverages





Bottles
Each drink has a bottle, lying under its niche: a stronger effect, and a 4-hour hangover that starts with the first sip and lowers something else. While a hangover lasts, no other bottle opens (cups still do), and a cup never works together with its own bottle. Resting at the tavern makes the hangover pass 1.5× as fast, only during the rest’s own 2 hours a day. A bottle’s icon at the top of the game shows the effect’s time, then the hangover’s, with a flickering red border until the hangover is over.






Arena
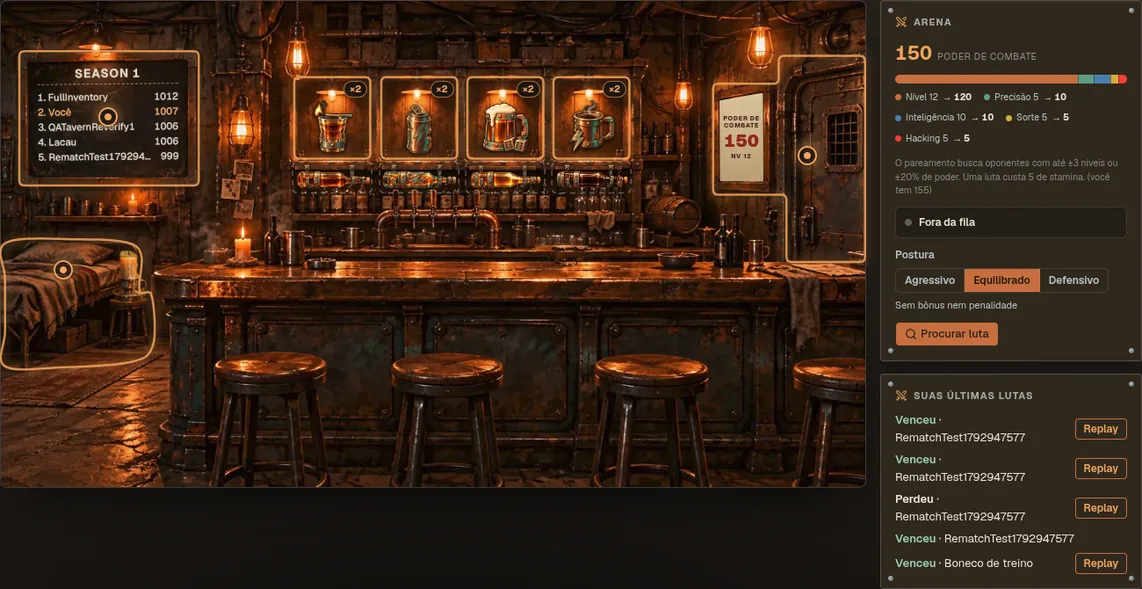
Battles use only your level and attributes, never your rigs: level weighs the most, then Accuracy, then Intelligence, Lucky and Hacking. You are matched within ±3 levels or ±20% power; a battle costs 5 stamina.
Before you join the queue, pick a posture: Aggressive (+2 to hit, −2 dodge), Balanced or Defensive (+2 dodge, 15% less damage dealt). The fight is decided blow by blow, and every fight has a replay. A fight lasts up to 25 turns; if both fighters still stand, both health bars drain until one runs dry, and whoever had more health left, in %, wins. If nobody turns up, a training opponent with your own level and attributes is offered after 2 minutes (5 minutes while another player near your level is online); it moves your ranking only 40% as much. A place in the queue lasts 30 minutes, and a match found later notifies you wherever you are in the game.
After a fight, either fighter can ask for one rematch within 10 minutes (5 stamina, like any battle). The first to ask gets it, and a rematch can't be rematched. The other fighter sees it at once: an open replay follows to the new fight, and in the tavern a banner says who asked.
Ranking. Everyone starts the season at 1000. Your attributes decide who wins the fight; the two rankings decide how many points it is worth. Two players level on points trade about 16. Beating someone well below you pays little, and losing to them costs a lot; beating someone above you pays a lot. What one player gains, the other loses.
Clans
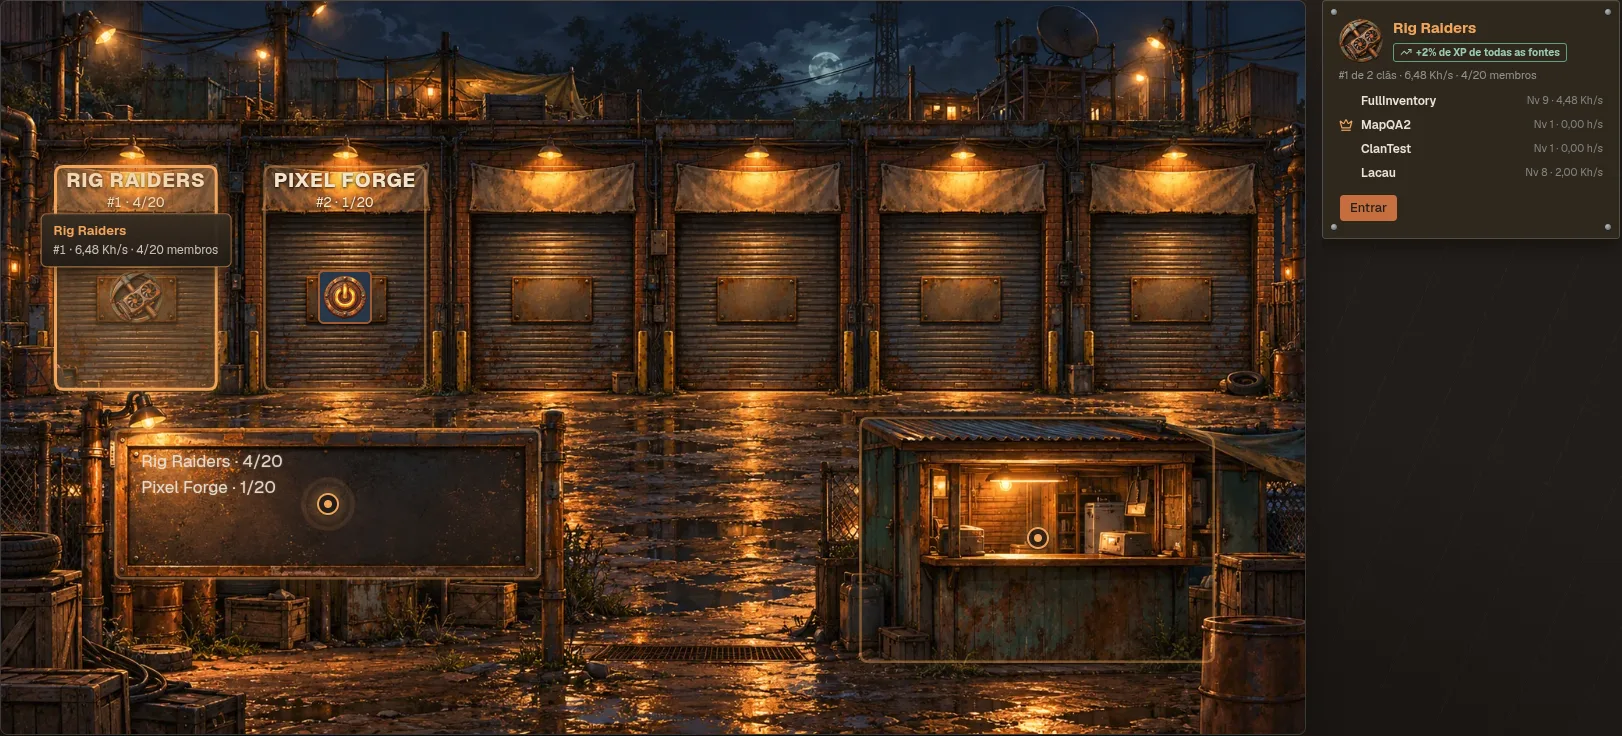
A clan is a group of up to 20 players with a name, an emblem, a chat and a small perk every member gets.
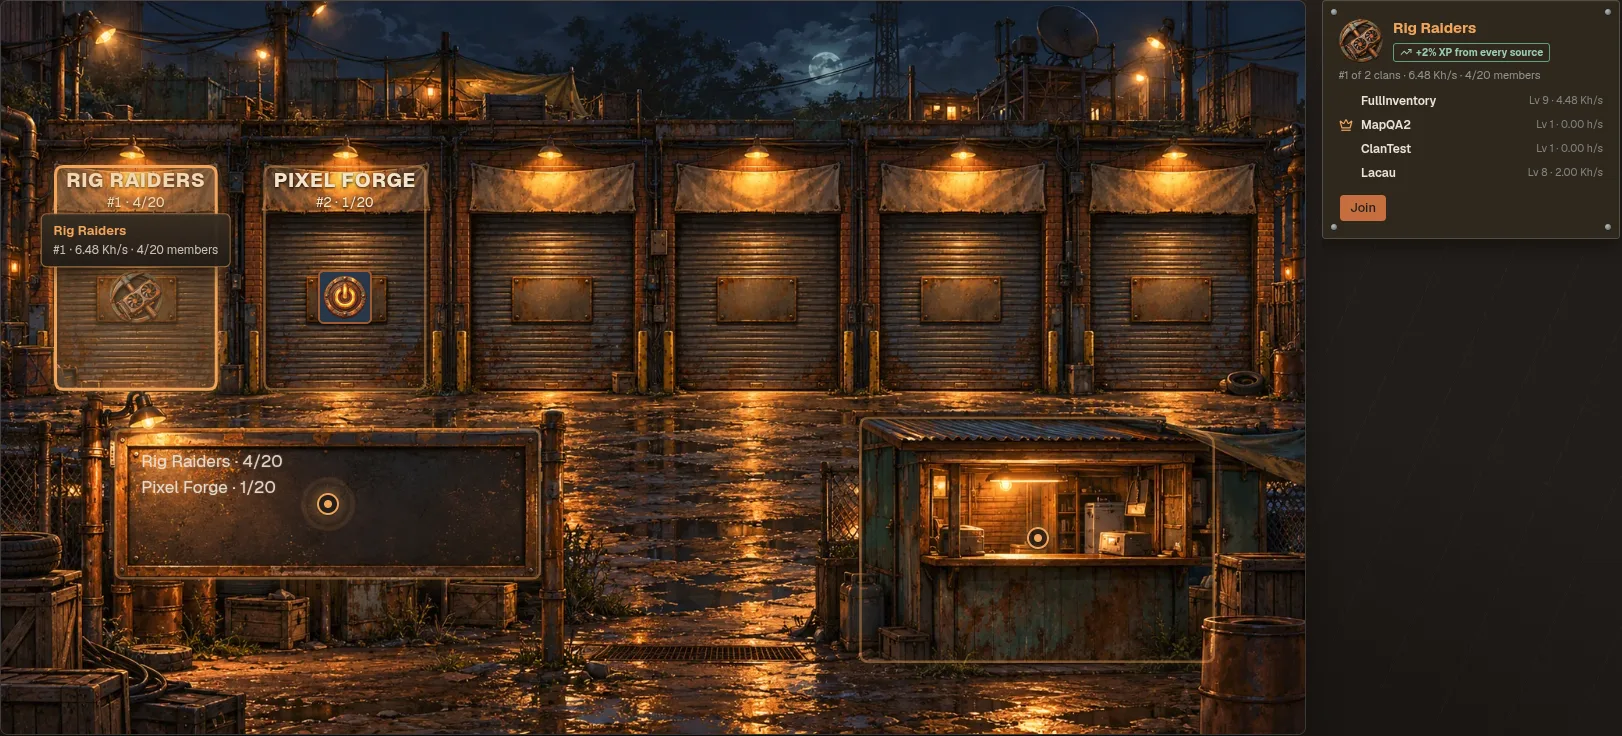
- Found a clan at the registry office for 1,000 RGC: give it a name, pick one of 8 emblems and, if you like, upload your own image (free the first time).
- Join a clan with room, from its garage or from the list of all clans. Each leader decides who gets in: an open clan takes you straight away; one with approval gets your request, and the leader accepts or turns it down (you get a notice when you're in). You can have up to 3 requests waiting and cancel any of them. You can be in one clan at a time; after leaving, you wait 7 days before joining another.
- The leader sets the clan open or with approval (new clans start with approval), answers requests, and can remove a member. A removed member isn't held back from other clans, but can't come back to that one for 7 days.
- The perk is small on purpose (today, +2% XP from every source) so big clans don't run the economy.
- The clan ranking adds up what every member's running rigs mine right now.
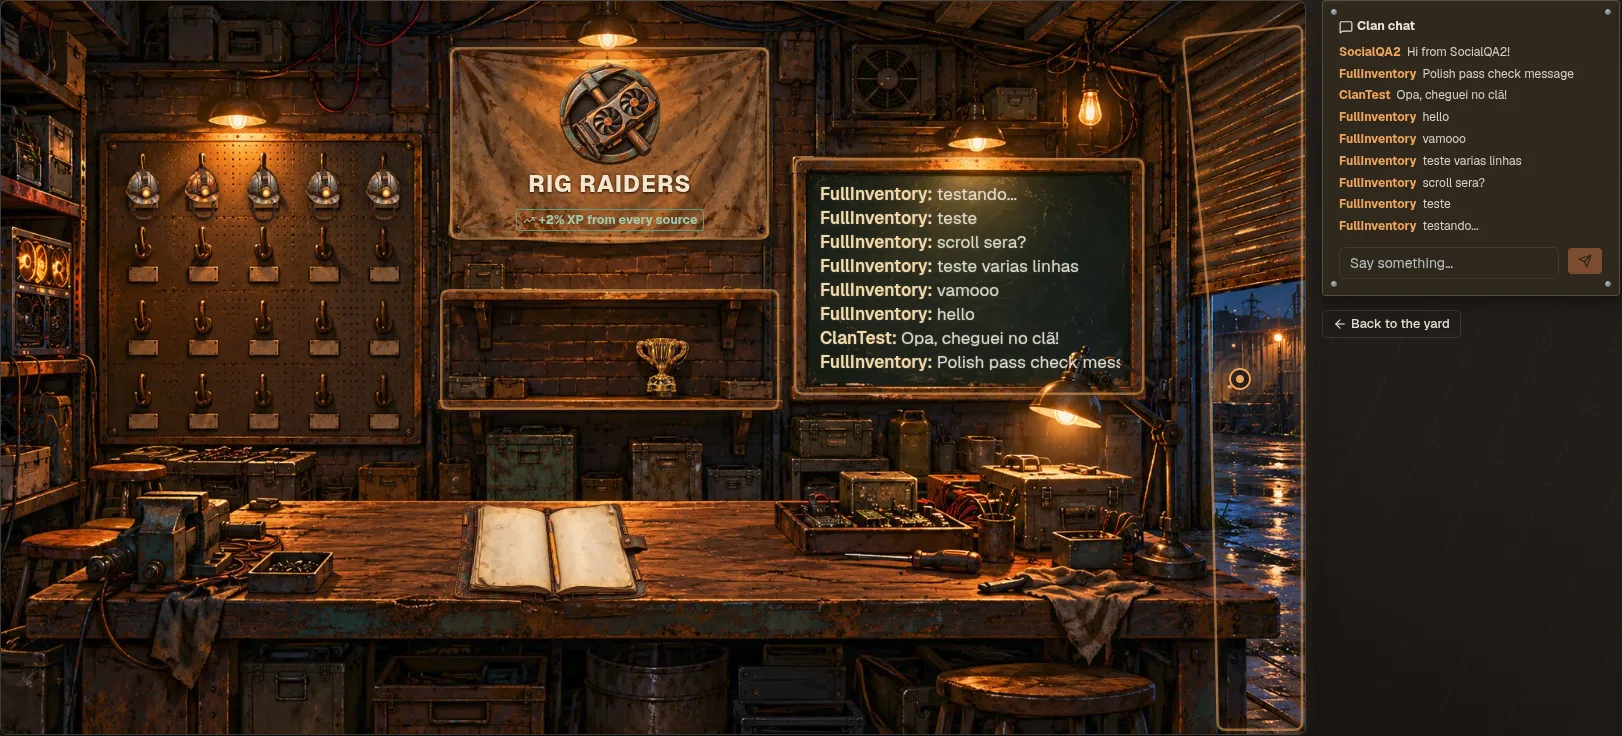
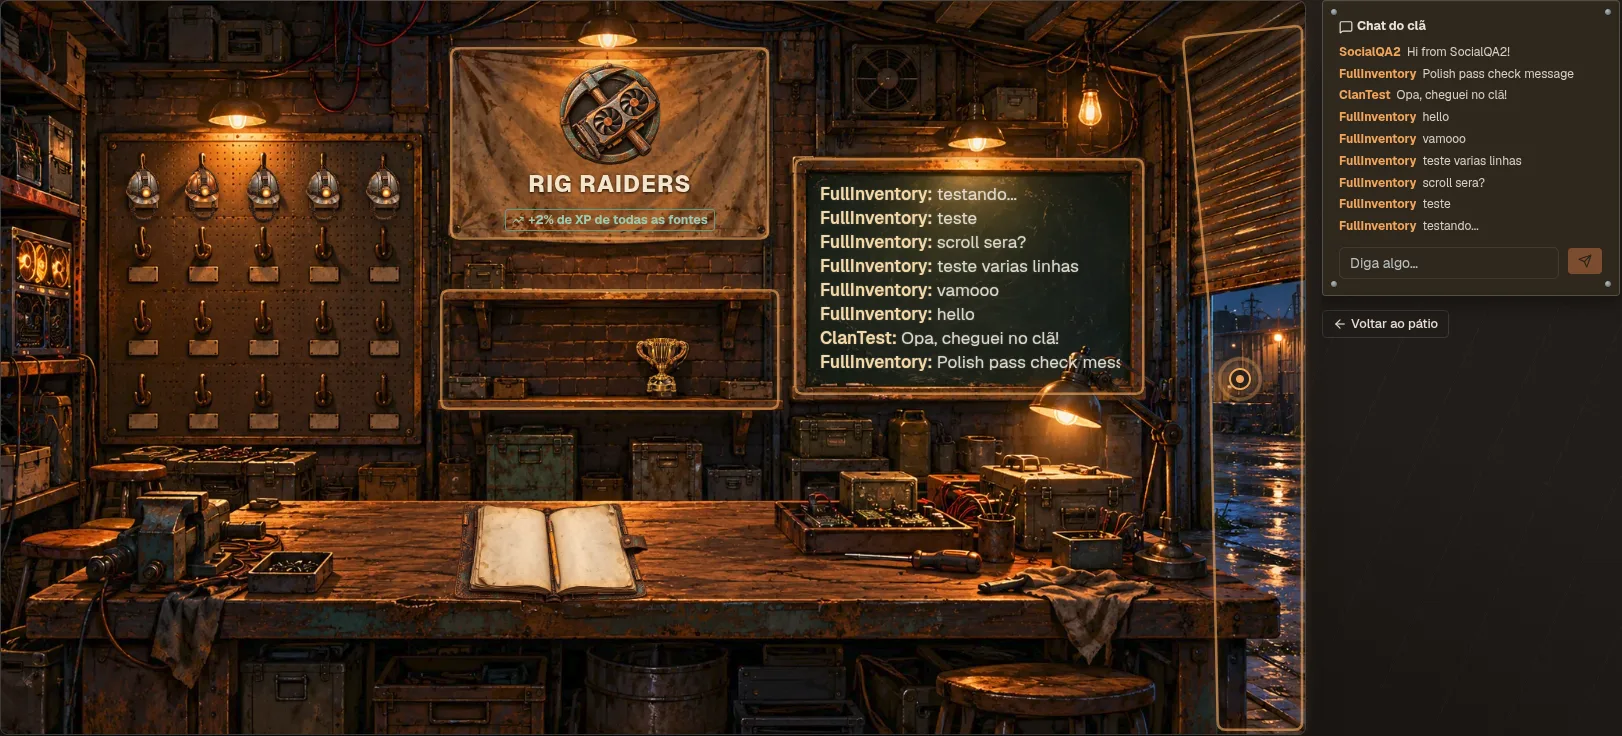
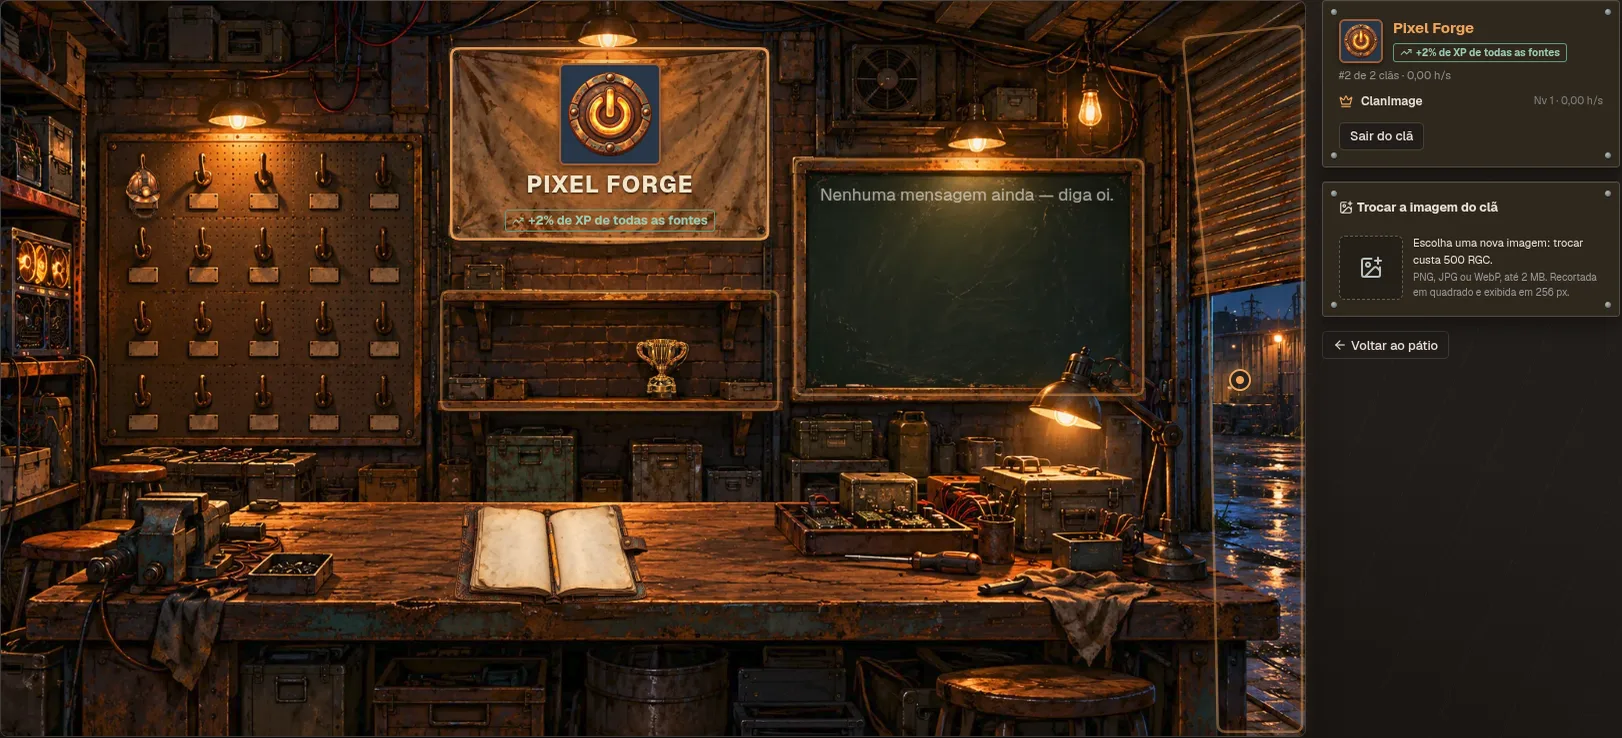
Once in a clan the game opens your garage. Point at a helmet for that member's level and hashrate, click it for their showcase. Click the chalkboard to write in the chat. The trophy on the shelf is gold for the top 3 clans, silver to 10th and bronze to 50th. The flag opens the clan card, with the roster and Leave clan.
The clan image
Instead of a painted emblem a clan can show its own picture: PNG, JPG or WebP, up to 2 MB. The game crops the centre square and shows it at 256 px, so you see exactly what it will look like before saving. The first image is free (at the registry office or later); only the leader can change it afterwards, from the flag in the garage, for 500 RGC each time.
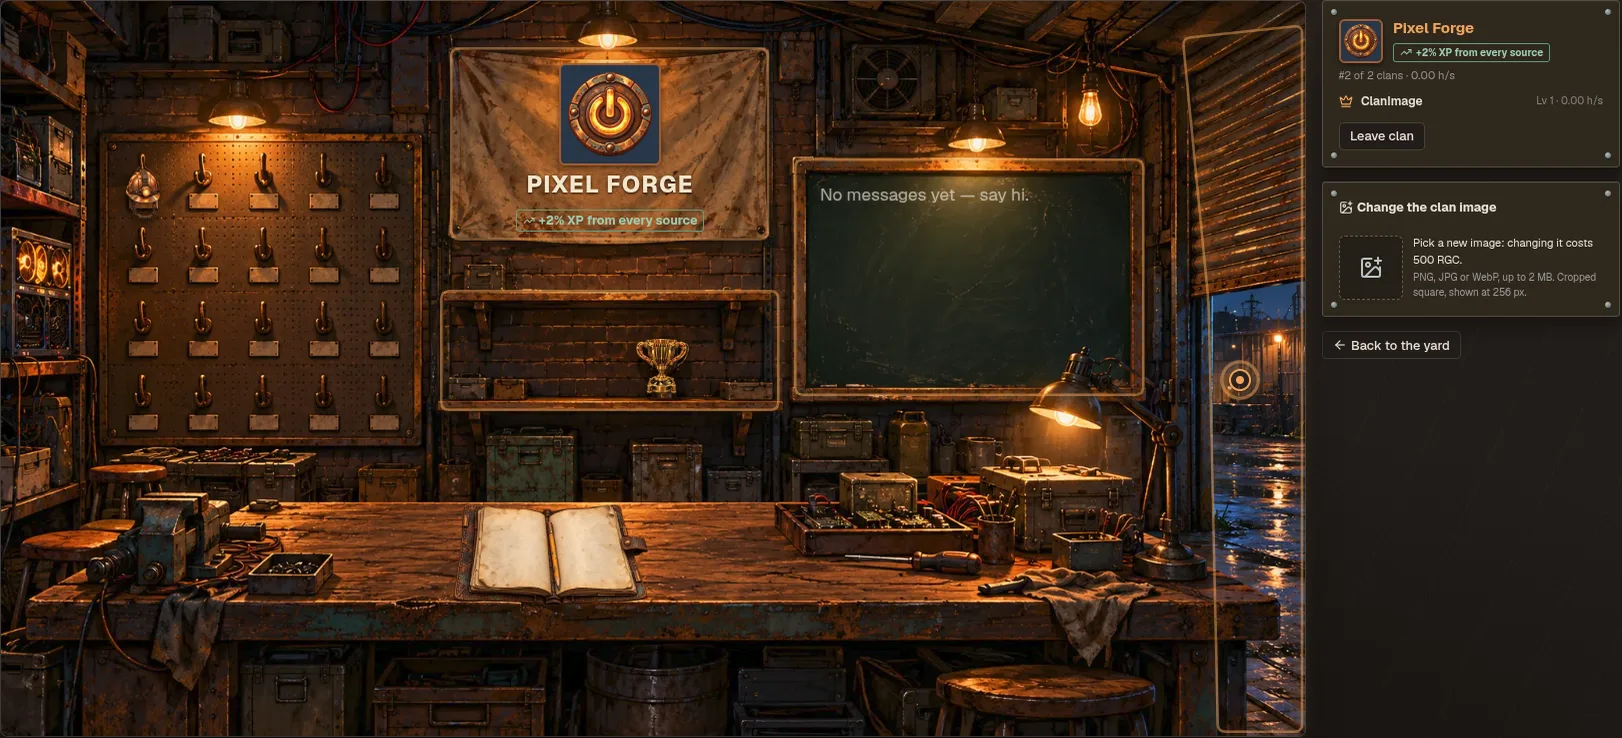
See an image that doesn't belong in the game? Open that clan's card and click Report this image. An admin reviews it; a removed image puts the clan back on its painted emblem.
All clans
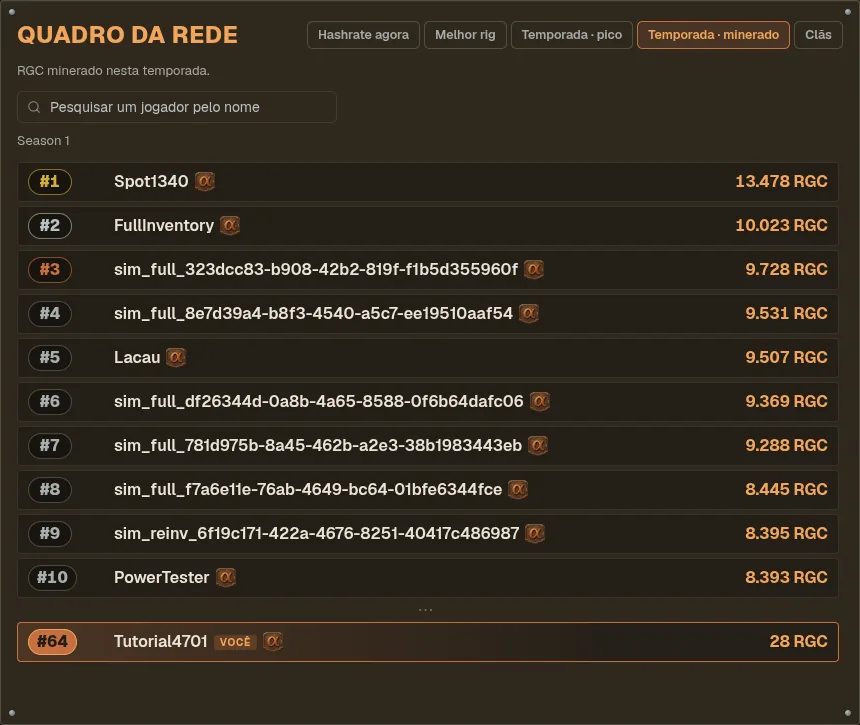
The bulletin board in the yard opens the list of every clan: search by name, show only clans with room, sort by rank, members or name. Each row has the emblem, rank, leader, hashrate, perk, members (out of 20) and how many of them played this week, plus Join. The same list is the Clans tab of the Network board (chapter 25).
If the leader stops playing for 14 days, the longest-standing active member takes over. A clan with no active member for 30 days is disbanded.
Your character
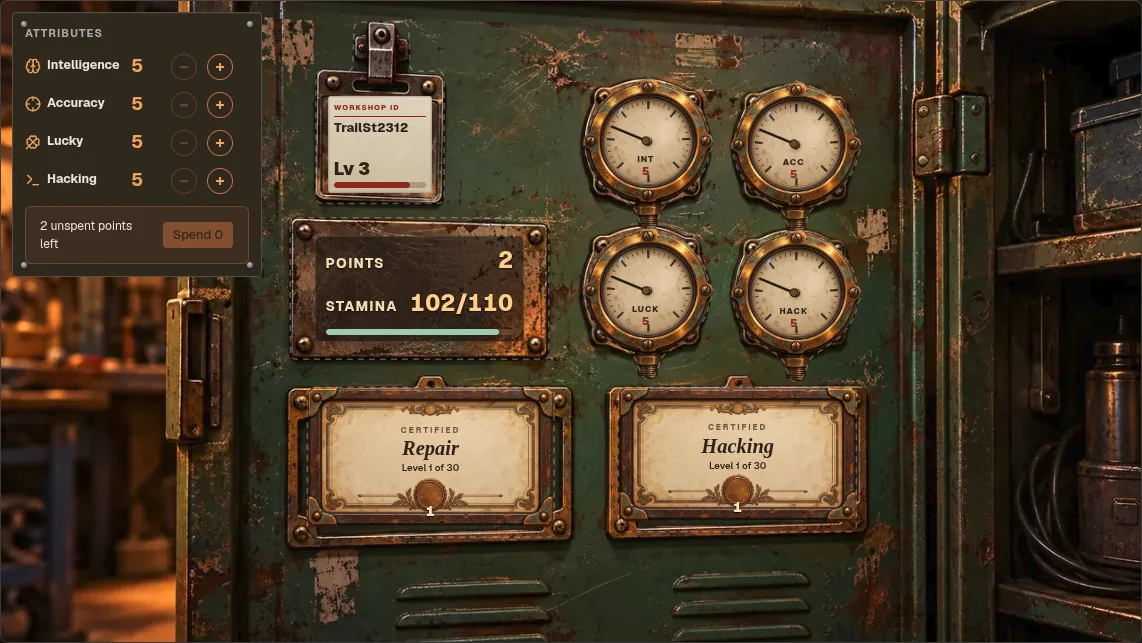
Spend points with − and + in the panel over the room's top-left corner. Until you press Spend, a dashed copper needle on each gauge shows where it will land.
| Action | Stamina |
|---|---|
| Power on / off | 1 |
| Clean a rig | 5 (full clean: 4 per 40 points) |
| Install / remove a part | 1 / 3 / 5 by size (cable, small, big); removing 1 / 2 / 3 |
| Test a batch of components | 2 + 0.4 a component, rounded up |
| Scavenge / deep dig | 15 / 30 |
| Repair attempt | 8 / 12 / 16 / 20 by tier, less with skill |
| Arena battle | 5 |
| Break into a data center | 15, −1 every 5 hacking-skill levels |
| Collect RGC | free |
Attributes
One point per level, up to level 60. Intelligence gates higher-tier repairs and shortens studying a manual (1% per point, up to 40%). Accuracy raises repair odds (+2% per step) and widens manual-repair tolerances. Lucky improves junk yard finds. Hacking raises break-in odds.
Reset attributes (on the Attributes screen) puts all four back to 5 and gives every point back to spend again. It costs your level × 100 RGC, doubled for each reset you made recently: the price steps back down one reset for every 30 days without resetting. While the alpha speed is on, the price is fixed (no doubling) and divided by the mining speed. The confirm box shows the exact price and the points you get back. Parts already installed stay installed even if your Intelligence drops; repair and hacking skills are not touched. Not available while in jail.
Passive skills
Repair and Hacking level up by doing, to level 30. Repair skill unlocks higher-tier repairs, lowers fatal and scrap odds and trims stamina cost; hacking skill unlocks tougher data centers and lowers your catch chance, and grows faster on better-guarded targets (a clean hit teaches 12 XP at security 1, 48 at security 10). Hacking's top levels are an endgame climb: each level asks 12% more XP than the one before (repair, 7%).
Missions
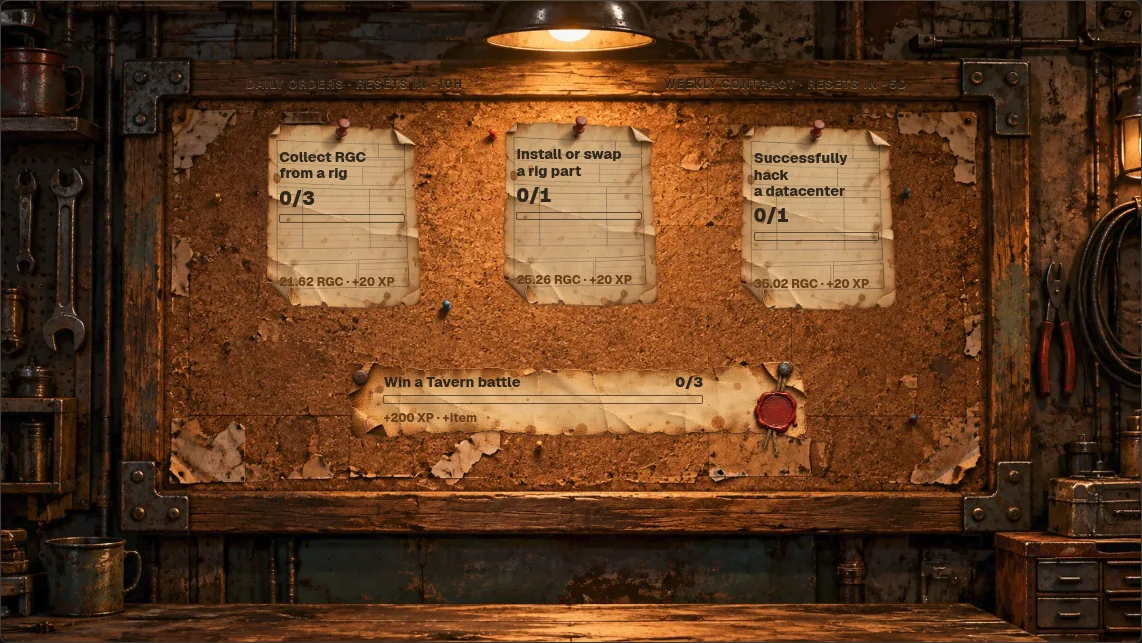
Three daily tasks reset at 00:00 UTC; one weekly resets Monday 00:00 UTC. Once a day you can swap them: the board gets three new ones you haven't had that day, and the ones still open leave it. Missions you already finished stay in the day's history beside the board. Most weeklies are a habit: do something on 5 different days of the week (4 for the harder ones). Each day counts once, so you have two days off, and the card lights one dot per day done. Rewards are paid automatically when you finish, and a banner drops in at the top of the screen wherever you are: click it to come here.
Achievements
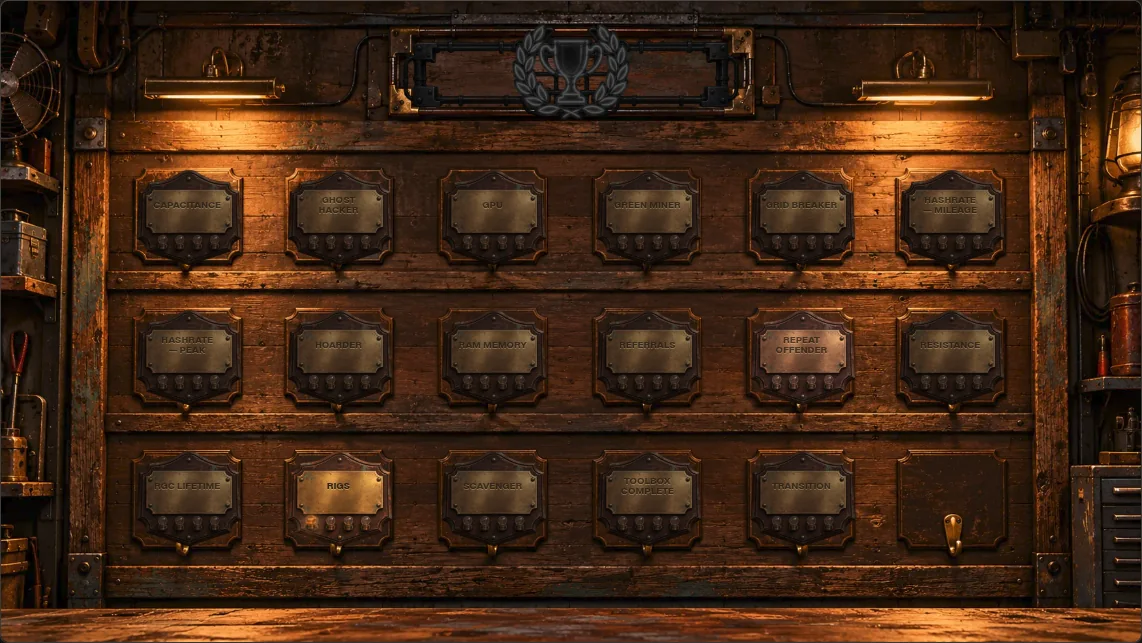
Each family has four tiers. Tier I pays a one-time 50 RGC (150 for Referrals and Toolbox Complete, nothing for Repeat Offender), tiers II and III give a title, tier IV grants a permanent perk. Achievement hashrate bonuses cap at +3% combined. Six families at tier IV earn the Collector title.
| Family | Counts | Tier IV perk |
|---|---|---|
| Rigs | Rigs powered on for the first time (once per rig) | +1 rig slot per workshop |
| Hashrate · Peak / Mileage | Best hashrate / h/s·hours mined | +1% hashrate each |
| RGC Lifetime | RGC ever earned | −2% auction listing fee |
| Grid Breaker / Green Miner | kWh drawn / best rig's efficiency held 24 h to 14 d | −3% consumption / +5% efficiency |
| Scavenger / Hoarder | Junk yard visits / rare finds | +1 junk yard charge / +2% Lucky there |
| Ghost Hacker / Repeat Offender | Longest clean-hack streak / times jailed | −3% catch chance / −10% bail |
| Resistance, Capacitance, Transition, GPU, RAM | Most of that item held at once | +0.5% max durability on parts using it |
| Referrals | Referred friends who played on 5 different days | −2% auction listing fee |
| Toolbox Complete | Own all 7 repair tools | one tier, 150 RGC |
Network board & showcases
See how you stack up, and look inside anyone's rigs.
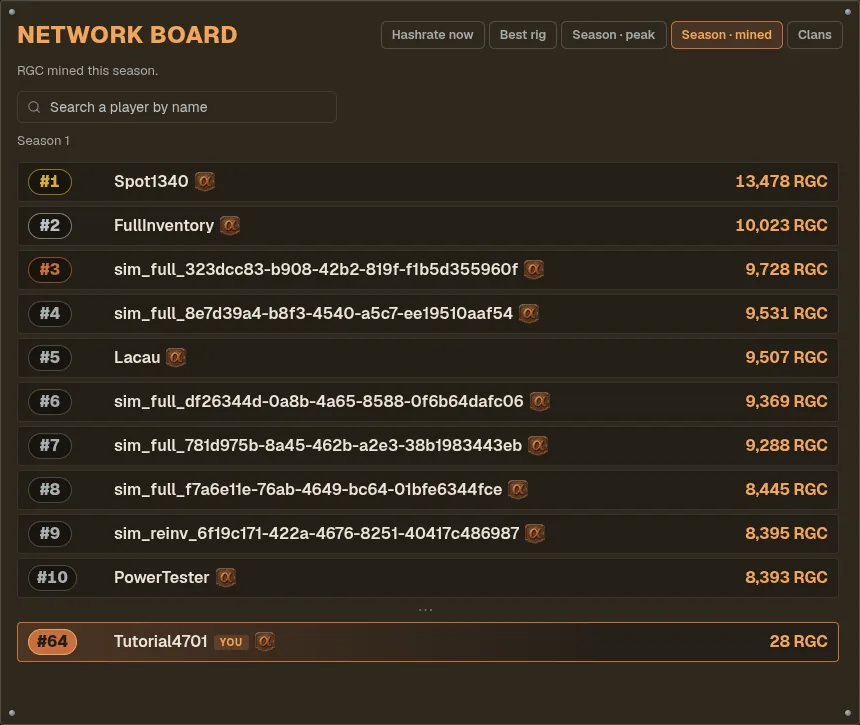
Network board in the menu has five boards: Hashrate now (players by what their running rigs mine right now, with your own place), Best rig (single rigs), this season's peak hashrate and RGC mined, and Clans, the list of every clan with search (chapter 21). Each player board shows its top 10 and, below them, your own row at your real place (your best rig, on Best rig); a name search finds any player at their real rank. Every player name opens that player's showcase. When a season ends, the top 3 of each season board get 500, 300 and 150 RGC, and the next season opens.
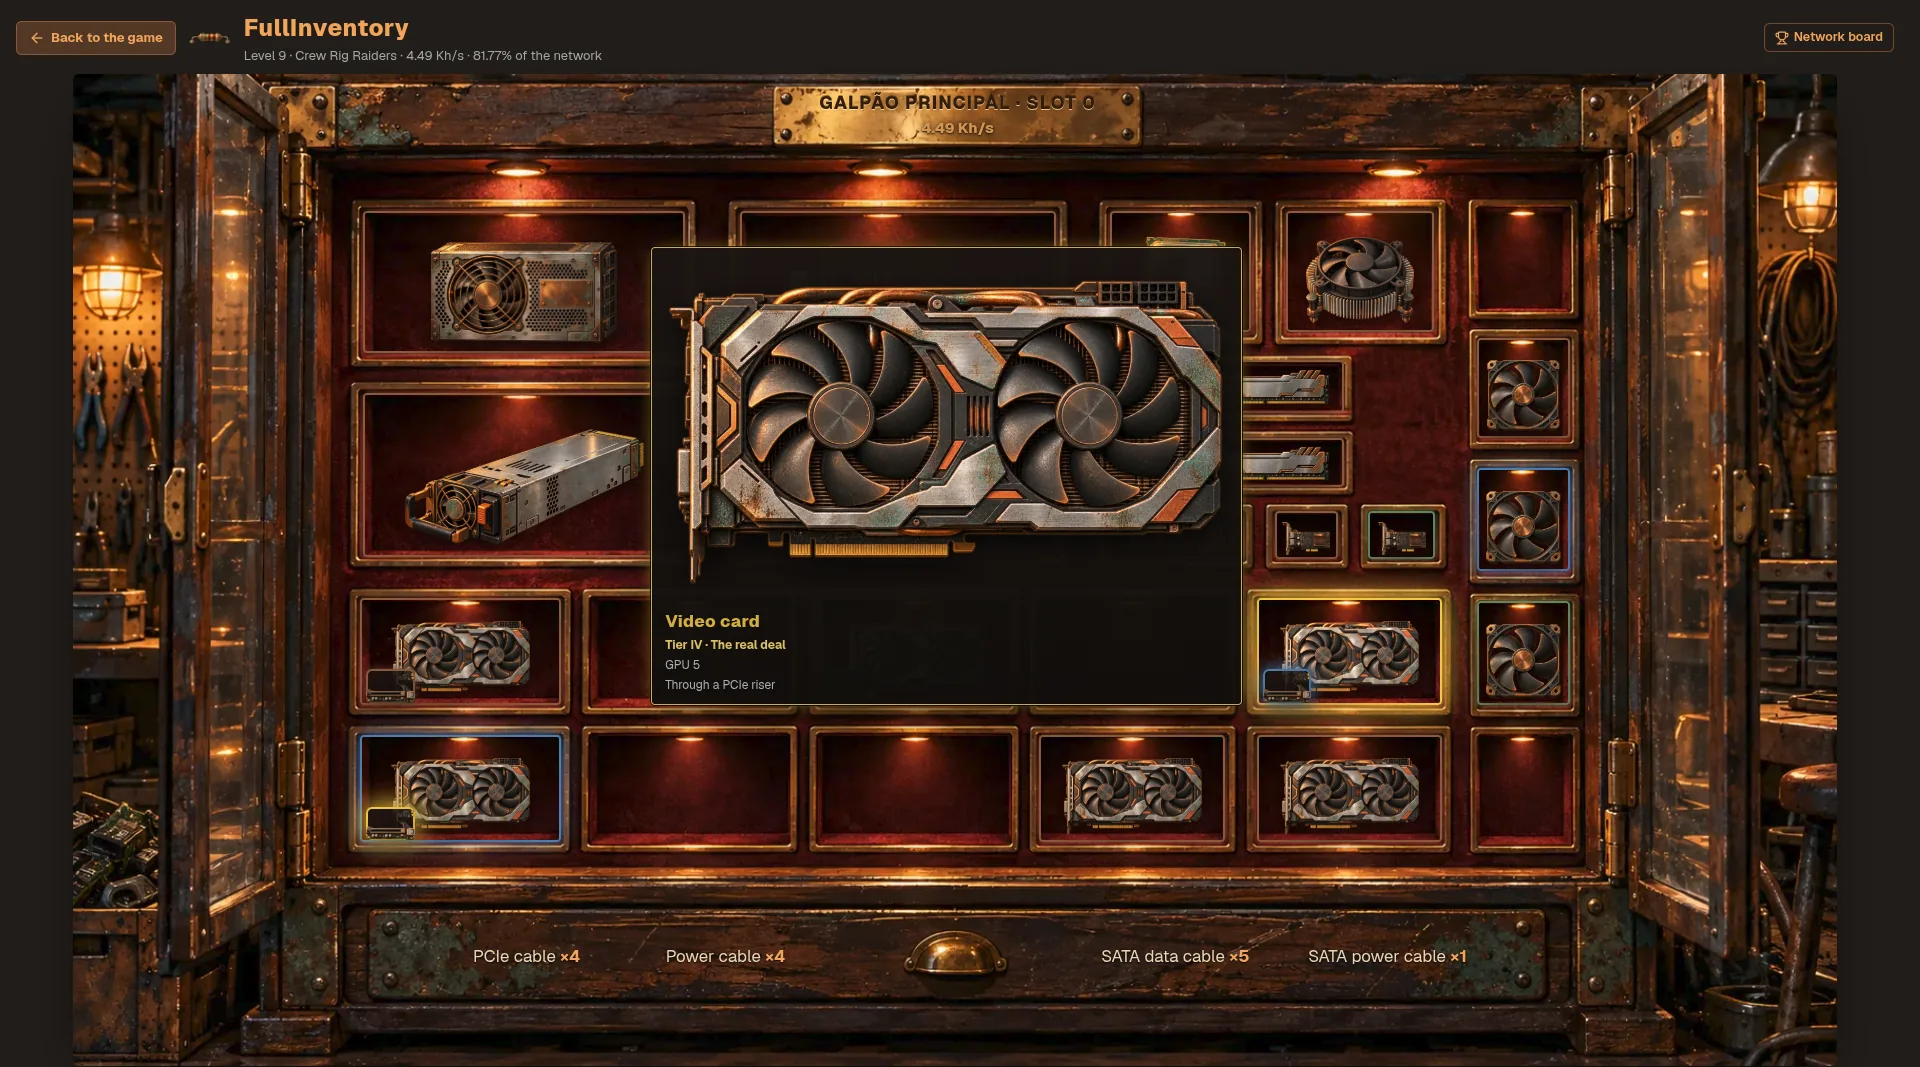
A showcase is a player's rig laid out piece by piece in a display cabinet. It shows only the hashrate, the parts and their tiers; durability, faults and balances stay private. A player with several rigs has one card per rig down the left. Open one from the Network board, from Visit workshop on the world map, or your own from your level icon or the Account page.
Economy & difficulty
RGC is tracked as a real ledger, every movement with its source and reason, so that it could move to a blockchain one day, if the real economy the project is studying happens (see chapter 0.10 and the roadmap; nothing from the alpha and beta carries over). Mining is by design the main source; everything else combined (missions, achievements, the welcome grant) stays a small fraction. Shop purchases, supplies, bills, fees, bail, deep digs, workshops and respecs take RGC out of the economy for good.
Network difficulty follows the whole network's hashrate and is adjusted every 6 hours, a little at a time. It aims at a steady amount of RGC mined per active player (no halvings): while the network is small a card mines at most about 0.67 RGC per h/s a day, and never less than about 0.44 once it's big. Rigs whose owner hasn't played in a day stop counting toward it. New accounts mine with an easier difficulty that fades out over their first 30 days, so your first month earns more.
Glossary
| Rig | A mining machine you build from PC parts (power supply, motherboard, CPU and its cooler, RAM, SSD, video cards and cables) inside a workshop. While it runs it mines RGC and pays its share of the electricity bill. The heart of the game. |
| RGC | RIG Coin, the game's currency. |
| h/s | Hashes per second: how fast a rig mines. |
| Workshop | A building on the world map holding up to 20 rigs. |
| Ceiling | The hashrate a rig's motherboard and CPU can carry (and, for the cards each feeds, its PSU server and power supply). |
| Durability ceiling | The most durability a part can be restored to; drops with each normal repair. |
| Faulty | A part with a broken component inside. Needs a repair. |
| Scrap | A destroyed part. Only worth its residual value. |
| Suspect | A component the diagnosis lets you probe; the broken ones hide among healthy decoys. |
| Designator | A component's label on the board: R resistor, C capacitor, EC large capacitor, Q transistor, L inductor, T transformer, M VRAM, U GPU. |
| OL | "Over limit" on the meter: nothing measured. An open circuit, or the wrong range. |
| Tolerance | How far your dial may be from the kit's target and still count. |
| BGA | Ball grid array: chips soldered by tiny balls underneath, reflowed with hot air. |
| Clan | A group of up to 20 players with a shared chat and perk. |
| Escrow | Money held by the game while a service order or an auction is open. |
| Showcase | A player's rig laid out part by part, as other players see it. |
| Technician | A player who repairs other players' parts for a fee. |
| UTC | The game clock. Store hours, tariffs and resets all run on it; the game itself shows every time in your own time zone (Brasília is UTC−3). |